
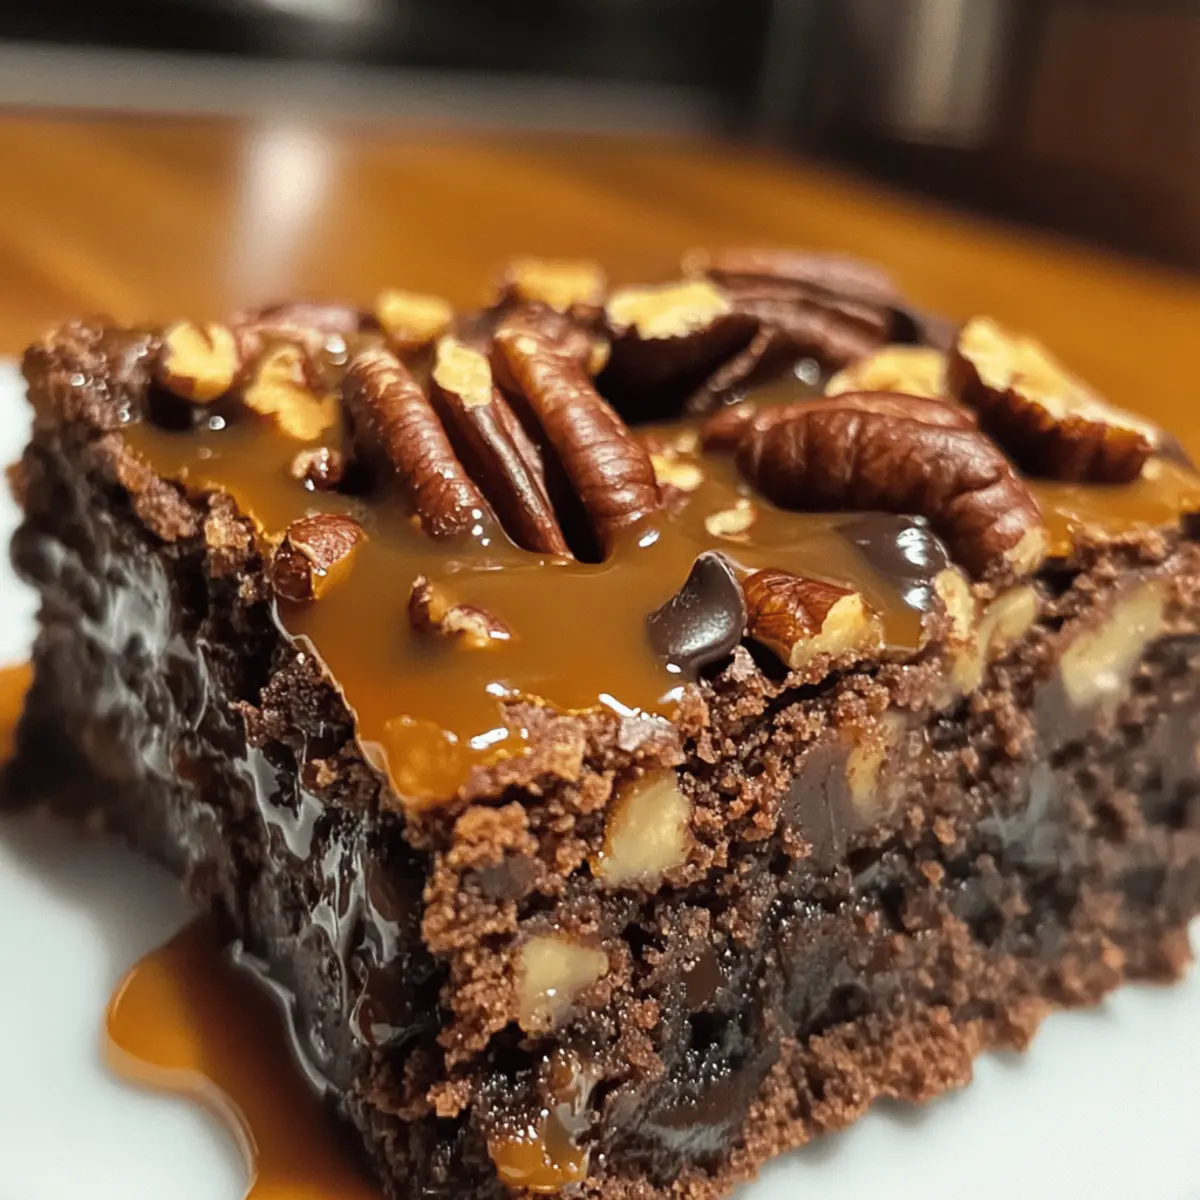
The moment I took my first bite of Turtle Brownies, I was transported to a cozy café where the air was thick with the scent of chocolate and caramel. These decadent Turtle Brownies bring the best of both worlds to your kitchen: a rich, fudge-like texture paired with a homemade caramel drizzle and crunchy pecans. Not only are they a chocolate lover’s dream, but they also come together quickly for an easy homemade dessert that will impress anyone lucky enough to share a bite. Whether you’re gathering friends for a game night or just treating yourself after a long day, these brownies are an instant crowd-pleaser. Are you ready to whip up a batch of these irresistible treats?
Why Are Turtle Brownies So Special?
Irresistible Turtle Brownies are more than just a dessert; they’re a delightful experience!
Decadent layers of gooey caramel and melty chocolate create a rich, fudge-like texture that melts in your mouth.
Quick and Easy to make, they require minimal effort, perfect for novice bakers or busy cooks.
Versatile enough to customize—simply swap out pecans for a nut-free option without sacrificing flavor.
Crowd-Pleaser guaranteed to impress at any gathering, whether it’s a cozy night in or festive celebrations.
Treat yourself to this indulgent dessert and savor each bite that takes you straight to chocolate heaven!
Turtle Brownies Ingredients
For the Brownies
- Unsalted Butter – 10 tbsp for rich flavor; can be swapped with margarine if needed.
- Granulated Sugar – 3/4 cup adds sweetness; a must for the brownies’ texture.
- Light Brown Sugar – 1/2 cup offers moisture and deeper flavor; dark brown can be used for a more robust taste.
- Unsweetened Cocoa Powder – 3/4 cup delivers that delicious chocolatey punch; Dutch cocoa can provide a unique twist.
- Salt – 1/2 tsp enhances all the bakery’s flavors; don’t skip this step!
- Instant Coffee Granules – 1 tbsp intensifies chocolate flavor; optional, but highly recommended.
- Baking Powder – 1/2 tsp helps the brownies rise; ensures a soft and fudgy texture.
- Large Eggs – 2 (cold) bind the ingredients; room temperature eggs mix better and create fluffiness.
- Vanilla Extract – 2 tsp adds a warm depth of flavor; pure vanilla extract is the best choice.
- All-Purpose Flour – 2/3 cup provides necessary structure; mix gently to avoid toughness.
- Semi-Sweet Chocolate Chips – 1/2 cup plus more for topping for extra chocolatey pleasure; feel free to increase for indulgence!
- Chopped Pecans – 1/2 cup plus more for topping adds delightful crunch; omit for a nut-free Turtle Brownies experience.
For the Topping
- Homemade Caramel Sauce – Use your rich homemade version to elevate the brownies; store-bought works in a pinch!
- Additional Pecans – For sprinkling on top to add that extra crunch and a touch of elegance.
- More Chocolate Chips – For an added melt-in-your-mouth texture; sprinkle generously for visual appeal.
Indulge yourself in these Turtle Brownies and delight in every bite!
Step‑by‑Step Instructions for Turtle Brownies
Step 1: Preheat the Oven
Start by preheating your oven to 350°F (175°C). Prepare an 8×8 or 9×9 inch baking dish by lining it with foil and greasing it with cooking spray or butter. This will ensure that your decadent Turtle Brownies are easy to lift out and serve once they’re baked.
Step 2: Brown the Butter
In a medium saucepan, melt 10 tablespoons of unsalted butter over medium heat. Stir continuously for 5–10 minutes until the butter turns a light caramel color and develops a nutty aroma. Keep an eye on it to prevent burning, as this will add a rich flavor to your brownies.
Step 3: Mix the Dry Ingredients
Once your browned butter has cooled slightly, transfer it to a large mixing bowl. Add in 3/4 cup granulated sugar, 1/2 cup light brown sugar, 3/4 cup unsweetened cocoa powder, 1/2 teaspoon salt, 1 tablespoon instant coffee granules, and 1/2 teaspoon baking powder. Stir the ingredients together until well combined, then allow the mixture to cool for about 5 minutes.
Step 4: Incorporate the Wet Ingredients
After the mixture has cooled, crack in 2 cold large eggs and add 2 teaspoons of vanilla extract. Whisk everything together until the batter becomes shiny and smooth, which should take about 1–2 minutes. This step helps create the signature fudge-like texture of the Turtle Brownies.
Step 5: Add the Flour
Gently fold in 2/3 cup of all-purpose flour into the brownie batter. Use a spatula to combine until just mixed, being careful not to overmix; you want to maintain that soft, fudgy consistency. Overmixing can lead to tougher brownies, so mix until you see no more dry flour.
Step 6: Stir in Chocolate and Nuts
Next, add 1/2 cup of semi-sweet chocolate chips and 1/2 cup of chopped pecans to the batter. Gently stir until evenly distributed throughout the mixture, ensuring every bite of your Turtle Brownies is bursting with rich chocolate and crunchy pecan goodness.
Step 7: Bake the Brownies
Pour the batter into your prepared baking dish, smoothing the top with a spatula. Place the dish in your preheated oven and bake for 20–25 minutes. Keep an eye on them—the brownies are done when a toothpick inserted into the center comes out clean or with a few moist crumbs.
Step 8: Cool and Drizzle
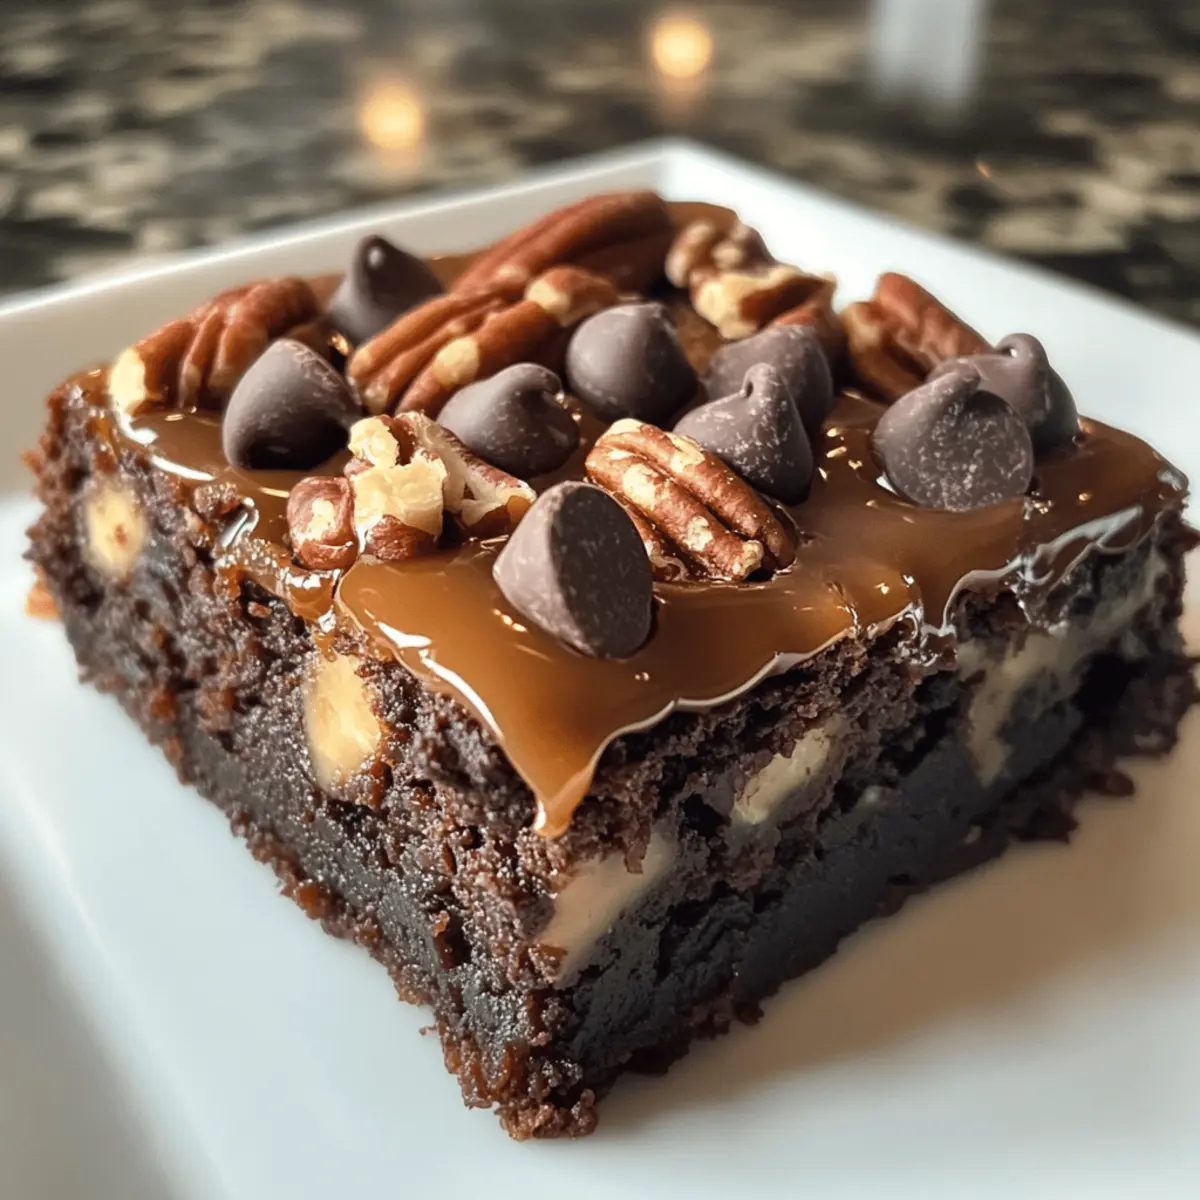
Once baked, remove the Turtle Brownies from the oven and let them cool completely in the pan on a wire rack. This cooling process helps enhance their fudginess. After they’ve cooled, drizzle your homemade caramel sauce over the top, and sprinkle with additional pecans and chocolate chips for that gourmet finish.
Step 9: Chill and Slice
Finally, refrigerate the Turtle Brownies for at least 30 minutes to set the caramel. Once chilled, use the foil to lift them out of the pan. Slice into 9 indulgent brownies, ready to be served and enjoyed!
Expert Tips for Turtle Brownies
-
Butter Browning: Pay close attention when browning the butter; a light-colored saucepan helps you monitor the color easily and avoid burning.
-
Avoid Overmixing: Mix the batter gently and stop as soon as the flour is incorporated. Overmixing can lead to tough Turtle Brownies instead of soft and fudgy ones.
-
Chill Correctly: Allow the brownies to cool completely before drizzling the caramel sauce. Chilling them for at least 30 minutes helps set the toppings.
-
Substitution Savvy: If you’re out of pecans, feel free to swap them for walnuts or leave them out for a nut-free version that still delights!
-
Testing Doneness: To ensure your Turtle Brownies are perfectly baked, use a toothpick; it should come out clean or with a few moist crumbs.
How to Store and Freeze Turtle Brownies
Room Temperature: Store Turtle Brownies in an airtight container at room temperature for up to 3 days. This keeps them soft and fudgy—perfect for immediate enjoyment!
Fridge: For a longer life, refrigerate Turtle Brownies in a well-sealed container for up to 3 days. This can enhance their flavor, making the chocolate and caramel even richer.
Freezer: Freeze Turtle Brownies for up to 3 months. Wrap individual brownies tightly in plastic wrap and then place them in a freezer-safe bag to prevent freezer burn.
Reheating: To enjoy, thaw in the fridge overnight, or microwave briefly until warm. A warm Turtle Brownie, drizzled with extra caramel, is an unforgettable treat!
Turtle Brownies Variations & Substitutions
Feel free to get creative and tailor these Turtle Brownies to your taste buds—there are so many delicious possibilities!
- Nut-Free: Simply omit the pecans to make these brownies safe for those with nut allergies.
- Dark Chocolate: Use dark chocolate chips for a richer, more intense chocolate experience that will satisfy serious cocoa lovers.
- Salted Caramel: Drizzle with a homemade salted caramel sauce for a sophisticated sweet-and-salty twist that enhances the overall flavor.
- Oreo Crust: Crumble Oreo cookies and mix into the batter or use as a crust for a delightful crunch that pairs perfectly with the brownie texture.
- Spicy Kick: Add a pinch of cayenne pepper or chili powder to the brownie batter for a surprising heat that beautifully complements the chocolate.
- Mint Chocolate: Incorporate peppermint extract instead of vanilla for a refreshing minty flavor that feels like a dessert and a treat in one.
- Gluten-Free: Substitute all-purpose flour with your favorite gluten-free flour blend for a delicious gluten-free adaptation without compromising on taste.
- Caramel Bits: Use caramel baking bits instead of making your own sauce for quicker preparation that still provides a delightful, gooey finish.
Remember, the beauty of baking lies in experimentation—don’t hesitate to swap ingredients or add unique touches! If you’re excited about other twists, check out our lovely recipe for Chocolate Chip Cookies or dive into flavorful ideas with Peanut Butter Brownies for more delightful variations!
What to Serve with Decadent Turtle Brownies?
Indulging in Turtle Brownies opens a world of delightful pairings that elevate your dessert game to the next level.
-
Vanilla Ice Cream: A scoop of creamy vanilla ice cream melts beautifully on warm brownies, balancing the rich chocolate and caramel with a cool, refreshing touch.
-
Fresh Berries: Tart raspberries or strawberries add a burst of freshness and acidity, enhancing the sweet flavors without overwhelming your palate.
-
Whipped Cream: Fluffy, lightly sweetened whipped cream creates a luscious cloud on top of the brownies, making each bite feel like a decadent treat.
-
Chocolate Sauce: Drizzling extra chocolate sauce brings even more indulgence to these already rich Turtle Brownies; it’s a chocolate lover’s dream!
-
Hazelnut Coffee: A warm cup of hazelnut coffee amps up the nutty flavor profile in the brownies and complements the chocolate beautifully.
-
Nutty Caramel Sauce: Enhance the dessert by serving it with a side of warm nutty caramel sauce for drizzling over the top; the gooey texture is absolutely divine.
-
Sea Salt Flakes: Sprinkling coarse sea salt over the brownies intensifies the sweet and salty contrast, elevating the flavor experience significantly.
-
Toasty Pecans: For those who love that nutty crunch, serving extra toasted pecans alongside enhances the brownie’s texture and flavor.
-
Dark Chocolate Stout: A rich dark chocolate stout or a glass of dessert wine pairs wonderfully, bringing harmonious flavors that accentuate the chocolatey notes.
These pairings create a beautiful balance, transforming your Turtle Brownies into an unforgettable dessert experience!
Make Ahead Options
These Turtle Brownies are perfect for meal prep enthusiasts! You can prepare the brownie batter and store it in the refrigerator for up to 24 hours before baking; this helps develop deeper flavors without sacrificing quality. Simply mix the dry and wet ingredients, and refrigerate, covered. When you’re ready to bake, pour the batter into the prepared baking dish and bake as instructed. For added convenience, you can also make the homemade caramel sauce ahead of time—just store it in the refrigerator for up to 3 days. When it’s time to serve, drizzle the chilled caramel over the brownies, and you’ll have decadent treats ready to impress with minimal effort!
Turtle Brownies Recipe FAQs
What type of butter should I use for Turtle Brownies?
I recommend using unsalted butter for the best flavor, but margarine can be a suitable dairy-free substitute. Make sure the butter is at the right temperature when browning, as it contributes to the rich flavor that makes these brownies truly decadent.
How should I store Turtle Brownies after baking?
Store your Turtle Brownies in an airtight container at room temperature for up to 3 days for the best texture. If you’re planning to keep them longer, refrigerate them for up to the same duration; this can also enhance the overall flavor of the chocolate and caramel.
Can I freeze Turtle Brownies, and how?
Absolutely! To freeze Turtle Brownies, wrap individual pieces tightly in plastic wrap and place them in a freezer-safe bag. They can be frozen for up to 3 months. When you’re ready to enjoy, simply thaw them in the fridge overnight or microwave them briefly for a warm treat.
What if my brownies turn out too dry?
If your Turtle Brownies are coming out dry, this is often a sign of overbaking or overmixing the batter. Ensure your toothpick test for doneness only shows a few moist crumbs; check around the 20-minute mark. Mix just until the flour is incorporated to maintain that fudgy texture.
Are Turtle Brownies safe for people with nut allergies?
For nut-free Turtle Brownies, simply omit the pecans, and you can still enjoy the rich chocolate flavor! Always check ingredient labels if sharing with someone who has allergies, and consider using safe substitutes if needed.
Can I use different types of chocolate in this recipe?
Very! You can swap semi-sweet chocolate chips for dark chocolate chips if you prefer a more intense chocolate flavor. Just be mindful of the ratios and taste as you go; the richness can vary depending on the type of chocolate you choose!
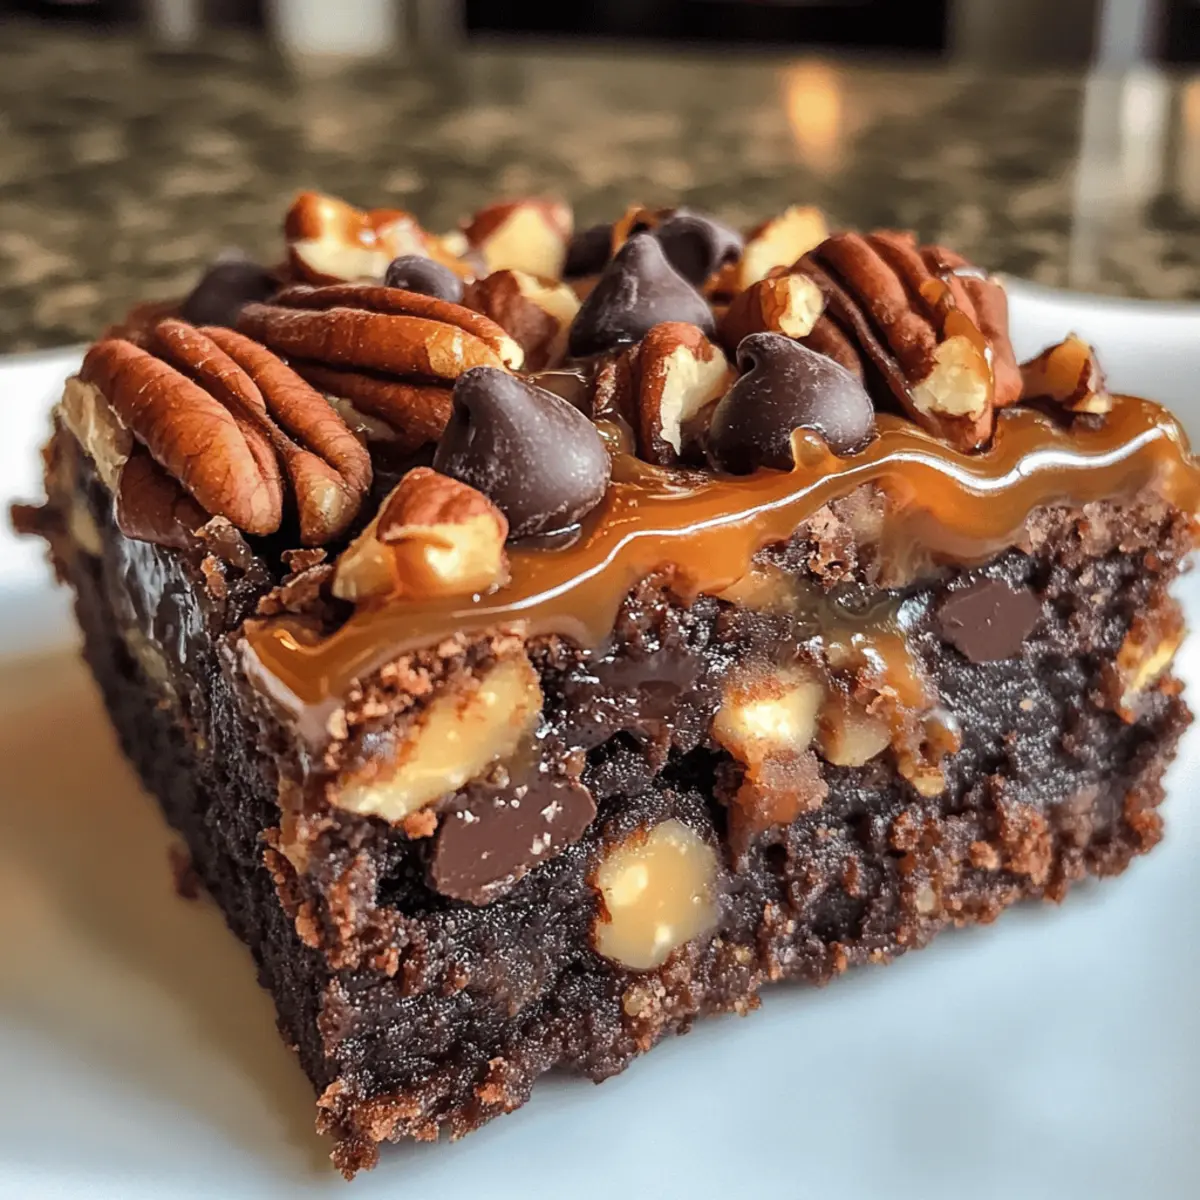
Irresistibly Fudgy Turtle Brownies Perfect for Chocolate Lovers
Ingredients
Equipment
Method
- Preheat your oven to 350°F (175°C). Prepare an 8x8 or 9x9 inch baking dish by lining it with foil and greasing it.
- Melt 10 tablespoons of unsalted butter in a medium saucepan over medium heat, stirring continuously for 5–10 minutes until a light caramel color.
- Transfer browned butter to a mixing bowl, add granulated sugar, light brown sugar, cocoa powder, salt, coffee granules, and baking powder. Combine well and cool for 5 minutes.
- Add 2 cold large eggs and 2 teaspoons of vanilla extract to the cooled mixture and whisk until shiny and smooth, about 1–2 minutes.
- Gently fold in 2/3 cup of all-purpose flour until just mixed, avoiding overmixing.
- Stir in 1/2 cup of semi-sweet chocolate chips and 1/2 cup of chopped pecans until evenly distributed.
- Pour the batter into the prepared baking dish, smoothing the top. Bake for 20–25 minutes until a toothpick comes out clean.
- Let the brownies cool in the pan on a wire rack. Drizzle homemade caramel sauce on top and sprinkle with additional pecans and chocolate chips.
- Refrigerate the brownies for at least 30 minutes, then slice into 9 brownies.
Leave a Reply