
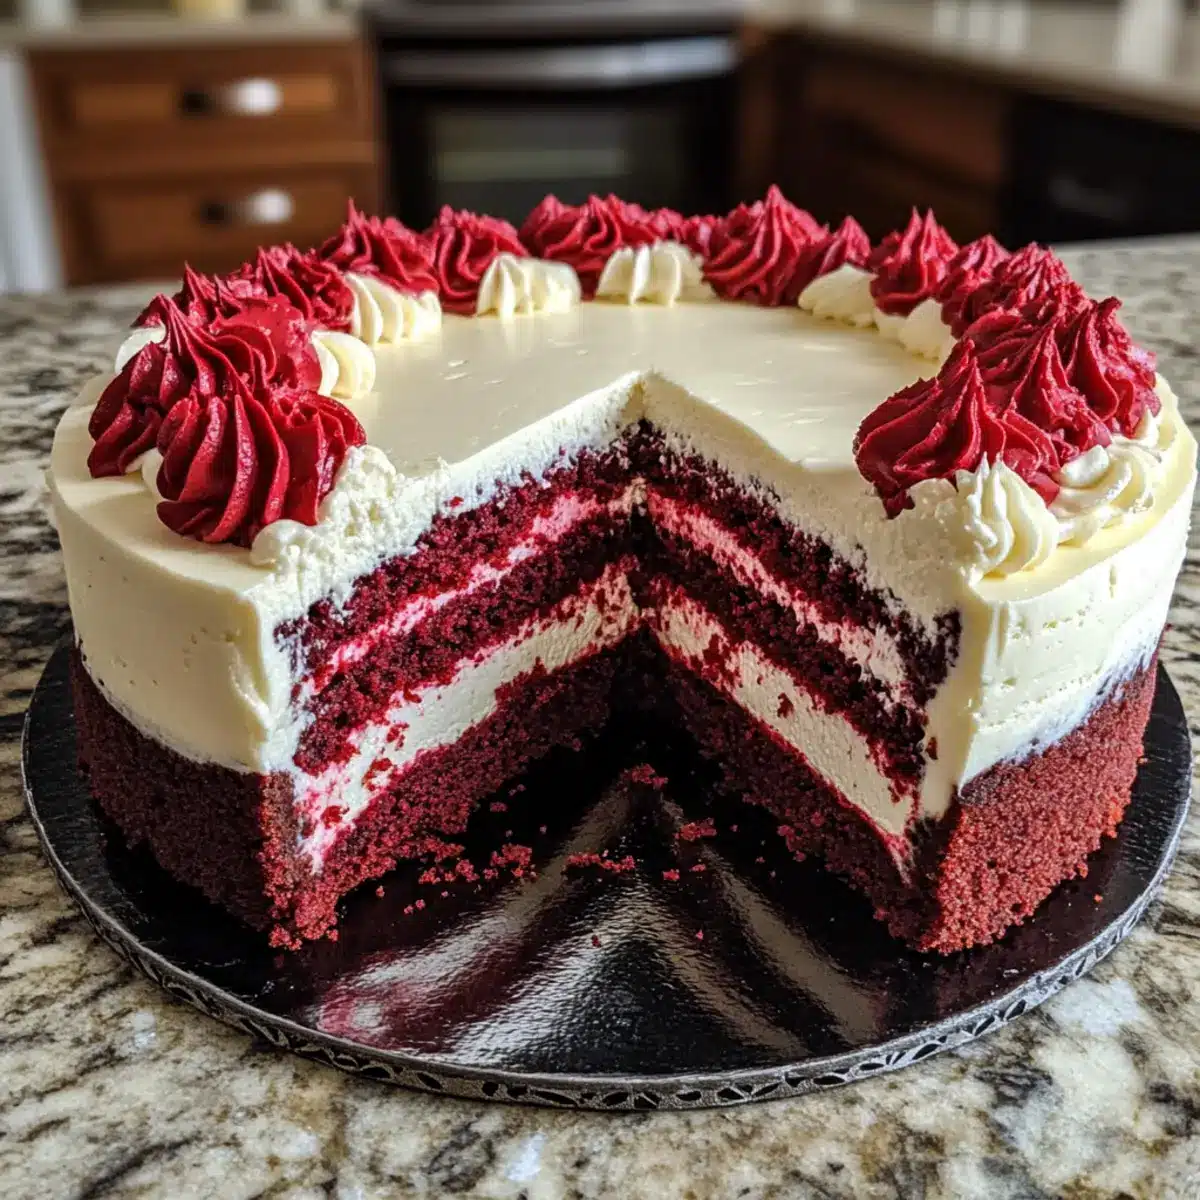
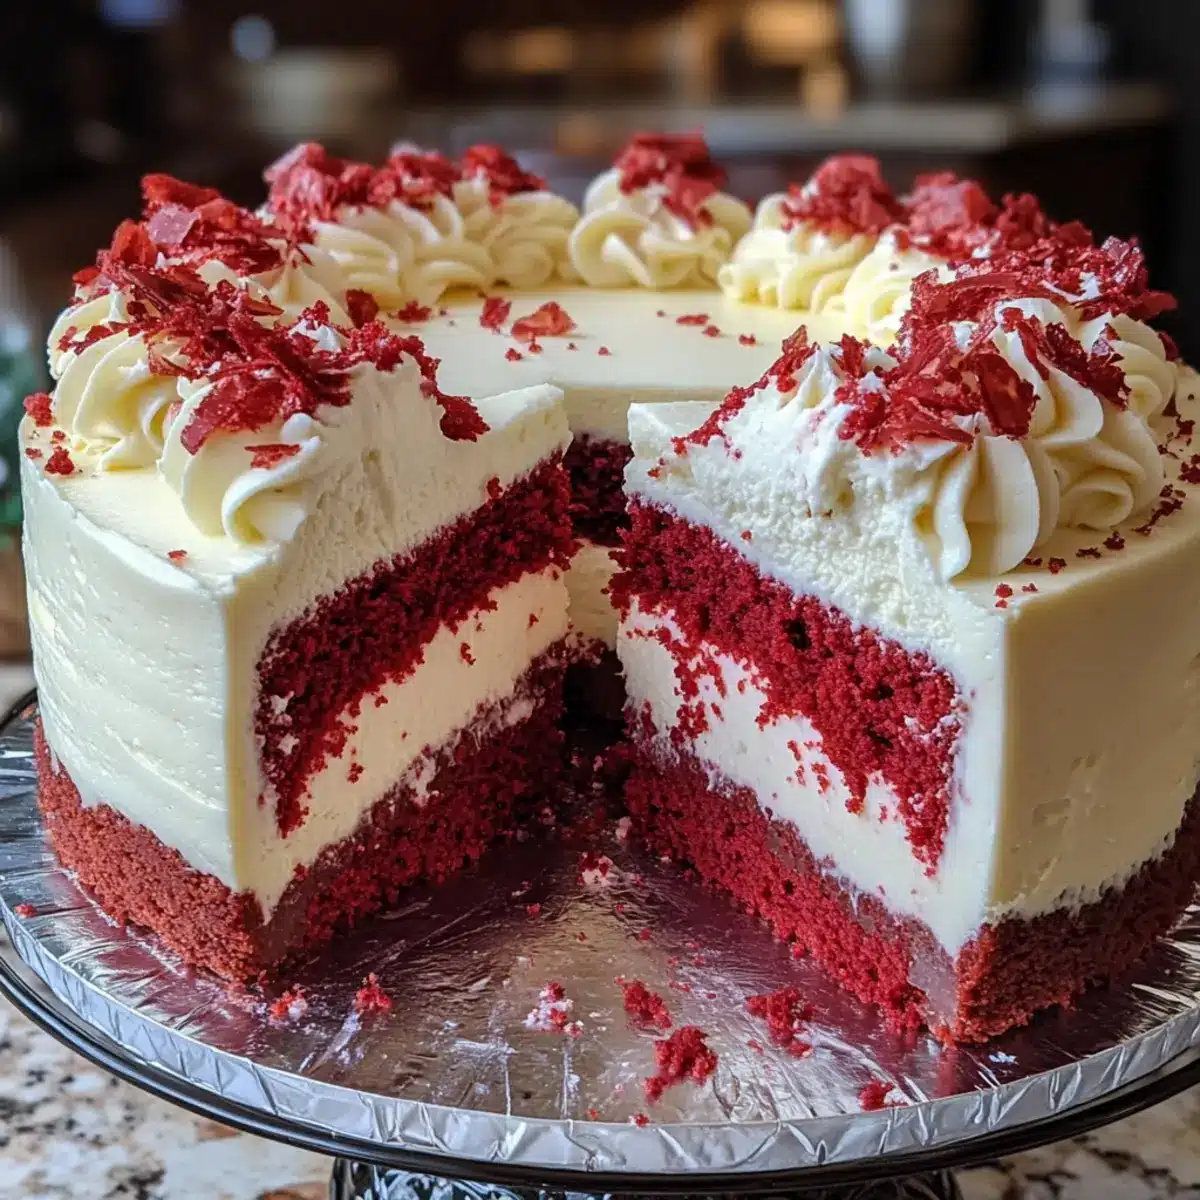
In the midst of holiday bustle, I stumbled upon a little culinary gem that instantly whisked me away to festive gatherings of yore: the Christmas Red Velvet Cheesecake. It’s not just any dessert; this vibrant masterpiece layers the rich taste of classic red velvet cake with the creamy indulgence of cheesecake, creating a stunning centerpiece that delights the eyes and palate alike. While many may feel the pull of fast food during this busy season, this homemade treat offers a rewarding escape—it’s quick to assemble and perfect for impressing family and friends. Get ready to elevate your dessert game this holiday season; who wouldn’t want a slice of this dreamy, velvety fusion? Are you ready to dive into this delightful recipe?

Why is this cheesecake a holiday essential?
Festive Showstopper: This Christmas Red Velvet Cheesecake isn’t just a treat; it’s a stunning centerpiece that transforms your holiday table into a festive wonderland.
Decadent Layers: With rich red velvet cake and creamy cheesecake, every bite offers an irresistible blend of textures and flavors that will leave everyone wanting more.
Easy to Make: The simplified steps ensure that even novice bakers can create this masterpiece without the fuss, giving you more time to celebrate with loved ones.
Perfect for Gatherings: Its elegant presentation makes it an outstanding choice for holiday parties, instantly captivating your guests and sparking conversation.
Make Ahead Delight: Chill it for a few hours or overnight, and watch the flavors meld together for a dessert that’s as rich in taste as it is in convenience.
If you’re on the hunt for more festive delights, you might also enjoy our Strawberry Cheesecake Cinnamon or Garten Pumpkin Cheesecake for additional holiday inspiration!
Christmas Red Velvet Cheesecake Ingredients
For the Cake Layers
- All-purpose flour – Provides structure to the cake layers; can substitute with gluten-free flour blend.
- Unsweetened cocoa powder – Adds chocolatey undertones to the red velvet flavor; Dutch-processed cocoa can be used for a milder taste.
- Baking powder – A leavening agent for that light texture; ensure it’s fresh for the best results.
- Baking soda – Reacts with acidic ingredients to give lift and color; no substitutions.
- Salt – Enhances flavor overall; any fine salt works well.
- Granulated sugar – Sweetens the cake to balance flavors; no substitutions noted.
- Vegetable oil – Keeps the cake moist; substitute with canola oil or melted coconut oil if needed.
- Buttermilk – Adds necessary acidity and moisture; substitute with regular milk mixed with lemon juice or vinegar.
- Eggs – Binds ingredients together and adds moisture; make sure they’re at room temperature for better emulsion.
- Red food coloring – Provides the signature vibrant red color; gel food coloring works best to achieve vibrancy without altering texture.
- Vanilla extract – Enhances flavors; always opt for pure vanilla for the most impactful taste.
- White vinegar – Reacts with baking soda to create a lighter texture; can substitute with lemon juice.
For the Cheesecake Layer
- Cream cheese – Forms the luscious cheesecake layer; use full-fat for the richest flavor.
- Sour cream – Adds tartness and moisture to the filling; Greek yogurt can serve as a substitute.
- Unsalted butter – Essential for buttercream; use only unsalted for accurate sweetness.
For the Frosting
- Powdered sugar – Sweetens and gives body to the frosting; ensure it’s sifted for a smooth texture.
- Vanilla extract – Adds depth to the frosting; again, pure vanilla is preferred for the best flavor.
Indulging in this Christmas Red Velvet Cheesecake will not only satisfy your sweet tooth, but it will also create a stunning memory around your holiday table!
Step‑by‑Step Instructions for Christmas Red Velvet Cheesecake
Step 1: Preheat the Oven
Begin your delightful journey by preheating your oven to 350°F (175°C). Prepare your cake pans by greasing them well and lining the bottoms with parchment paper to ensure an easy release after baking. This initial step lays the foundation for your beautiful Christmas Red Velvet Cheesecake.
Step 2: Mix the Dry Ingredients
In a large mixing bowl, sift together the all-purpose flour, unsweetened cocoa powder, baking powder, baking soda, and salt. This step not only combines the dry ingredients evenly but also ensures that no lumps remain. Set this mixture aside while you focus on the wet ingredients, keeping the vibrant flavors of red velvet in mind.
Step 3: Combine the Wet Ingredients
In another bowl, whisk together the granulated sugar, vegetable oil, buttermilk, eggs, red food coloring, vanilla extract, and white vinegar. Mix until smooth and well combined, ensuring that the colors blend beautifully. This mixture brings the signature velvety depth to your Christmas Red Velvet Cheesecake, making it truly special.
Step 4: Blend Mixtures Together
Carefully pour the dry mixture into the bowl with the wet ingredients. Gently fold the two batters together until just combined, avoiding over-mixing to maintain a light, tender texture. Once your batter is smooth and lump-free, it’s time to give it the eagerly awaited heat!
Step 5: Bake the Cake Layers
Divide the batter evenly between the prepared cake pans and place them in the preheated oven. Bake for 25 to 30 minutes, or until a toothpick inserted in the center comes out clean. When ready, let the layers cool in the pans for about 10 minutes before transferring them to wire racks to cool completely.
Step 6: Prepare the Cheesecake Filling
In a large mixing bowl, beat the cream cheese until creamy, adding granulated sugar, sour cream, eggs, and vanilla extract. Mix until smooth and well-combined, creating a luxurious filling that will complement the rich red velvet layers. This cheesecake layer is what truly elevates your Christmas Red Velvet Cheesecake.
Step 7: Assemble the Layers
Once the cake layers have completely cooled, carefully place one layer on a serving plate or cake stand. Pour the prepared cheesecake filling over the top, spreading it evenly. Then, gently add the second cake layer on top of the cheesecake filling to create a stunning cake with a rich creamy layer inside.
Step 8: Chill for Flavors to Meld
Refrigerate the assembled Christmas Red Velvet Cheesecake for at least 4 hours, allowing the flavors to meld and the filling to set up nicely. For best results, letting it chill overnight enhances the taste and creaminess, making each slice irresistible and decadent when served.
Step 9: Frost the Cheesecake
Prepare the buttercream frosting by beating together unsalted butter, cream cheese, sifted powdered sugar, and vanilla extract until fluffy and smooth. Once your cheesecake has chilled sufficiently, generously frost the top and sides, creating a beautiful outer layer. Enjoy the festive appearance of your completed Christmas Red Velvet Cheesecake!
Step 10: Serve and Celebrate
When ready to serve, slice the cheesecake and present it on a festive platter. Pair it with a hot beverage or sparkling drink to enhance the holiday spirit. Each cut reveals the beautiful red and cream layers, making it the perfect showstopper for your holiday gatherings!
Expert Tips for Christmas Red Velvet Cheesecake
Room Temperature Ingredients: Ensure all your ingredients are at room temperature for better mixing and a smoother batter, enhancing your Christmas Red Velvet Cheesecake.
Avoid Over-Mixing: Gently combine the cake batter to maintain its tenderness. Over-mixing can lead to a dense cake, which we definitely want to avoid!
Chill for Best Flavor: Letting your cheesecake set overnight in the refrigerator allows the flavors to meld beautifully, elevating the taste experience when serving.
Level Your Cake: If your cake layers dome during baking, level them carefully before adding the cheesecake layer. This step ensures a flat and even surface for your final masterpiece.
Sift the Powdered Sugar: For a smooth buttercream frosting, always sift your powdered sugar before mixing. This results in a velvety finish that complements the creamy layers perfectly.
How to Store and Freeze Christmas Red Velvet Cheesecake
Fridge: Store your Christmas Red Velvet Cheesecake in an airtight container in the refrigerator for up to 5 days to maintain its freshness and flavor.
Freezer: If you’d like to keep it longer, it can be frozen for up to 2 months. Slice into portions, wrap securely in plastic wrap, then place in a freezer-safe container.
Thawing: To enjoy your frozen cheesecake, transfer it to the fridge for 6–8 hours or overnight to thaw before serving; this keeps the texture delightful.
Reheating: Enjoy it chilled or bring it to room temperature before serving for the best taste experience.
Christmas Red Velvet Cheesecake Variations
Feel free to put your own twist on this delightful cheesecake and make it uniquely yours!
-
Colorful Creations: Swap red food coloring for other vibrant colors to match different holiday themes or occasions. Imagine a green or blue cheesecake for a dazzling display!
-
Nutty Crunch: Add chopped nuts, like walnuts or pecans, to the cake layers for a delicious crunch and nutty flavor. This twist will elevate the texture and surprise your guests with every bite.
-
Chocolate Lovers: Fold in chocolate chips into the batter for an extra layer of richness and indulgence. Each slice will be bursting with delightful chocolate surprises when you dig in.
-
Flavorful Extracts: Experiment with flavored extracts, like almond or coconut, in place of vanilla to give your cheesecake a unique flavor profile. The subtle change can transform your cheesecake into a delightful surprise!
-
Decadent Toppings: Top with crushed candy canes for a festive touch or a drizzle of caramel sauce for extra indulgence. The added sweetness and crunch will bring joy to every forkful.
-
Heat It Up: Add a pinch of cinnamon or nutmeg to the batter for a hint of warmth that beautifully complements the festive season. This will create a cozy vibe, reminiscent of holiday gatherings past.
-
Dairy-Free Delight: Substitute with dairy-free cream cheese and coconut milk to create a delicious dairy-free version. You can enjoy the flavors that transport you to those cherished family moments, without any dairy.
-
Cheesecake Hybrid: Layer additional cheesecake-flavored desserts, like a peppermint cheesecake layer or a pumpkin spice cheesecake, for a fun twist. The combination will dazzle your guests and leave them wanting more.
For more delightful dessert ideas, don’t miss out on our Strawberry Cheesecake Stuffed bites or check out our smooth and rich Vanilla Bean Cheesecake recipes!
What to Serve with Christmas Red Velvet Cheesecake
As you craft this stunning dessert, consider the perfect accompaniments that will elevate your holiday feast.
-
Creamy Mashed Potatoes: The smooth, buttery texture of mashed potatoes provides a comforting contrast to the rich cheesecake layers, creating a delightful balance on your plate.
-
Spiced Hot Cocoa: A warm mug of spiced hot cocoa with a hint of cinnamon and marshmallows complements the festive flavors of the cheesecake perfectly, making every bite a cozy experience.
-
Roasted Brussels Sprouts: Their crispy exterior and earthy flavor bring a refreshing crunch, contrasting beautifully with the cheesecake’s creamy richness. This savory touch adds depth to your holiday spread.
-
Fresh Cranberry Sauce: Bright and tart, a dollop of homemade cranberry sauce offers a burst of freshness that cuts through the sweetness of the dessert, making for a refreshing palate cleanser.
-
Vanilla Ice Cream: A scoop of vanilla ice cream adds an extra layer of creamy goodness. The cold, sweet treat creates a decadent experience that pairs wonderfully with rich red velvet.
-
Sparkling Prosecco: For a festive toast, a glass of sparkling Prosecco adds effervescence and brightness, enhancing the holiday spirit while harmonizing with the cheesecake’s sweetness.
-
Pecan Pie Bites: These bite-sized treats provide a crunchy, nutty texture that contrasts the smooth cheesecake layers, perfect for those who love to mix flavors during festive gatherings.
Now, gather your loved ones around the table and serve up this magnificent Christmas Red Velvet Cheesecake alongside these delightful pairings for a memorable holiday celebration!
Make Ahead Options
Preparing your Christmas Red Velvet Cheesecake in advance is a wonderful way to save time during the busy holiday season! You can bake the cake layers up to 3 days before serving, storing them in an airtight container at room temperature to maintain moisture. Additionally, prepare the cheesecake filling and refrigerate it up to 24 hours before assembly. On the day of serving, simply layer the cheesecake filling between the cooled cake layers and let it chill for at least 4 hours (or overnight) to allow flavors to meld beautifully. This make-ahead approach ensures that your dessert will be just as delicious and stunning while freeing up your time for holiday celebrations!
Christmas Red Velvet Cheesecake Recipe FAQs
How do I choose the best red food coloring for my cheesecake?
Absolutely! I recommend using gel food coloring for a vibrant red hue while maintaining the cake’s texture. Liquid food coloring can alter the consistency, so opt for gel to achieve the perfect color without compromising quality.
How should I store the Christmas Red Velvet Cheesecake?
To keep your cheesecake fresh, store it in an airtight container in the refrigerator for up to 5 days. If you’re preparing ahead of time, you can even make it 1-2 days in advance, allowing the flavors to meld beautifully as it chills.
Can I freeze the Christmas Red Velvet Cheesecake?
Very! You can freeze your cheesecake for up to 2 months. Simply slice it into portions and wrap each slice tightly in plastic wrap. Place them in a freezer-safe container to protect against freezer burn. When ready to enjoy, transfer slices to the fridge for 6–8 hours or overnight to thaw and maintain the creamy texture.
What if my cheesecake layer doesn’t set properly?
If your cheesecake layer doesn’t set, simply refrigerate it longer. Ideally, it should chill for at least 4 hours, but letting it sit overnight will yield even better results. Additionally, ensure you’ve beaten the cream cheese mixture until smooth; lumps can prevent it from setting properly.
Are there any dietary considerations for this recipe?
Yes! While this recipe is a delightful treat, it’s important to note that it contains common allergens like dairy and eggs. If you’re making this for someone with allergies, consider substitutes like dairy-free cream cheese and egg replacers. Also, always check the labels for gluten-free ingredients if needed.
How can I tell when my cheesecake is done?
To check if your cheesecake layer is ready, give the pan a gentle shake. It should be slightly wobbly in the center but set around the edges. If it jiggles too much, give it some more time in the fridge. For a perfect texture, patience is key!
These are the essential FAQs that will guide you through your cheesecake-making journey, ensuring your Christmas Red Velvet Cheesecake becomes a beloved dessert this holiday season!

Indulge in Christmas Red Velvet Cheesecake Bliss
Ingredients
Equipment
Method
- Preheat your oven to 350°F (175°C). Grease and line the cake pans with parchment paper.
- Sift together the flour, cocoa powder, baking powder, baking soda, and salt in a bowl.
- In another bowl, whisk the sugar, oil, buttermilk, eggs, food coloring, vanilla, and vinegar until smooth.
- Gently fold the dry ingredients into the wet ingredients, ensuring not to over-mix.
- Pour the batter into prepared pans, bake for 25-30 minutes until a toothpick comes out clean, cool in pans.
- Beat cream cheese until creamy, add sugar, sour cream, eggs, and vanilla; mix until smooth.
- Place one cake layer on a serving plate, spread cheesecake filling and top with the second layer.
- Chill the cheesecake for at least 4 hours to allow flavors to meld, preferably overnight.
- Beat the butter, cream cheese, powdered sugar, and vanilla for the frosting until fluffy and smooth.
- Frost the chilled cheesecake and serve with festive beverages.
Leave a Reply