
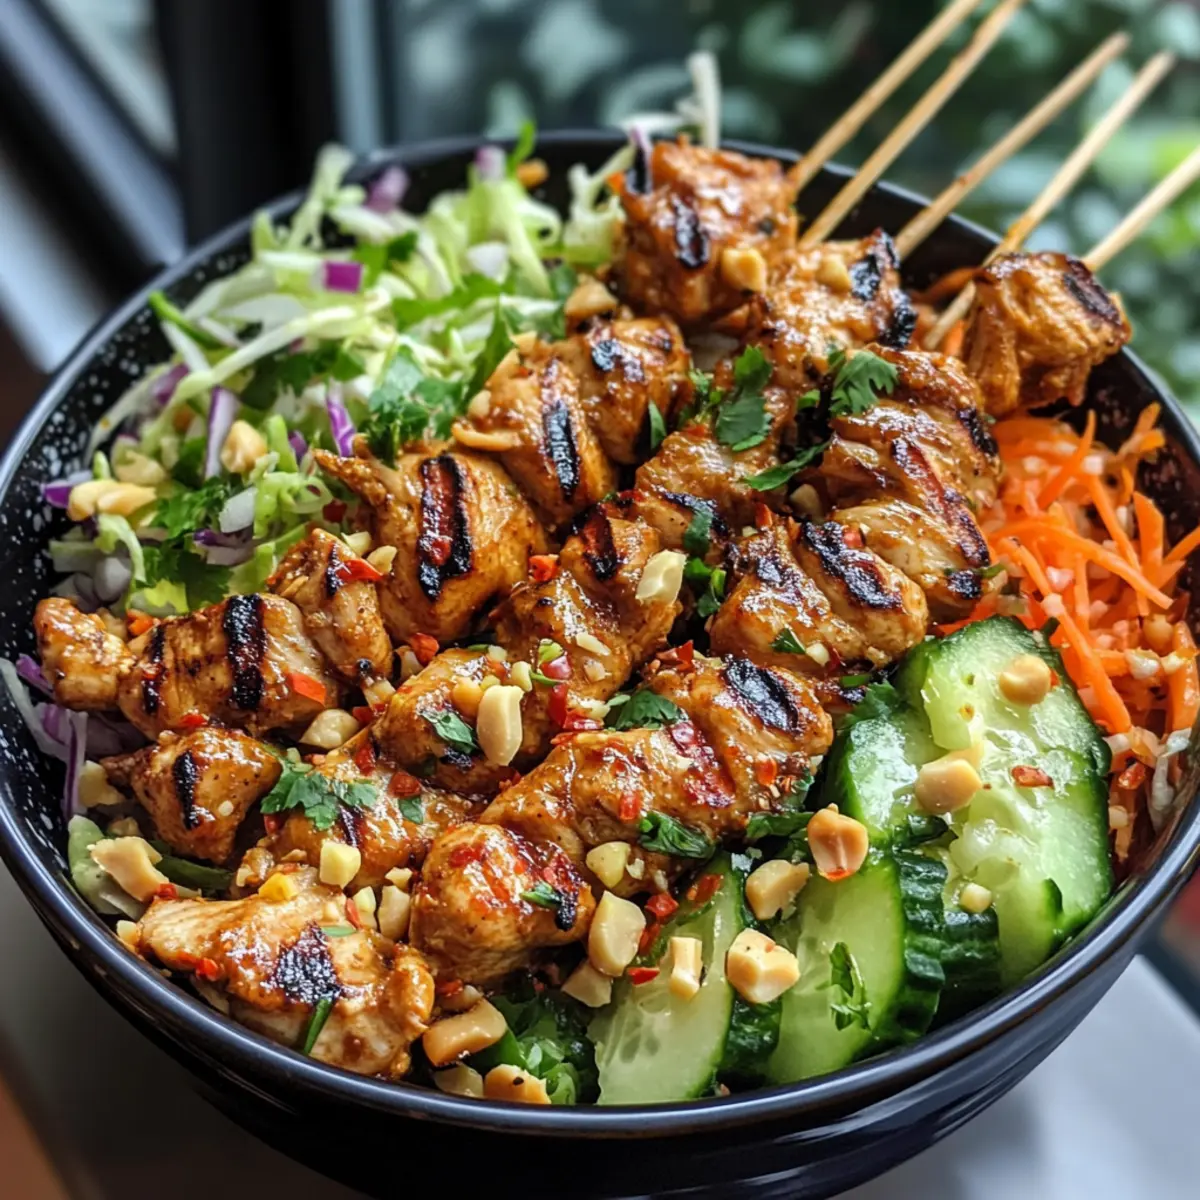
As the sizzling scent of marinated chicken fills the kitchen, I can’t help but feel an excitement building. That’s exactly how I felt when I first experimented with my Chicken Satay – Spring Roll Bowls, a dish bursting with vibrant flavors inspired by Southeast Asian cuisine. This one-pot wonder is not just a feast for the senses; it’s quick to whip up and wonderfully adaptable. Whether you’re meal prepping for the week, hosting friends, or simply looking for an easy dinner solution, these bowls provide a nutritious, protein-packed option that can even cater to gluten-free diets. Are you ready to bring a delightful twist to your dinner routine? Let’s dive in!
What Makes This Recipe So Special?
Bold flavors: With its combination of spices and marinades, each bite of the Chicken Satay – Spring Roll Bowls is an explosion of taste that transports you straight to Southeast Asia.
Customizable goodness: This recipe caters to many dietary preferences! Substitute chicken with tofu or adjust the base with cauliflower rice for a low-carb twist.
Meal prep friendly: Making these bowls ahead saves time during busy weekdays. Pack everything in separate containers for easy grab-and-go lunches.
Crowd pleaser: Whether you’re hosting friends or serving family, these bowls are always a hit, pleasing those who crave comfort food with a twist.
Elevated nutrition: Packed with around 38g of protein and vibrant veggies, you can enjoy a guilt-free feast that’s both healthy and satisfying.
If you’re looking for more delicious chicken ideas, don’t miss my Hot Honey Chicken or Sticky Garlic Chicken Noodles recipes!
Chicken Satay Ingredients
For the Chicken Marinade
• Boneless, Skinless Chicken Thighs – A tender source of protein; swap for chicken breasts, tofu, or shrimp if preferred.
• Olive Oil – Keeps the chicken moist and flavorful; avocado oil is a great alternative.
• Fresh Garlic – Boosts flavor; in a rush, use garlic powder as a substitute.
• Ginger Paste – Adds a warm, spicy kick; fresh or ground ginger works well too.
• Low-Sodium Soy Sauce – Infuses umami depth; opt for tamari to keep it gluten-free.
• Yellow Curry Powder – Provides an aromatic backbone; feel free to explore varied spices!
• Ground Turmeric – Adds a beautiful color and earthiness; adjust to taste.
• Ground Coriander – Contributes a citrusy note; replace with curry paste if desired.
• Chili Powder – A touch of heat; omit or reduce for milder flavors.
• Coconut Milk – Ensures richness and moisture; alternatives like yogurt or almond milk work too.
For the Bowl Assembly
• Salt and Ground Black Pepper – Essential seasonings; adjust according to your dietary needs.
• Brown Sugar or Honey – Balances out the savory notes; coconut sugar is a great low-sugar alternative.
• Red Pepper Flakes – Use sparingly for added heat; leave it out for a family-friendly version.
• Chopped Fresh Cilantro – Brightens flavor; mint or basil can serve as fresh alternatives.
• Lime Juice – Adds a refreshing acidity; lemon juice can be a last-minute substitute.
• Chopped Peanuts – Provides delightful crunch; sunflower seeds work well for nut-free diets.
The Chicken Satay ingredients will bring your dish to life, creating a wonderful meal that’s as nutritious as it is delicious!
Step‑by‑Step Instructions for Chicken Satay – Spring Roll Bowls
Step 1: Marinate Chicken
Begin by combining boneless, skinless chicken thighs with olive oil, minced garlic, ginger paste, low-sodium soy sauce, and the various spices, including curry powder and turmeric, in a large mixing bowl. Stir in coconut milk, salt, pepper, and sweetener until well-coated. Cover the bowl and refrigerate the marinated chicken for at least 30 minutes, allowing those delicious flavors to meld.
Step 2: Prepare Skewers
While the chicken marinates, soak wooden skewers in water for about 15 minutes to prevent burning during cooking. After marinating, thread the chicken pieces onto the skewers, ensuring they are evenly spaced for proper cooking. The skewers will hold the chicken securely while giving you a perfect presentation for your Chicken Satay – Spring Roll Bowls.
Step 3: Cook Chicken
Heat a cast-iron skillet or grill over medium-high heat, adding a drizzle of oil once hot. Carefully place the chicken skewers into the skillet and cook for 5-6 minutes on each side until they are golden brown. To ensure full doneness, reduce the heat and cook for an additional 1-2 minutes, checking that the interior reaches a safe temperature of 165°F.
Step 4: Assemble Bowls
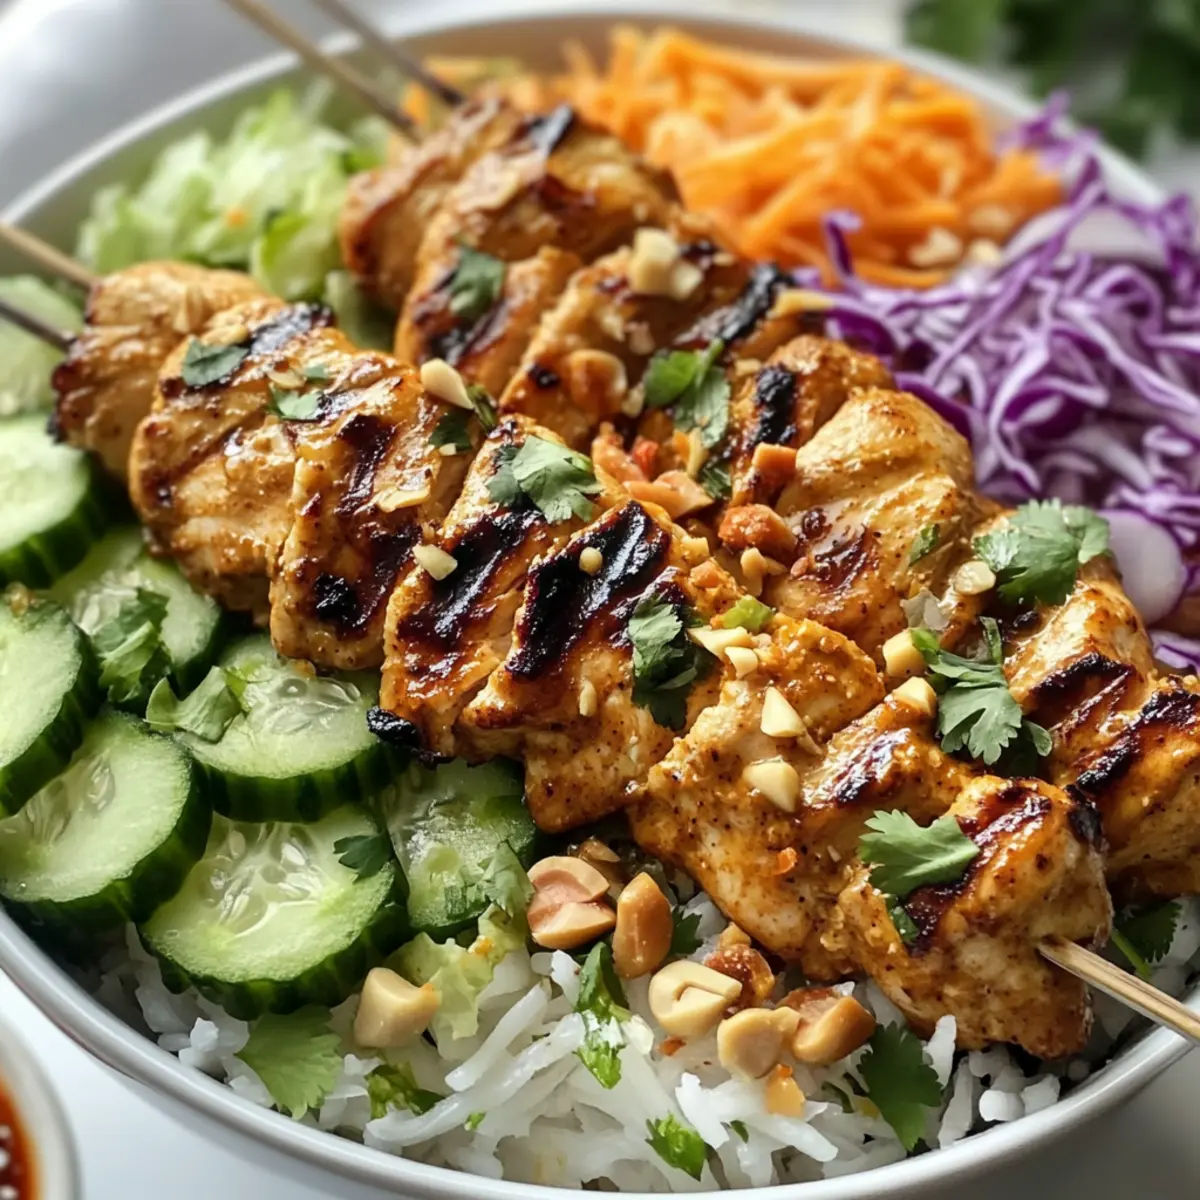
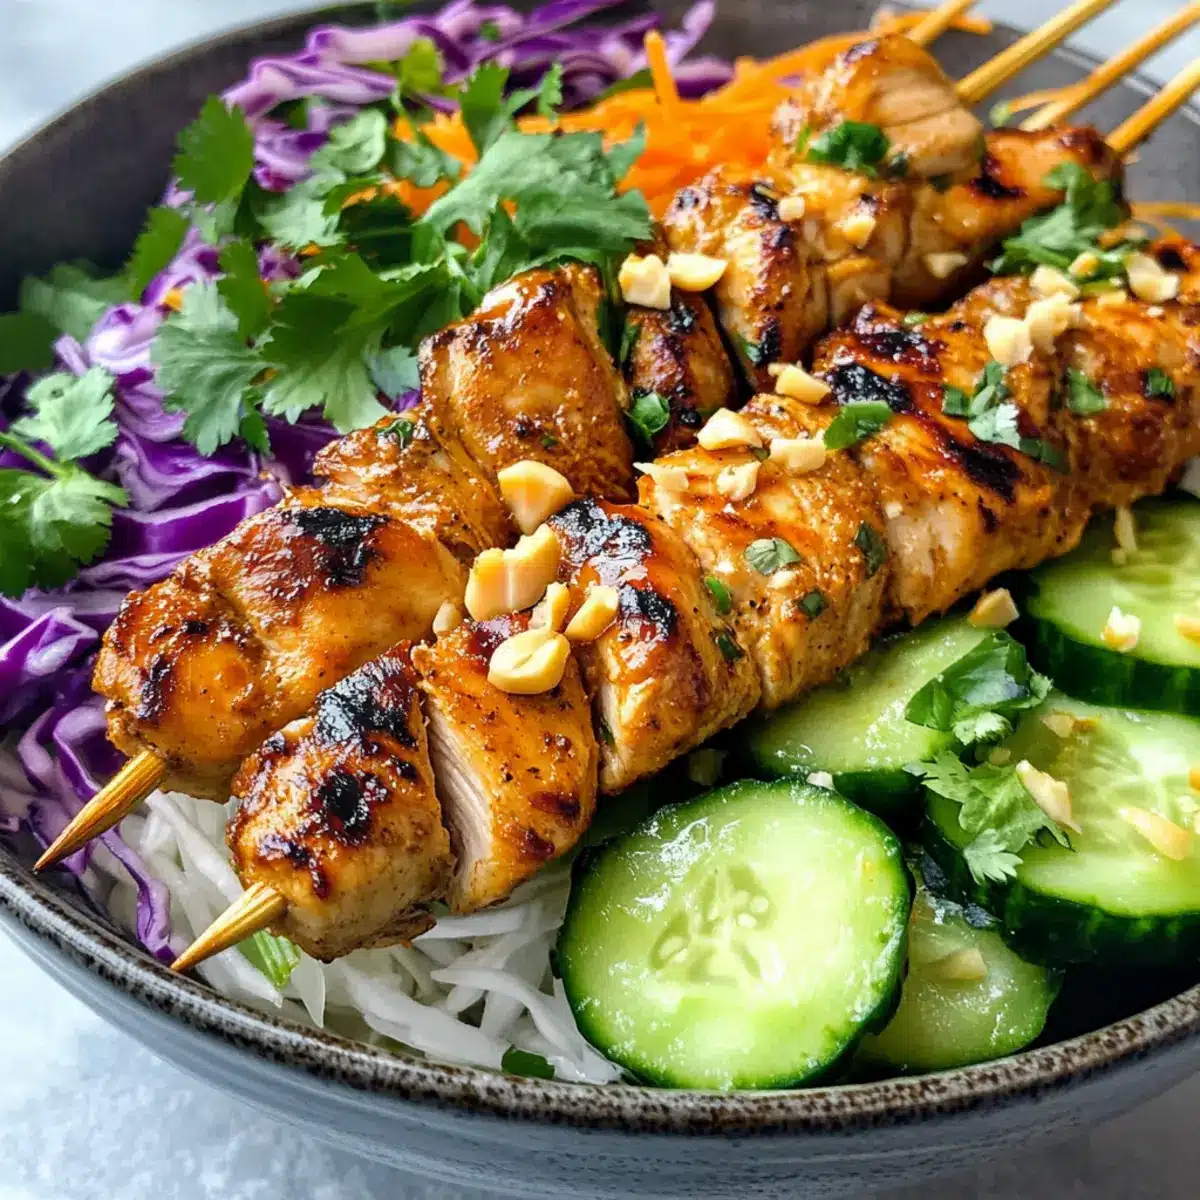
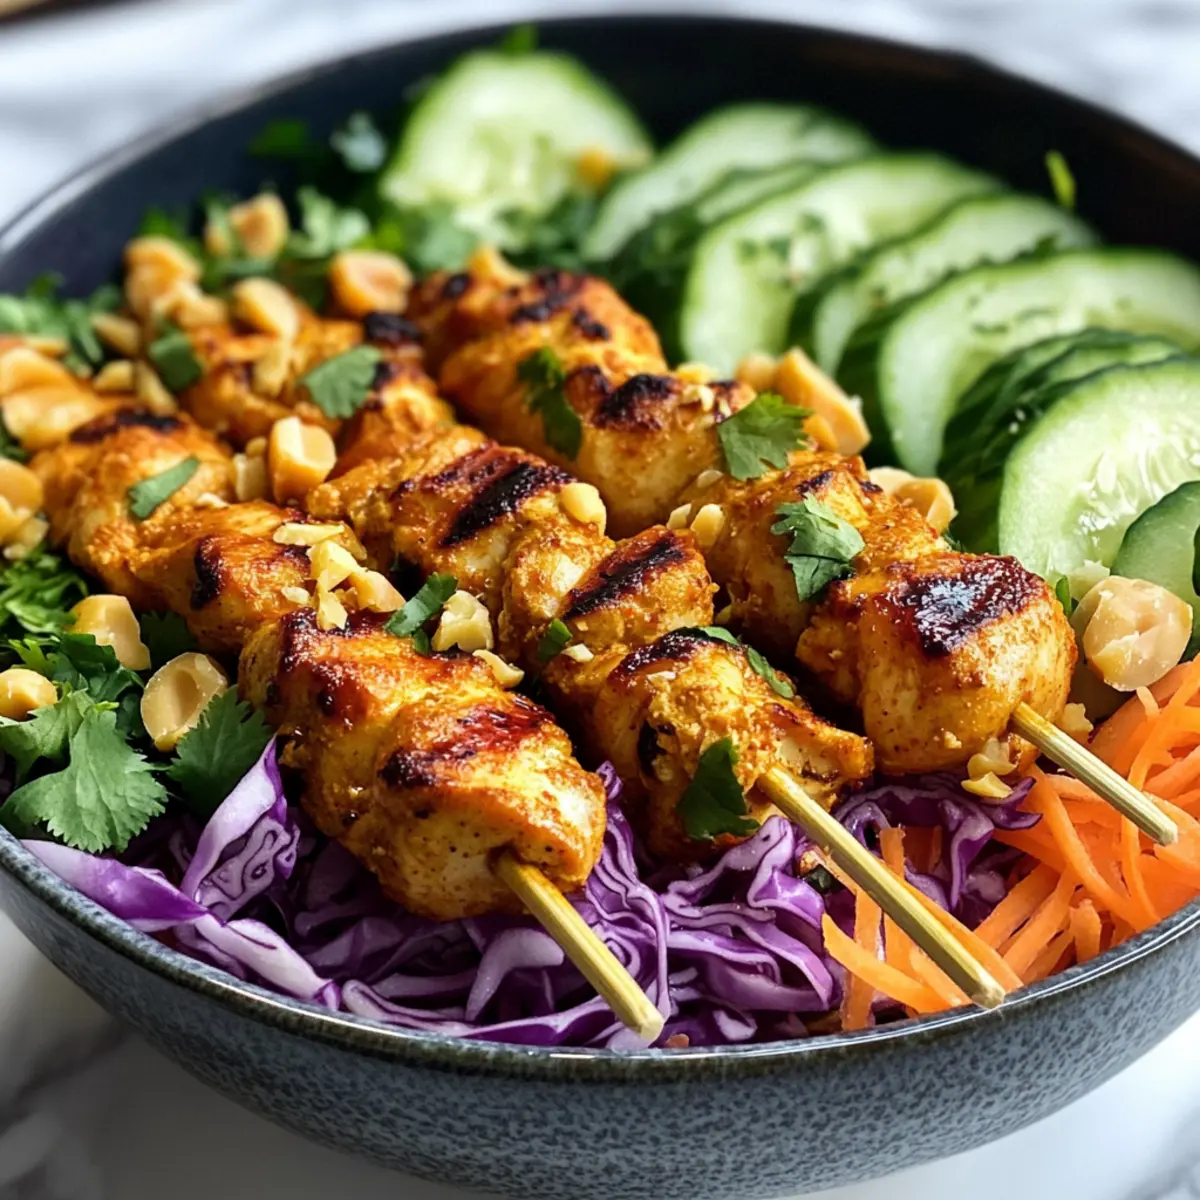
Prepare your serving bowls by starting with a base of rice or noodles. Layer on a colorful mixture of shredded cabbage, sliced cucumbers, julienned carrots, and fresh herbs. Place the grilled chicken skewers on top, allowing the vibrant components of your Chicken Satay – Spring Roll Bowls to shine through, creating a lovely visual appeal.
Step 5: Garnish & Serve
Finish your bowls with a generous drizzle of your favorite sauce, such as a peanut dressing or a tangy vinaigrette. Top with chopped peanuts for crunch, fresh cilantro for brightness, and a squeeze of lime juice to enhance all the flavors. Serve these Chicken Satay – Spring Roll Bowls warm, ready to be enjoyed by everyone at the table.
Make Ahead Options
These Chicken Satay – Spring Roll Bowls are perfect for meal prep enthusiasts! You can marinate the chicken up to 24 hours in advance for maximum flavor and tenderness, simply combining the marinade ingredients and refrigerating the chicken. The components of the bowl, like chopped vegetables, can also be prepped ahead and will stay fresh in airtight containers in the fridge for up to 3 days. To serve, reheat the chicken skewers in a skillet for a few minutes. Assemble your bowls right before enjoying them, layering the veggies, chicken, and sauce for a restaurant-quality meal ready in minutes. Just imagine the time you’ll save on busy weeknights!
Expert Tips for Chicken Satay
-
Marinate Longer: For the most tender and flavorful chicken, marinate overnight, allowing the spices to deeply infuse the meat.
-
Check Pan Temperature: Ensure your skillet is hot enough before adding the chicken; this prevents sticking and promotes that lovely sear that enhances flavor.
-
Avoid Overcrowding: Cook skewers in batches if necessary, as overcrowding the pan can result in steaming instead of searing, affecting the texture of your Chicken Satay.
-
Rest Before Serving: Let your chicken rest for a few minutes post-cooking before serving. This allows the juices to redistribute, keeping your chicken moist and flavorful.
-
Ingredient Flexibility: Don’t hesitate to get creative! Substitute ingredients based on your personal preferences or pantry on hand to make your Chicken Satay uniquely yours.
-
Store Separately: For meal prep, keep components like the chicken, veggies, and sauces in separate containers. This prevents sogginess and ensures freshness when you’re ready to enjoy.
Chicken Satay Variations & Substitutions
Dive into a world of flavors by customizing your Chicken Satay – Spring Roll Bowls! Explore these delightful variations to make this dish truly your own.
- Vegan Option: Replace chicken with tofu or tempeh marinated in a similar spice mix for a satisfying plant-based twist.
- Low-Carb Base: Swap out traditional rice or noodles for cauliflower rice or spiralized zucchini to keep it light and refreshing.
- Nut-Free Garnish: Use sunflower seeds instead of peanuts to maintain that tasty crunch without the allergens.
- Zesty Sauce: Drizzle with a sweet chili sauce or spicy sesame dressing to elevate the flavor and add some zing.
- Extra Crispy: For a crunchy topping, consider adding crispy fried onions or roasted chickpeas for a fun texture contrast.
- Herb Variation: Experiment with fresh herbs like mint or basil instead of cilantro for a unique flavor profile that brightens the dish.
- Heat Adjustment: If you love spice, ramp up the heat with more red pepper flakes or a splash of sriracha in your sauce.
- Coconut Cream Swap: For an even richer flavor, use coconut cream instead of coconut milk for an indulgent twist in your marinade.
Feel free to mix and match these ideas according to your pantry staples or dietary preferences. For additional inspiration, try my Garlic Parmesan Chicken or Street Corn Chicken Rice Bowl recipes! Enjoy the process of making this dish yours, as the options are endless!
Storage Tips for Chicken Satay
Fridge: Store each component, including the marinated chicken and fresh veggies, in airtight containers for up to 3 days. This helps maintain their freshness and flavor.
Freezer: The grilled chicken can be frozen in a sealed bag or container for up to 2 months. Just make sure to separate it from sauces to prevent sogginess upon thawing.
Reheating: When ready to enjoy your Chicken Satay again, defrost the chicken in the fridge overnight, then reheat in a skillet over medium heat until thoroughly warmed.
Assembling Bowls: Keep garnishes like peanuts, cilantro, and lime juice separate until serving to ensure every bowl bursts with freshness and crunch.
What to Serve with Chicken Satay – Spring Roll Bowls
Surrounded by a medley of tastes and textures, you can elevate this delicious main course into a delightful full meal that captivates the palate.
-
Cucumber Salad: A refreshing mix of crisp cucumbers and tangy dressing complements the savory satay and adds a cooling effect.
-
Pickled Vegetables: Their sweet and tangy profile balances the spices of the chicken and adds a delightful crunch to your bowls.
-
Light Fruit Slaw: Juicy fruits like mango or pineapple tossed with lime create a sweet contrast and bring a tropical flair to your meal.
-
Rice or Noodles: Perfect for soaking up the satay sauce, they provide a hearty base while harmonizing with the flavors of the dish.
-
Steamed Broccoli: The vibrant green adds color and nutrition, while its slight bitterness beautifully enhances the rich flavors of the chicken.
-
Thai Iced Tea: This sweet and creamy beverage is the perfect sip to cool your palate while complementing the dish’s spices beautifully.
These pairings create a colorful spread, enticing everyone to gather around the table to share this vibrant meal experience.
Chicken Satay – Spring Roll Bowls Recipe FAQs
How do I know if my chicken is fresh?
Absolutely! Fresh chicken should have a pink hue without any dark spots or a foul smell. If the chicken seems slimy or has a grayish tint, it’s best not to use it.
How should I store my Chicken Satay – Spring Roll Bowls?
For the best results, store each component in airtight containers in the fridge for up to 3 days. Keep the sauces separate to maintain freshness and prevent sogginess in your vegetables.
Can I freeze the grilled chicken?
Yes! To freeze the grilled chicken, let it cool completely before transferring it to a freezer-safe bag or container. It can be stored in the freezer for up to 2 months. When ready to enjoy, thaw it in the fridge overnight, and then reheat in a skillet over medium heat until warmed through.
What should I do if the Chicken Satay is too spicy?
If you find your Chicken Satay to be too spicy, try serving it with a cool side like cucumber salad or yogurt-based sauce, which can help tone down the heat. Alternatively, you could omit the red pepper flakes next time or adjust the amount of chili powder used in your marinade.
Are there any dietary considerations I should be aware of?
If you’re preparing this dish for guests, be aware of common allergens. For a nut-free version, replace peanuts with sunflower seeds. If you have gluten sensitivities, be sure to use tamari instead of soy sauce. Always check ingredient labels on any packaged sauces for hidden allergens.
How long can I keep the marinated chicken in the fridge?
Marinated chicken can be stored in the refrigerator for up to 2 days. If you plan to marinate it for longer, consider freezing it before the marinating process. This way, you can enjoy flavors when you’re ready to cook!
Zesty Chicken Satay Spring Roll Bowls for Flavor Lovers
Ingredients
Equipment
Method
- Begin by combining boneless, skinless chicken thighs with olive oil, minced garlic, ginger paste, low-sodium soy sauce, and the various spices including curry powder and turmeric in a large mixing bowl. Stir in coconut milk, salt, pepper, and sweetener until well-coated. Cover the bowl and refrigerate the marinated chicken for at least 30 minutes.
- While the chicken marinates, soak wooden skewers in water for about 15 minutes to prevent burning during cooking. After marinating, thread the chicken pieces onto the skewers, ensuring they are evenly spaced for proper cooking.
- Heat a cast-iron skillet or grill over medium-high heat, adding a drizzle of oil once hot. Carefully place the chicken skewers into the skillet and cook for 5-6 minutes on each side until they are golden brown. To ensure full doneness, reduce the heat and cook for an additional 1-2 minutes, checking that the interior reaches a safe temperature of 165°F.
- Prepare your serving bowls by starting with a base of rice or noodles. Layer on a colorful mixture of shredded cabbage, sliced cucumbers, julienned carrots, and fresh herbs. Place the grilled chicken skewers on top.
- Finish your bowls with a drizzle of your favorite sauce, such as a peanut dressing or a tangy vinaigrette. Top with chopped peanuts, fresh cilantro, and a squeeze of lime juice.
Leave a Reply