
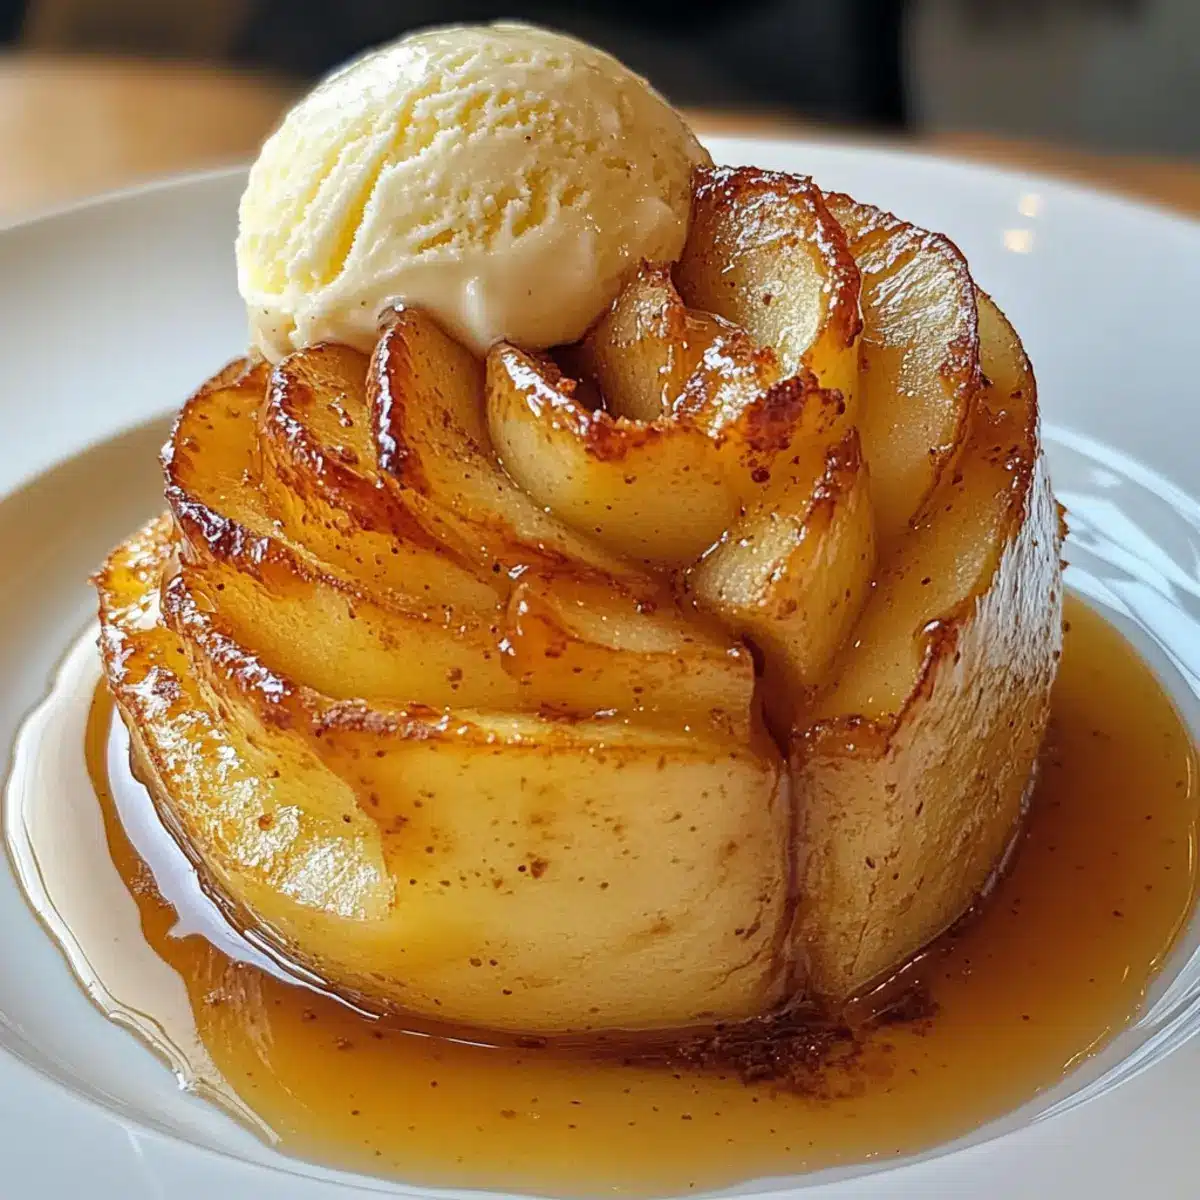
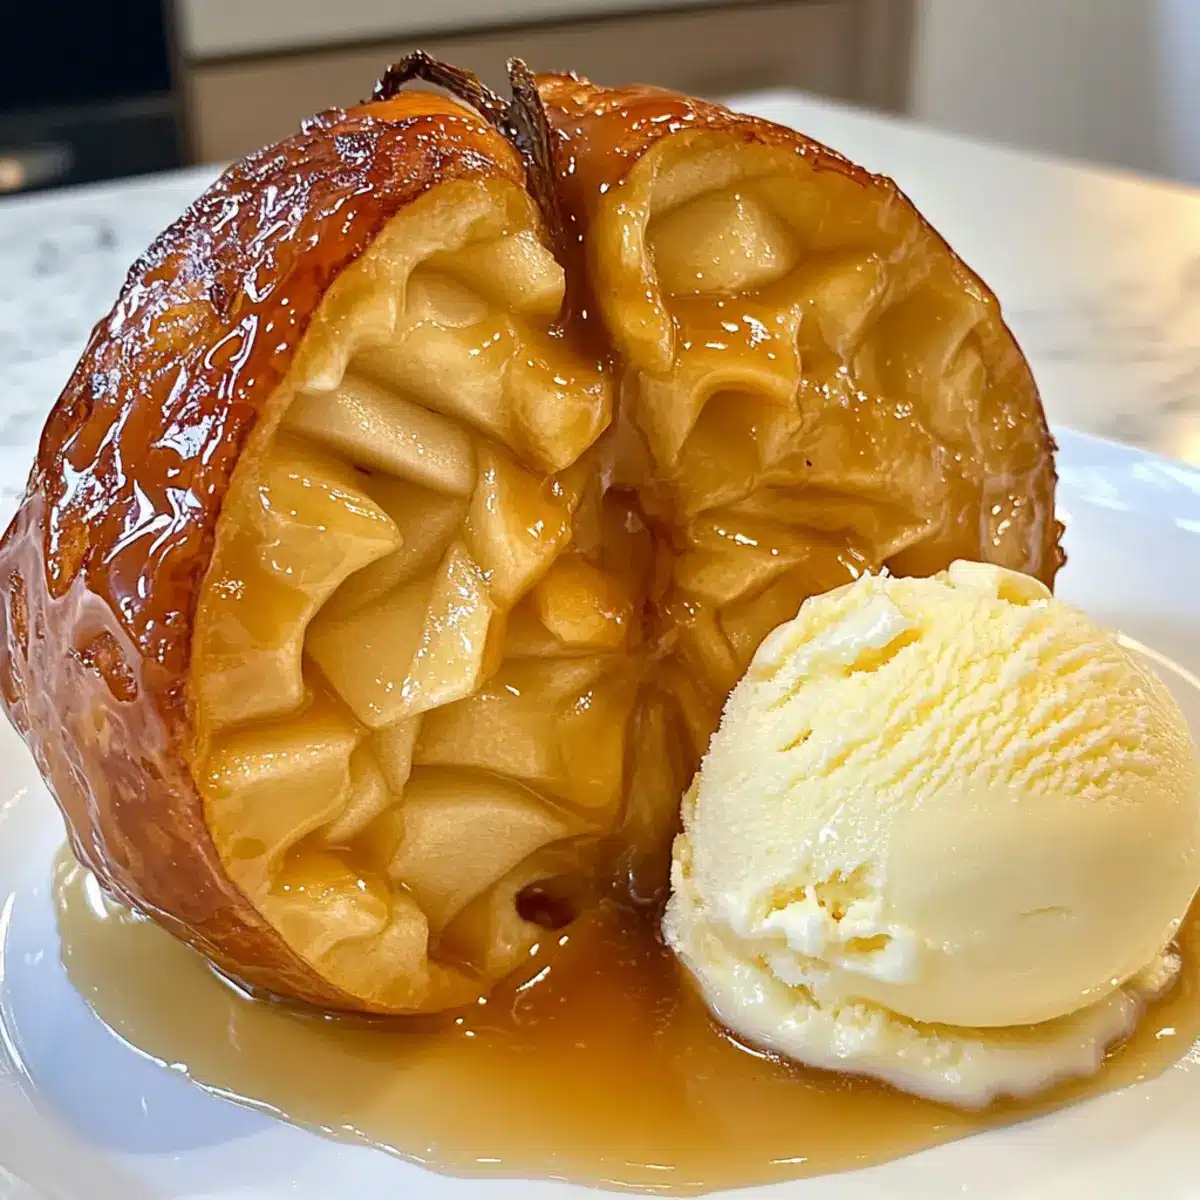
As I peeled back the layers of autumn’s warmth, I discovered a dessert that perfectly embodies the season: Bloomin’ Apples. These captivating delights feature tender apples that bloom open to reveal a gooey caramel center, making them not just a recipe but an interactive experience for family and friends alike. This fall dessert combines easy preparation with the heartwarming aroma of cinnamon and the luscious indulgence of vanilla ice cream. Who can resist the call of warm, baked fruit awash in caramel goodness? Plus, you can whip them up in your oven or air fryer, offering you plenty of options to suit your time constraints. Are you ready to enchant your taste buds this fall with Bloomin’ Apples?
Why You’ll Love Bloomin’ Apples
Easy Preparation: These delightful Bloomin’ Apples come together effortlessly, allowing you to spend more time enjoying the company of your loved ones. Whether you choose the oven or air fryer method, both offer superb results.
Irresistible Flavor: The combination of tender baked apples, warm cinnamon, and gooey caramel creates a heavenly indulgence that’s perfect for cozy fall evenings.
Interactive Experience: Watching these apples bloom reveals a magical center that’s perfect for sharing. Your friends and family will love being part of this charming dessert display.
Versatile Serving Options: Serve your Bloomin’ Apples warm with a scoop of vanilla ice cream, or, for a twist, try pairing with some Stuffed Baked Apples for an exciting dessert spread.
Perfect for Gatherings: Whether it’s a casual weeknight dinner or a festive gathering, this dessert is sure to wow your guests and have them coming back for more.
Bloomin’ Apples Ingredients
• Here’s everything you need to create this delightful fall dessert!
For the Apples
• Apples – 4 firm varieties (Honeycrisp, Gala, Granny Smith) hold shape when baked for a stunning presentation.
• Cooking Spray – Prevents sticking; use any non-stick spray of your choice.
For the Flavor
• Melted Butter – 4 Tbsp. adds moisture and rich flavor; substitute with coconut oil for a dairy-free option.
• Granulated Sugar – 1 Tbsp. sweetens the dish nicely; no direct substitute necessary.
• Brown Sugar – 1 Tbsp. adds depth of flavor; can swap with maple syrup for a unique twist.
• Ground Cinnamon – ½ tsp. offers warmth and classic autumn spice; mixing in nutmeg can create fun variations.
For the Filling
• Chewy Caramel Squares – 8 pieces melt into the center for a gooey, indulgent texture; opt for soft caramels from the candy aisle.
For Serving
• Vanilla Ice Cream – Essential for serving; enhances flavors beautifully; choose dairy-free ice cream as an alternative if desired.
Enjoy making these Bloomin’ Apples with your loved ones, and immerse yourself in the cozy embrace of fall flavors!
Step‑by‑Step Instructions for Bloomin’ Apples
Step 1: Preheat the Oven or Air Fryer
Begin by preheating your oven to 375°F or your air fryer to 350°F. This is a crucial step to ensure that your Bloomin’ Apples cook evenly and thoroughly, resulting in that perfect tender texture. Preheating helps lock in the warmth of autumn flavors, so don’t skip this part!
Step 2: Prepare the Apples
Take your four firm apples and carefully slice off the tops, creating a small opening. Core each apple using an apple corer or a knife, being cautious not to cut through the bottom. This preparation will keep the apples intact, letting them bloom beautifully during baking while providing a delightful cavity for the caramel.
Step 3: Slice for Blooming
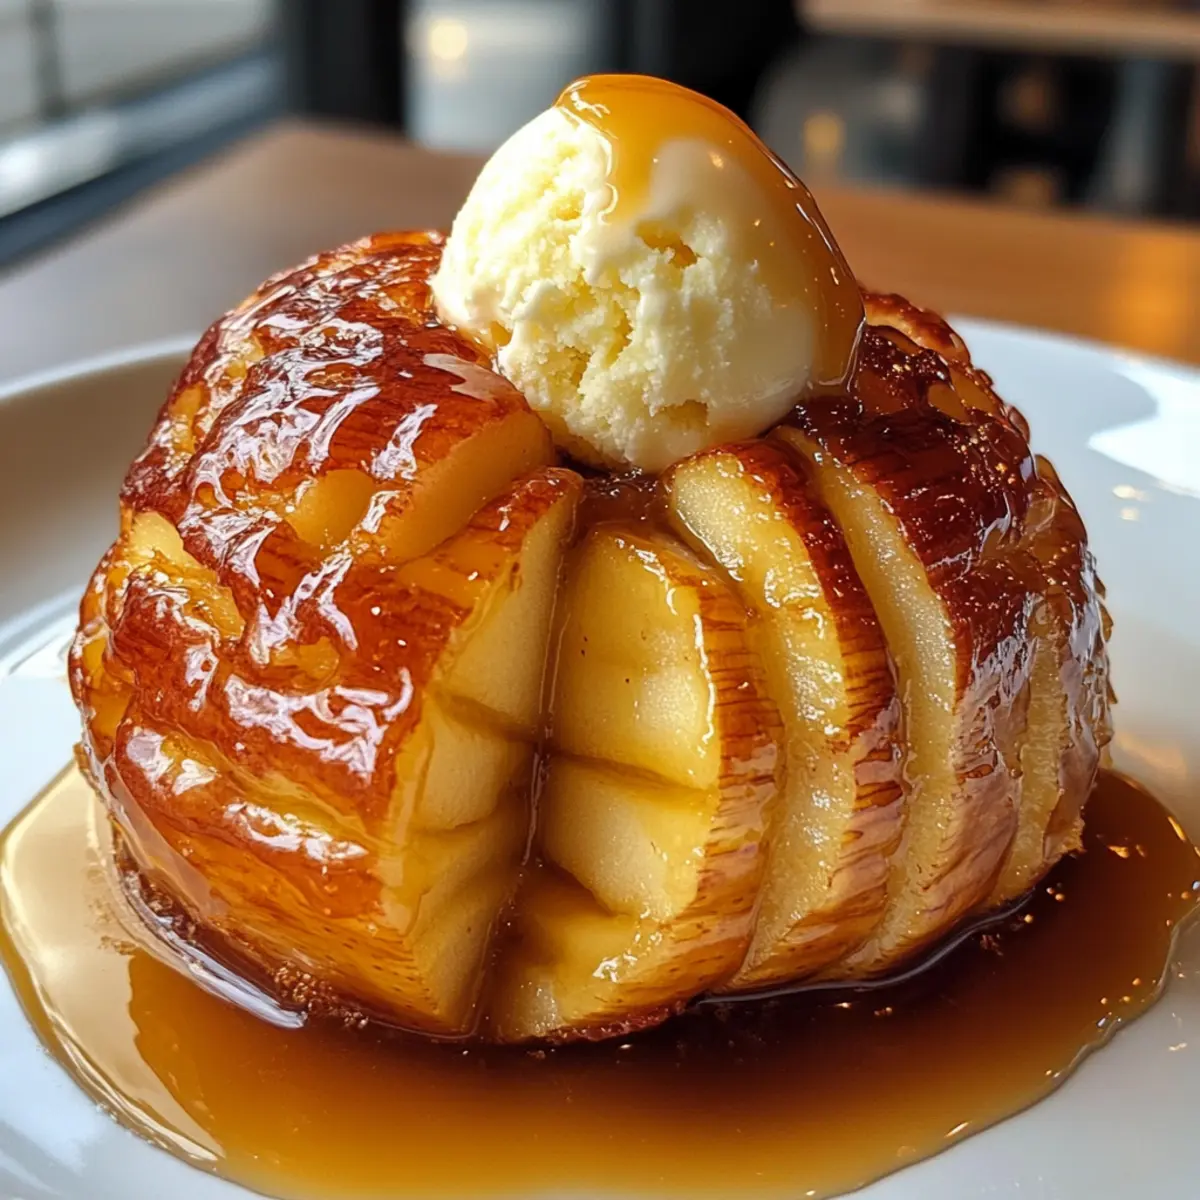
Create thin crosswise cuts along the sides of each apple, but make sure you stop before cutting all the way through. These slices will open up the apples as they bake, allowing them to bloom like flowers and enhancing their aesthetic appeal, a key feature of your Bloomin’ Apples.
Step 4: Fill the Apples
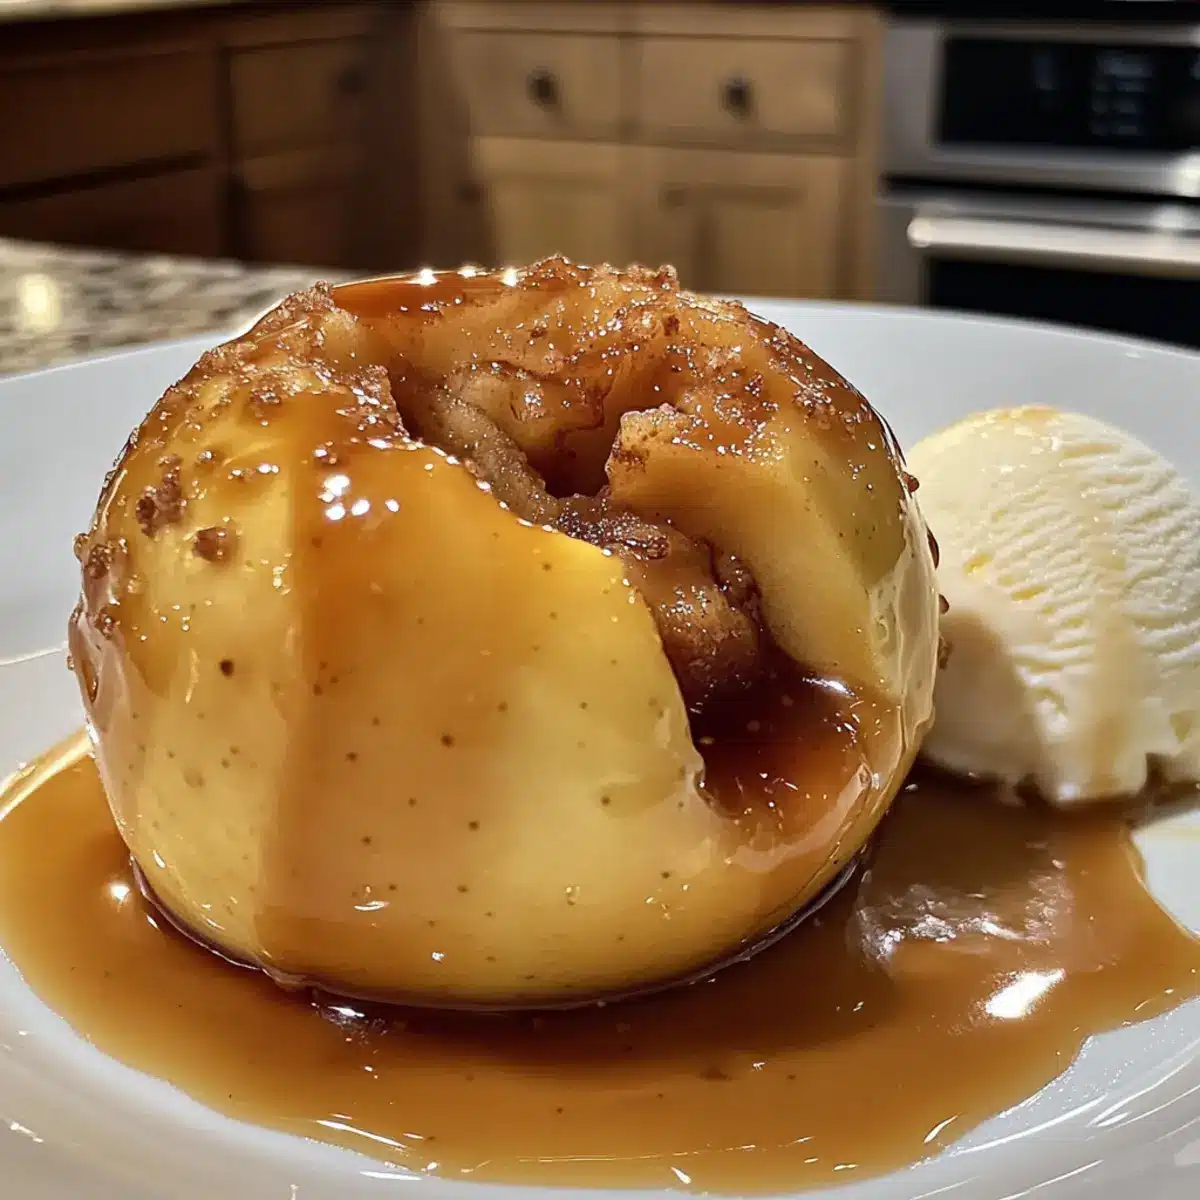
Gently insert two chewy caramel squares into the center of each apple, pushing them down slightly. This gooey filling will melt beautifully as the apples bake, providing a heavenly center that oozes flavor. Make sure to distribute the caramels evenly among the apples for a consistent sweetness in every bite.
Step 5: Brush with Butter Mixture
In a small bowl, combine melted butter with granulated and brown sugar, along with ground cinnamon. Generously brush this mixture over each apple, ensuring it seeps into the crevices. This step is essential for enhancing the flavor of your Bloomin’ Apples, giving them that rich, caramelized exterior you’ll love.
Step 6: Bake the Apples
Place the prepared apples in a baking dish or air fryer basket, and bake in the preheated oven for 30 minutes or in the air fryer for about 20 minutes. You’ll know they’re done when they are tender and the skins start to split slightly, revealing the beautiful caramel oozing out from within.
Step 7: Serve and Enjoy
Once baked, allow the Bloomin’ Apples to cool slightly before serving. Plate them warm and add a generous scoop of vanilla ice cream on top, letting it melt into the warm apple. A drizzle of additional caramel sauce can elevate this exquisite fall dessert, providing the perfect sweet finish to a cozy evening.
Make Ahead Options
These Bloomin’ Apples are a fantastic choice for meal prep, allowing you to enjoy delightful flavors without the last-minute rush. You can slice and core the apples up to 24 hours in advance, just be sure to toss them with a bit of lemon juice to prevent browning. The caramel filling can also be prepared ahead by portioning the chewy caramel squares for easy assembly later. When you’re ready to serve, simply brush the apples with the melted butter mixture and bake them in the oven or air fryer. This method keeps the apples just as delicious while saving time, letting you savor the exquisite blend of warm flavors on busy weeknights!
Bloomin’ Apples: Creative Twists Await
These delightful Bloomin’ Apples are just the beginning—feel free to let your imagination soar and create a version that sings to your tastes!
-
Crunchy Oat Filling: Add a mixture of oats, brown sugar, and chopped nuts inside the apples for a satisfying crunch. This twist not only adds texture but also a nutty flavor that complements the gooey caramel perfectly.
-
Different Apple Varieties: Switch things up by using different types of apples, such as Fuji or Braeburn, for a unique sweetness and tartness in every bite. Each apple brings its own personality, creating a delightful flavor dance.
-
Dairy-Free Ice Cream: Replace vanilla ice cream with your favorite dairy-free version if you’re looking for a lactose-free treat. Coconut or almond-based ice creams provide a creamy consistency and enhance the dessert’s tropical vibes.
-
Spiced Apple Twist: Add cardamom or nutmeg to the butter and sugar mixture to deepen the flavor profile. A hint of spice transforms these already enchanting apples into something extra special.
-
Drizzle of Chocolate: After baking, drizzle melted dark chocolate over each apple for an indulgent twist. Chocolate and caramel create the ultimate sweet harmony, adding richness to your delicious dessert.
-
Zesty Citrus Kick: Incorporate a splash of lemon or orange juice with the caramel filling for a refreshing citrus twist. The brightness balances the sweetness, creating an exciting contrast.
-
S’mores Inspired: Stuff the apples with mini marshmallows and crushed graham crackers along with the caramel. This campfire-inspired touch adds a nostalgic flavor, taking your Bloomin’ Apples to a whole new level.
Explore these variations while enjoying the heartwarming magic of your Bloomin’ Apples, and don’t forget to share your favorites with loved ones. And if you’re looking for a complementary dessert, you might also enjoy some delicious Stuffed Baked Apples for an exciting dessert spread that will impress all your guests!
Expert Tips for Bloomin’ Apples
-
Apple Selection: Choose firm varieties like Honeycrisp or Gala to maintain structure during baking. Avoid soft apples that may turn mushy.
-
Prevent Cutting Through: Use chopsticks as a guide to limit how deep you slice into the apples. This ensures they bloom beautifully without falling apart.
-
Butter Mixture Matters: Generously brush each apple with melted butter and sugar mixture. This enhances flavor and creates a caramelized exterior.
-
Monitor Baking Time: Start checking for tenderness a few minutes before the recommended time to avoid over-baking. You want apples soft but not mushy.
-
Alternative Fillings: Experiment with oat or nut fillings for added crunch. This can enhance your Bloomin’ Apples while creating delightful flavor combinations.
What to Serve with Bloomin’ Apples
Delight in crafting a full meal that pairs beautifully with warm, caramel-touched Bloomin’ Apples.
- Creamy Vanilla Ice Cream: The perfect companion, its coolness contrasts beautifully with the warmth of your dessert, elevating your experience.
- Nutty Granola: Add a crunchy topping for texture, bringing a wholesome spin to your indulgent dessert while enhancing the fall flavors.
- Cinnamon Sugar Donuts: These sweet, fluffy treats offer a cozy addition that echoes the cinnamon notes in the apples, making a delightful fall match.
- Spiced Coffee: A warm cup of spiced coffee can enhance the comforting flavors of your dish, creating a perfect cozy beverage pairing for dessert.
- Apple Cider: Sip on warm apple cider for a nostalgic touch, celebrating the essence of fall and perfectly complementing the apple dessert.
- Pecan Pie: As a nod to traditional autumn flavors, this rich, nutty dessert can amplify the experience of your Bloomin’ Apples and add a festive flair.
- Cheese Plate: Offer a variety of cheeses like sharp cheddar or creamy brie to contrast the sweet and gooey flavors, creating a sophisticated balance.
- Pumpkin Spice Muffins: For a seasonal twist, these muffins blend beautifully with the flavors of fall, creating a comforting and inviting atmosphere.
- Caramel Sauce Drizzle: Serve extra caramel sauce on the side for those who crave additional sweetness, allowing guests to customize their dessert experience.
How to Store and Freeze Bloomin’ Apples
Room Temperature: Enjoy your Bloomin’ Apples fresh for the best flavor and texture, ideally on the day they’re made. If left at room temperature, consume them within 4 hours.
Fridge: If you have leftovers, store them in an airtight container in the fridge for up to 2 days. Reheat gently in the microwave or oven for a delicious dessert revival.
Freezer: For longer storage, wrap individual Bloomin’ Apples tightly in plastic wrap, then place them in a freezer-safe bag. They last up to 2 months; thaw in the fridge before reheating.
Reheating: To enjoy your Bloomin’ Apples again, reheat in a preheated oven at 350°F for about 10-15 minutes, or until warmed through. Add a scoop of vanilla ice cream and enjoy!
Bloomin’ Apples Recipe FAQs
What type of apples are best for Bloomin’ Apples?
Absolutely! Choosing the right apples is crucial for this recipe. I recommend using firm varieties like Honeycrisp, Gala, or Granny Smith. These apples hold their shape beautifully during baking, ensuring they bloom without collapsing. Soft apples, on the other hand, may not maintain their integrity and could become mushy.
How should I store leftover Bloomin’ Apples?
Very! If you’ve got leftovers, store your Bloomin’ Apples in an airtight container in the refrigerator for up to 2 days. To reheat, warm them gently in the microwave or place them back in a 350°F oven for about 10-15 minutes until they are heated through. This way, you can savor the flavors of your delightful dessert even after the initial serving!
Can I freeze Bloomin’ Apples?
Of course! To freeze, wrap each Bloomin’ Apple tightly in plastic wrap and then place them in a freezer-safe bag. They can be stored for up to 2 months. When you’re ready to enjoy them again, thaw them in the fridge overnight before reheating. It’s a fantastic way to have a cozy dessert ready to go!
What if my apples don’t bloom properly?
Don’t worry! If your apples don’t bloom as expected, it’s usually due to cutting too deep. To achieve that lovely blooming effect, make sure to stop your knife just before cutting through the bottom of the apple when slicing. Using chopsticks as a cut guide can help you get those even slices without overdoing it!
Can pets eat any ingredients in Bloomin’ Apples?
Very important! While Bloomin’ Apples are a delightful treat for us, many ingredients can be harmful to pets. Apples are generally fine for dogs in moderation, but you should avoid feeding them caramel or ice cream, as these can be unsafe. Always keep dessert treats away from your furry friends for their safety.
How long can I keep Bloomin’ Apples at room temperature?
For the best experience, enjoy your Bloomin’ Apples fresh! If left at room temperature, they should be consumed within 4 hours. After that, it’s best to store any leftovers to maintain the delicious texture and flavor that makes this fall dessert so delightful.
Bloomin’ Apples: Delightful Caramel Treat for Fall Nights
Ingredients
Equipment
Method
- Preheat your oven to 375°F or air fryer to 350°F.
- Slice off the tops of the apples and core them.
- Make thin crosswise cuts along the sides of each apple.
- Insert two chewy caramel squares into the center of each apple.
- Brush melted butter mixture over each apple.
- Bake in the oven for 30 minutes or air fryer for 20 minutes.
- Allow to cool slightly, serve warm with vanilla ice cream.
Leave a Reply