
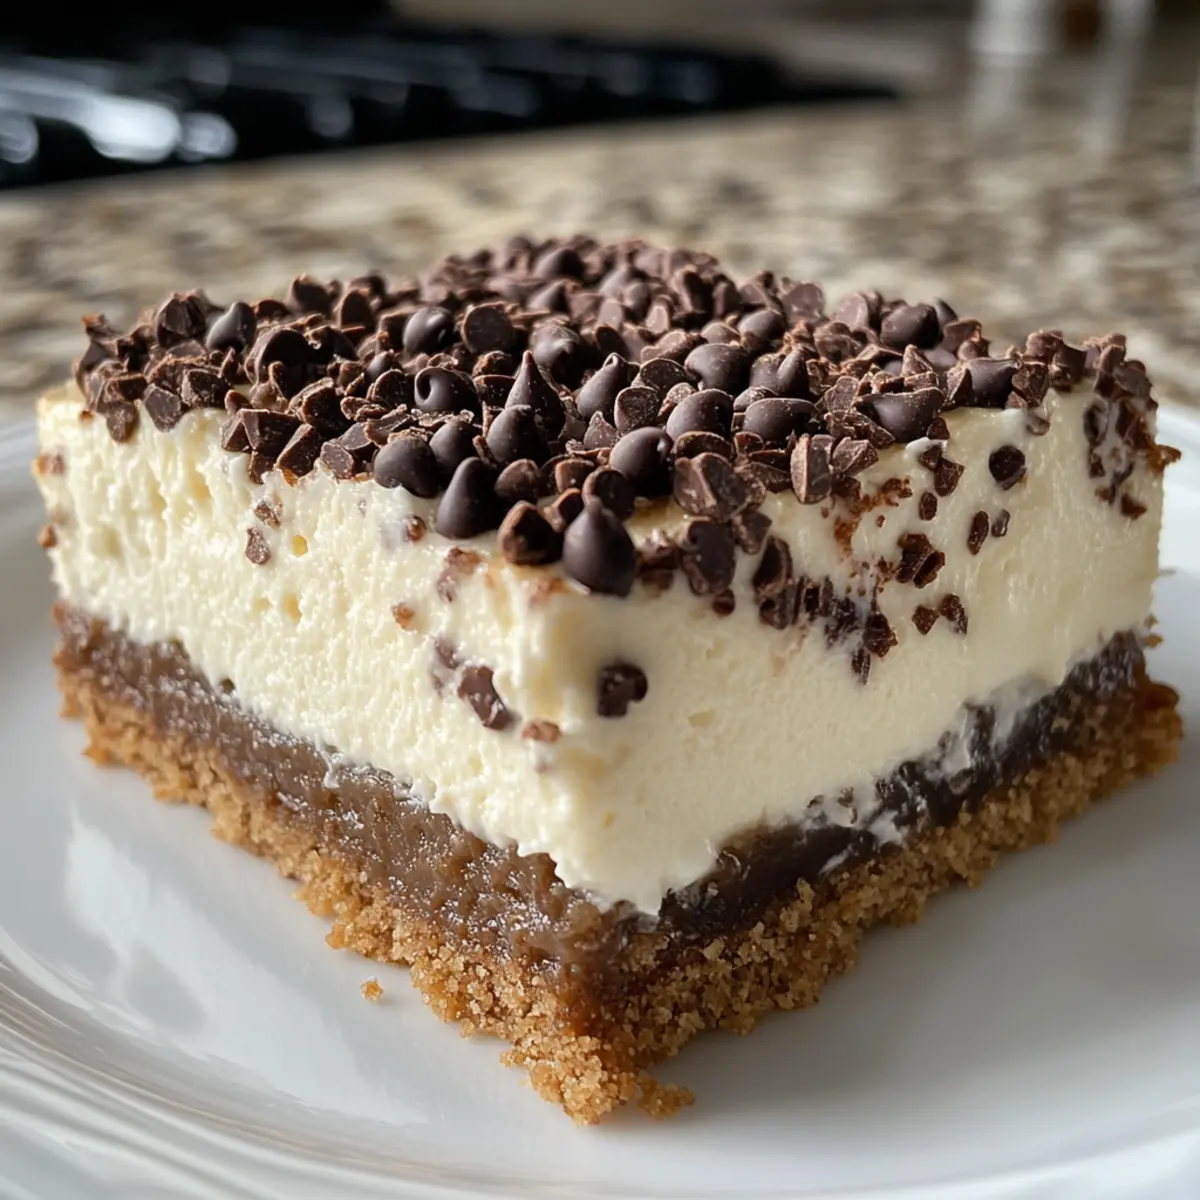
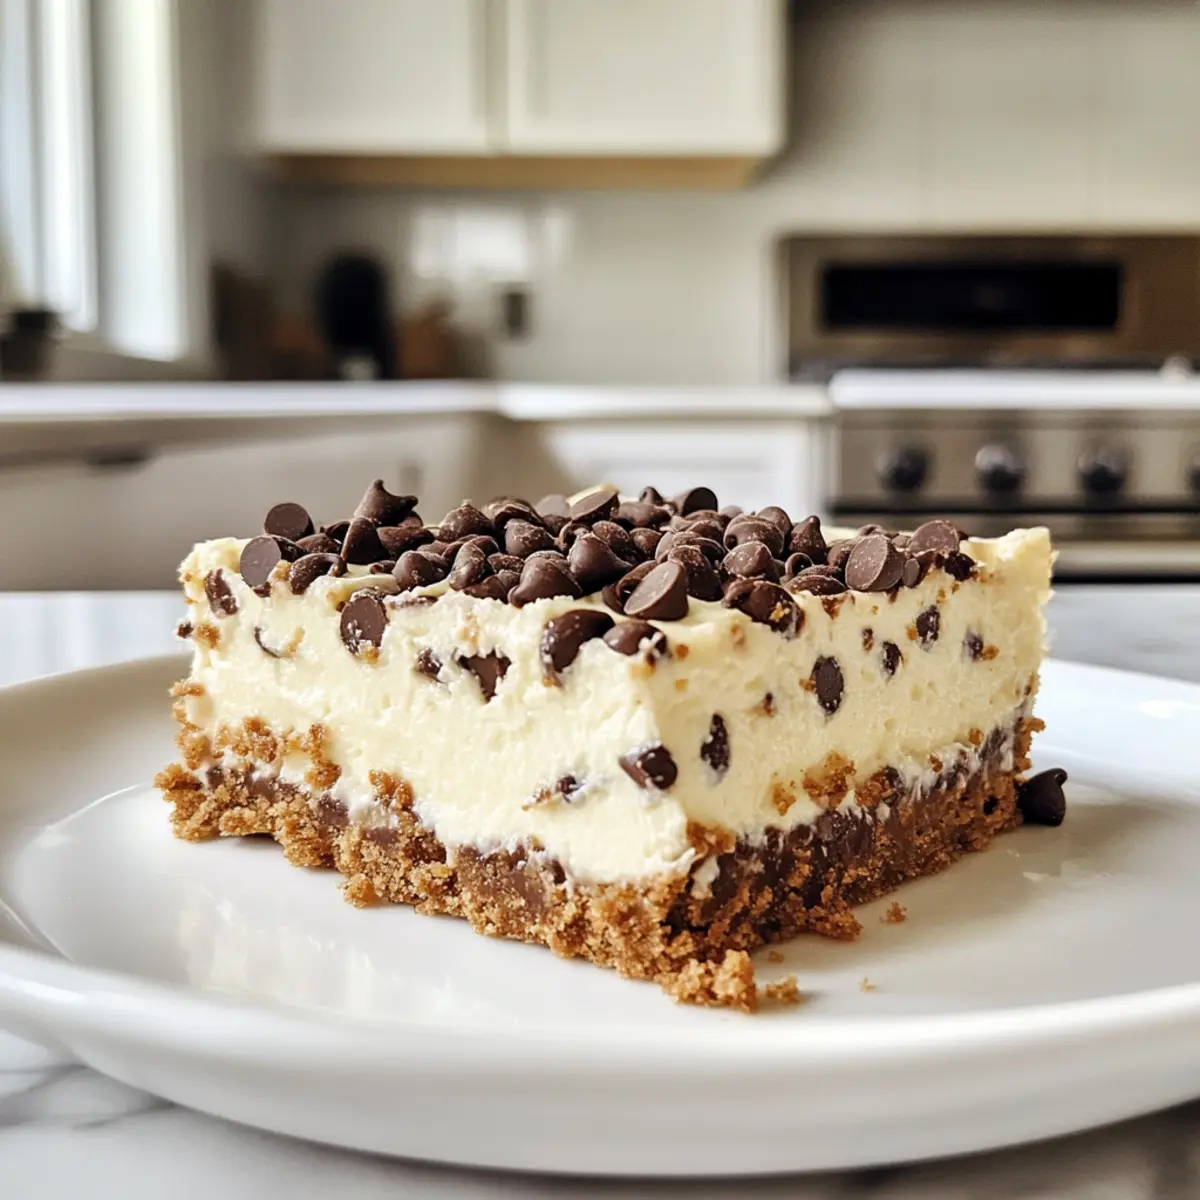
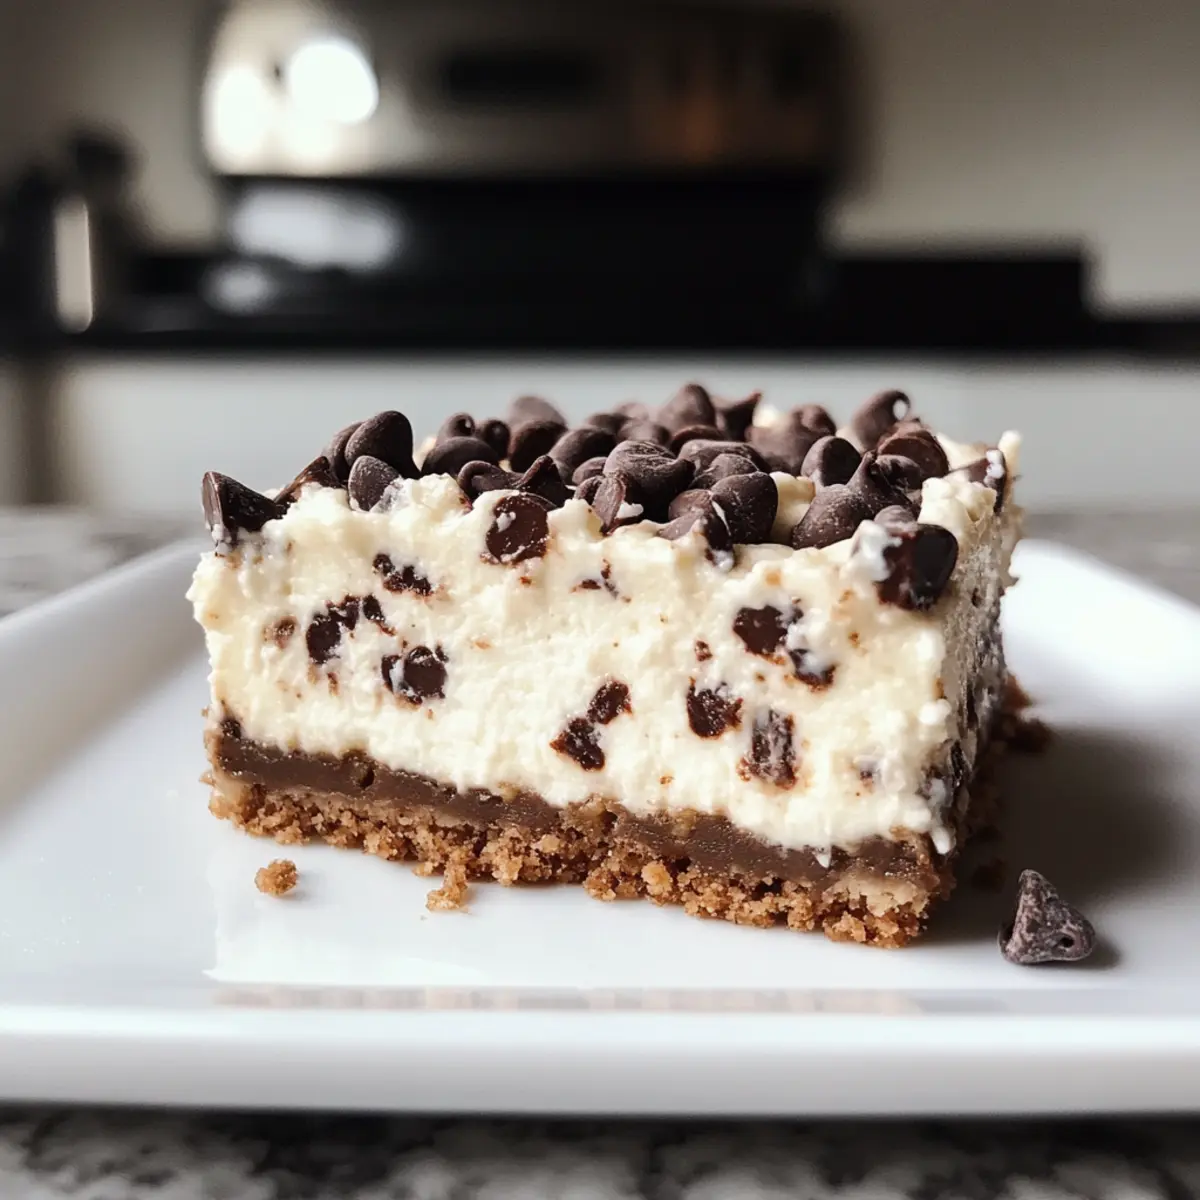
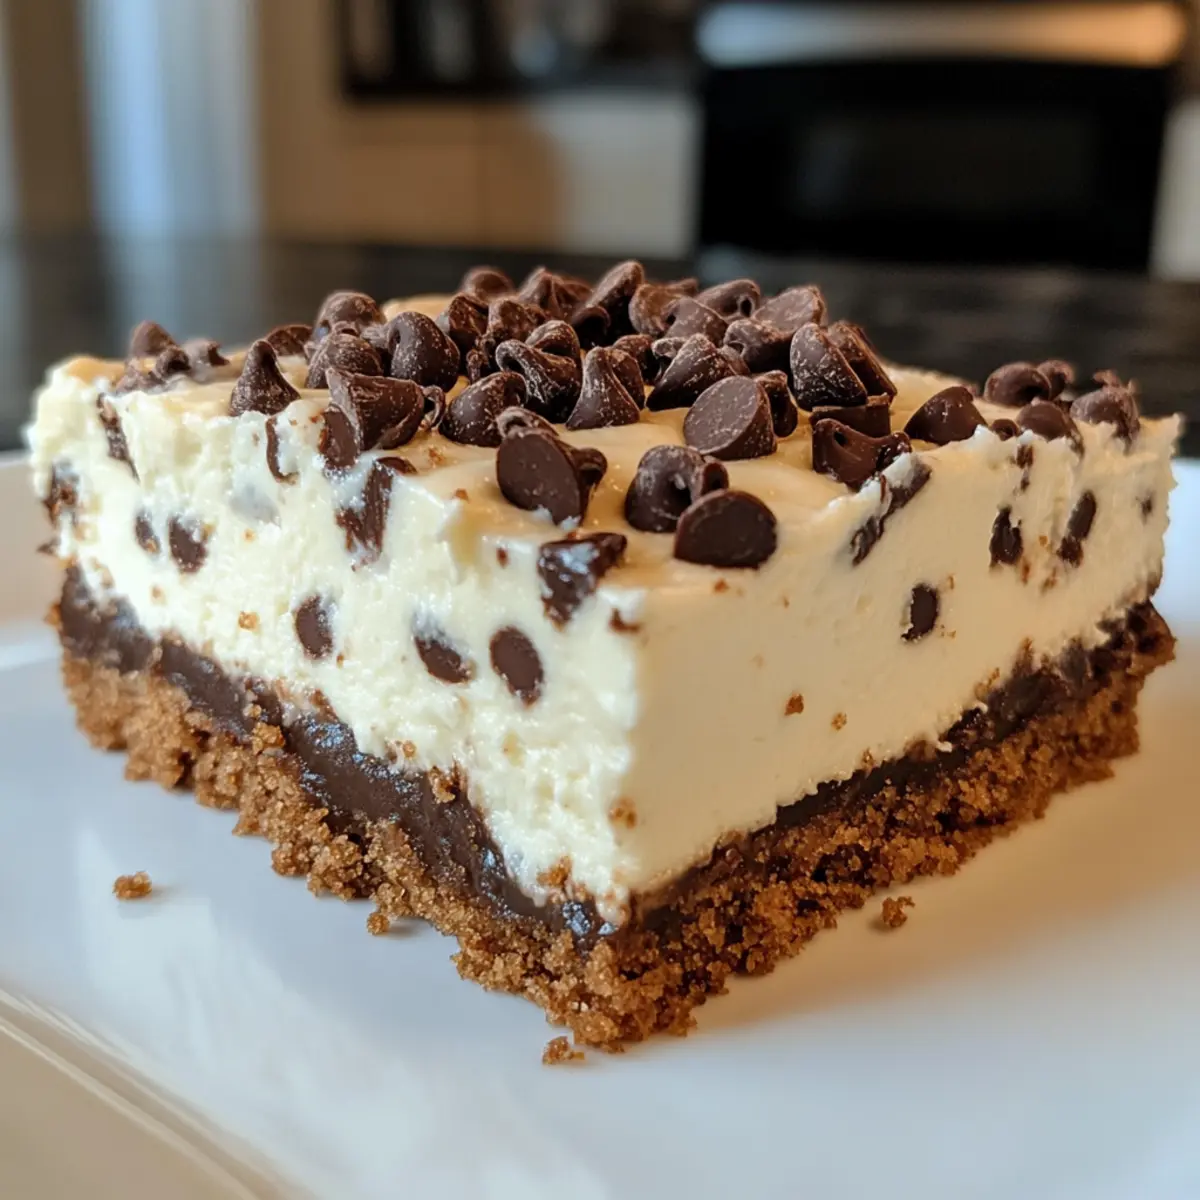
The rich aroma of freshly baked sweets often transports me back to my grandma’s kitchen, where dessert was always a moment to savor. Today, I’m thrilled to share my 15-minute irresistible Cannoli Cheesecake Bars—a delightful twist on the classic Italian treat. With their creamy ricotta filling and crunchy mini chocolate chips, these bars offer a luxurious taste without the fuss. Not only do they come together in a flash, making them perfect for last-minute gatherings, but they’re also a crowd-pleaser that will have everyone craving seconds. Plus, with easy gluten-free options and dairy substitutions available, this no-fuss dessert caters to various dietary needs. Are you ready to indulge in this creamy, dreamy delight?
Why are Cannoli Cheesecake Bars a Must-Try?
Simplicity: These Cannoli Cheesecake Bars are quick and easy to whip up, taking just 15 minutes of hands-on time—perfect for busy bakers!
Crowd-Pleaser: With their creamy ricotta center and crunchy chocolate chips, these bars blend classic flavors into one irresistible treat that everyone will love.
Versatile Options: Whether you’re gluten-free or dairy-free, this recipe offers easy substitutions, ensuring that everyone at the table can indulge. Try making them with almond flour for a gluten-free crust or a dairy-free ricotta alternative.
Effortless Presentation: These bars look stunning with a light dusting of powdered sugar, making them a showstopper at any gathering. Pair them with a drizzle of chocolate sauce for an extra touch!
Rich Flavor: The combination of sweet and tangy notes gives these bars a rich taste that’s reminiscent of traditional Italian cannoli. They truly are a modern twist on a beloved classic!
Ready to explore more delightful desserts? Don’t miss my recipes for Strawberry Cheesecake Stuffed treats or Vanilla Bean Cheesecake for even more sweet options!
Cannoli Cheesecake Bars Ingredients
For the Crust
• Graham Crackers – These provide a sturdy base; swap with almond flour for a gluten-free option.
• Granulated Sugar – Sweetens the crust and filling; no need for substitutions.
• Unsalted Butter – Helps bind the crust; remember to melt it before mixing.
For the Filling
• Cream Cheese – The base of your rich filling; use full-fat and ensure it’s at room temperature for the best texture.
• Eggs – Provide structure to the cheesecake; make sure they are at room temperature to avoid lumps.
• Vanilla Extract – Adds depth of flavor; opt for pure vanilla for a more authentic taste.
• Ricotta Cheese – This is the star of the filling; full-fat is recommended, or use strained almond milk ricotta for a dairy-free variation.
• Mini Chocolate Chips – These add sweetness and delightful texture; only use mini ones for optimal results.
Feel free to gather these ingredients and get ready to create the perfect batch of Cannoli Cheesecake Bars that will melt in your mouth!
Step‑by‑Step Instructions for Cannoli Cheesecake Bars
Step 1: Prepare the Crust
Begin by preheating your oven to 325°F (160°C). In a medium bowl, mix together crushed graham crackers, granulated sugar, and melted unsalted butter until the mixture resembles wet sand. Press this mixture firmly into the bottom of a lined 9×9 inch pan, creating a slight lip around the edges to hold in the filling.
Step 2: Make the Filling
In a large mixing bowl, beat the softened cream cheese with granulated sugar using an electric mixer until the mixture is smooth and creamy. Add the room-temperature eggs one at a time, mixing well after each addition. Then, incorporate pure vanilla extract, followed by the ricotta cheese, and gently fold in the mini chocolate chips until evenly distributed throughout the filling.
Step 3: Bake the Cheesecake Bars
Pour the luscious filling over the prepared crust, spreading it evenly with a spatula. Place the pan in the preheated oven and bake for 40-45 minutes. The edges should be set while the center remains slightly jiggly—this indicates the perfect texture for your Cannoli Cheesecake Bars.
Step 4: Cool Gradually
Once baked, remove the pan from the oven and allow the bars to cool at room temperature for about 1 hour. After this time, transfer them to the refrigerator and let chill for at least 4 hours, or preferably overnight. This cooling time helps achieve a creamy, smooth texture for slicing.
Step 5: Serve and Garnish
When ready to serve, dust the top with powdered sugar for a delightful presentation. For an extra touch, you may sprinkle additional mini chocolate chips or a bit of orange zest over the top for flavor and color. Cut into squares and enjoy these irresistible Cannoli Cheesecake Bars chilled!
How to Store and Freeze Cannoli Cheesecake Bars
Room Temperature: These Cannoli Cheesecake Bars are best enjoyed cold; however, they can sit at room temperature for up to 2 hours before serving.
Fridge: Store any leftovers in an airtight container in the refrigerator for up to 5 days. The flavors only get better after a day!
Freezer: To freeze, wrap the bars tightly in plastic wrap and then in aluminum foil. They’ll keep well for up to 2 months—simply thaw in the fridge overnight when you’re ready to indulge again.
Reheating: If you prefer a softened texture, allow the bars to warm slightly at room temperature for about 15-20 minutes before serving.
Cannoli Cheesecake Bars Variations
Feel free to get creative and make these delectable Cannoli Cheesecake Bars your own with some delightful twists!
-
Gluten-Free Crust: Substitute graham crackers with almond flour (1 1/4 cups mixed with 2 tbsp sugar) for a delicious gluten-free option. Your taste buds won’t even notice the difference!
-
Dairy-Free Delight: Replace ricotta cheese with strained almond milk ricotta for a dairy-free treat that still tastes divine. You can share the joy with everyone regardless of dietary needs!
-
Zesty Twist: Add orange or lemon zest to the filling for a refreshing citrus kick that will brighten each bite. The hint of zest effortlessly elevates the flavor profile!
-
Nutty Flavor: Stir in a handful of chopped nuts like pistachios or almonds for an added crunch that compliments the creamy filling beautifully. It’s all about that delightful texture!
-
Flavorful Extracts: Experiment with flavored extracts like almond or hazelnut for a unique twist. Each time you make this dessert, it can feel like a whole new experience!
-
Mini Chocolate Chips: If you’re feeling adventurous, try different chocolate varieties. Dark, milk, or even white chocolate can completely change the flavor while keeping that sweetness intact!
-
Additional Toppings: Get creative with toppings! Serve with a dollop of whipped cream, a drizzle of chocolate sauce, or a sprinkle of crushed biscotti for an indulgent finishing touch.
Looking for more sweet inspiration? Try my Pumpkin Cheesecake Truffles or whip up some irresistible Strawberry Cheesecake Cinnamon rolls for an unforgettable dessert experience!
Expert Tips for Cannoli Cheesecake Bars
-
Room Temperature Ingredients: Ensure that your cream cheese and eggs are at room temperature. This prevents lumps and results in a smoother filling for your Cannoli Cheesecake Bars.
-
Don’t Rush Cooling: Allow your cheesecake bars to cool gradually to prevent cracks. Leaving the oven door slightly ajar after baking can help with this process.
-
Check Filling Consistency: If your filling seems runny before baking, chill it in the refrigerator for about 30 minutes. This helps solidify it for a perfect bake.
-
Use Mini Chips Only: For the best texture, avoid regular-sized chocolate chips. Mini chocolate chips evenly distribute sweetness without overwhelming the creamy filling.
-
Chill for Best Texture: Letting the bars chill in the fridge for at least 4 hours (or overnight!) enhances the flavors and achieves that creamy dreaminess you crave!
Make Ahead Options
These Cannoli Cheesecake Bars are a fantastic choice for meal prep enthusiasts! You can prepare the crust up to 3 days in advance; simply mix the graham cracker crumbs, sugar, and melted butter, then press it into your pan and store it covered in the fridge. Additionally, the filling can be made and kept in the refrigerator for up to 24 hours before baking. Just ensure it’s properly covered to maintain its creamy texture. When you’re ready to serve, pour the filling over the chilled crust and follow the baking instructions. After baking, allow them to cool as directed, and these dessert bars will be just as delicious as if they were freshly made!
What to Serve with Irresistible Cannoli Cheesecake Bars
Elevate your dessert experience with complementary treats that enhance the delicious flavors of these creamy, dreamy indulgences.
-
Fresh Berries: The tartness of raspberries or strawberries offers a refreshing contrast to the rich, sweet bars. Each bite bursts with flavor, enhancing your indulgence.
-
Chocolate Drizzle: A swirl of warm chocolate sauce adds a luxurious finish. It provides a delightful extra layer of sweetness that pairs beautifully with the creamy texture.
-
Whipped Cream: Light and airy, a dollop of whipped cream elevates the dessert to new heights. It’s the perfect way to balance out the rich flavors of the cheesecake bars.
-
Espresso or Coffee: A bold cup of espresso or coffee complements the sweetness of the bars while balancing their richness. The warmth of the beverage makes for a comforting pairing.
-
Pistachios: Chopped pistachios offer a crunchy texture and earthy flavor that enhances the dessert. Their subtle saltiness will keep your taste buds dancing with delight.
-
Citrus Zest: A sprinkle of orange zest not only adds pop of color but also brightens the overall flavor profile. The citrus notes perfectly complement the creamy filling of the bars.
Cannoli Cheesecake Bars Recipe FAQs
What kind of graham crackers should I use for the crust?
I recommend using regular graham crackers for the best flavor and texture. However, for a gluten-free option, you can substitute them with 1 1/4 cups of almond flour mixed with 2 tablespoons of sugar. This change not only keeps the recipe gluten-free but also adds a unique nutty flavor that pairs wonderfully with the cheesecake.
How should I store leftovers of my Cannoli Cheesecake Bars?
To keep your Cannoli Cheesecake Bars fresh, store them in an airtight container in the refrigerator. They will stay good for up to 5 days. Trust me, the flavors continue to develop, making each slice even more delightful as the days go by!
Can I freeze Cannoli Cheesecake Bars?
Absolutely! To freeze, wrap the cheesecake bars tightly in plastic wrap, followed by aluminum foil to prevent freezer burn. They can be stored in the freezer for up to 2 months. When you’re ready to enjoy them, simply thaw in the refrigerator overnight for that creamy delight you love.
What should I do if my filling is too runny?
If your filling seems too runny before baking, don’t worry! Simply chill the mixture in the refrigerator for about 30 minutes. This extra time helps the filling firm up slightly before pouring it over the crust, ensuring a perfectly set cheesecake bar after baking.
Are there any dietary considerations for this recipe?
Yes! If you need a dairy-free option, you can use strained almond milk ricotta instead of regular ricotta to maintain that creamy texture without dairy. Just be sure to check for any other allergens in the ingredients you choose, especially with chocolate chips, as some brands may contain milk or other allergens.
How do I know when my Cannoli Cheesecake Bars are done baking?
The bars are done when the edges are set, but the center still jiggles slightly when you gently shake the pan. This jiggle indicates a perfectly creamy filling. Remember, don’t rush the cooling process afterward to avoid cracks and maintain that smooth texture!
Cannoli Cheesecake Bars That Will Melt in Your Mouth
Ingredients
Equipment
Method
- Preheat your oven to 325°F (160°C). Mix crushed graham crackers, granulated sugar, and melted butter until it resembles wet sand. Press into the bottom of a lined 9x9 inch pan.
- Beat softened cream cheese with granulated sugar until smooth. Add eggs one at a time, mixing well. Incorporate vanilla extract and ricotta cheese, then fold in mini chocolate chips.
- Pour filling over crust. Bake for 40-45 minutes until edges are set and center is slightly jiggly.
- Allow to cool at room temperature for 1 hour, then refrigerate for at least 4 hours or overnight.
- Dust with powdered sugar before serving. Optionally add mini chocolate chips or orange zest.
Leave a Reply