
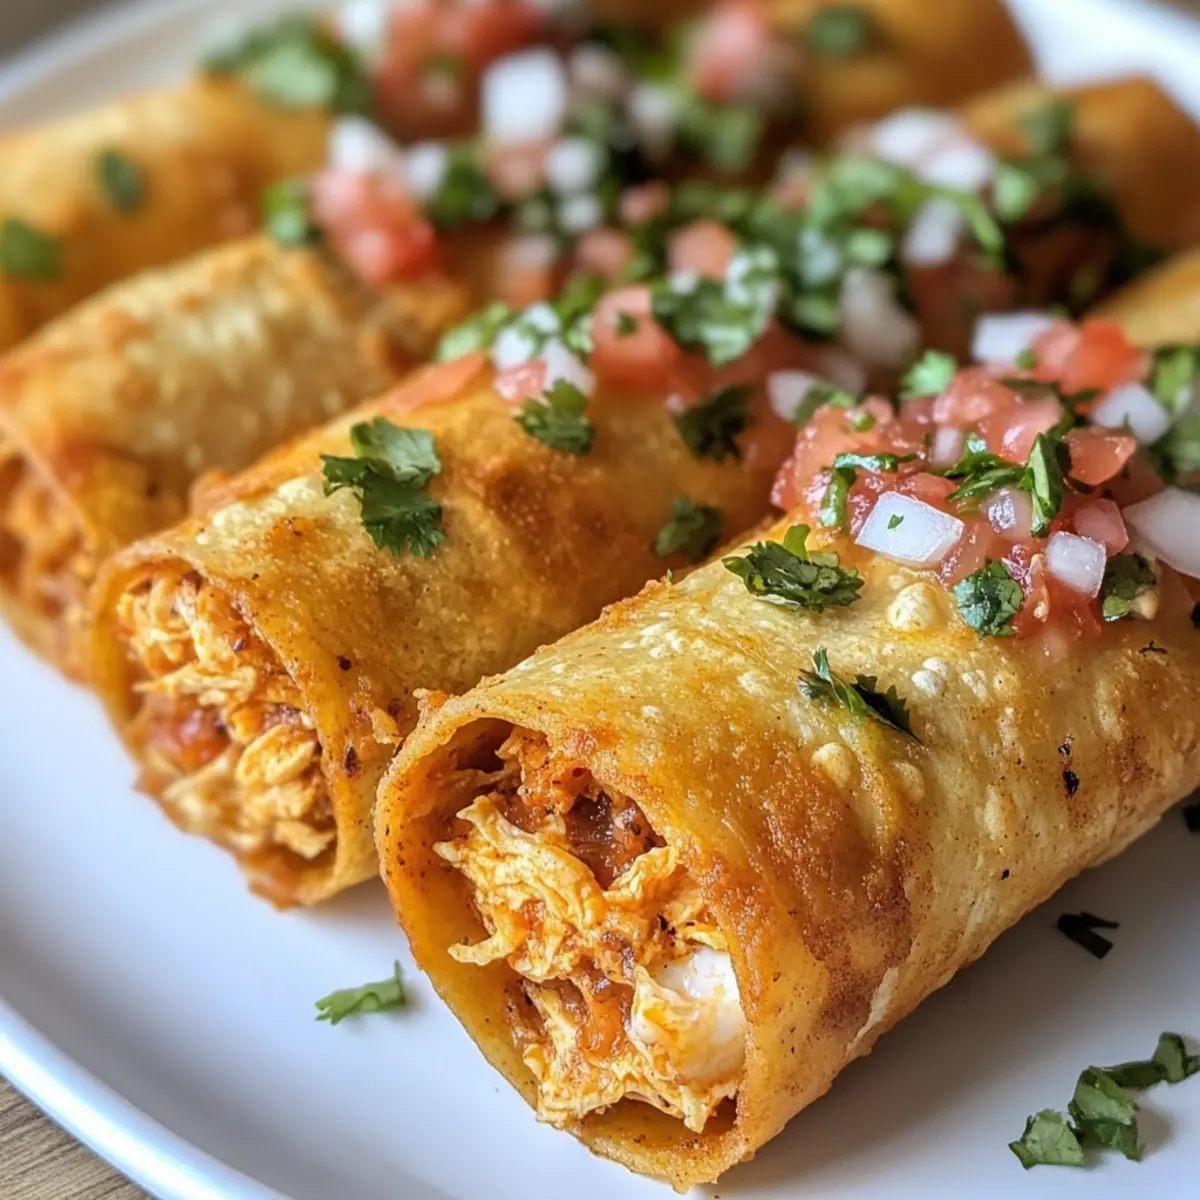
The aroma of baked taquitos wafts through the air as I pull them from the oven, their golden edges glistening and inviting. Crispy Chicken Taquitos have become a staple in my kitchen, not just for the crunch but for their satisfying, creamy filling that delivers the flavor of a fiesta with every bite. This simple recipe offers a healthier twist compared to the greasy fast-food versions, allowing me to indulge without the guilt. Whether you’re serving them at a gathering, preparing a quick weeknight dinner, or simply craving a snack, these crispy delights are sure to be a crowd-pleaser, even for the pickiest eaters. What’s your favorite dipping sauce for taquitos? Let’s get cooking!

Why Will You Love Crispy Chicken Taquitos?
Crispy, baked perfection: Enjoy the crunch of freshly baked taquitos that rival any fried version! These delightful bites deliver a satisfying crunch while keeping things healthy.
Flavorful filling: The creamy chicken and cheese blend harmonizes perfectly with spices, ensuring every mouthful is bursting with flavor.
Quick prep time: With just a few simple steps, you can whip up a batch for last-minute gatherings or a cozy family dinner.
Versatile customizability: Add your favorite ingredients, like veggies or different cheeses, to cater to your family’s tastes. Try it with Hot Honey Chicken for a spicy twist!
Ideal for leftovers: These taquitos store well—just reheat in the oven to retain that irresistible crispiness! Enjoy them with toppings like guacamole or sour cream for an extra kick.
Crispy Chicken Taquitos Ingredients
• For all of your crispy chicken taquitos needs!
For the Filling
- Cooked Shredded Chicken – Provides the main protein and essential texture; using rotisserie chicken saves time!
- Cream Cheese – Adds a creamy richness and helps bind the filling together; a dairy-free alternative works great for vegan options.
- Shredded Cheddar or Mexican Blend Cheese – Enhances flavor and creaminess; feel free to mix it up with your cheese preference.
- Salsa – Brings moisture and flavor; choose a spicy version if you’re looking to spice things up!
- Garlic Powder – Intensifies the savory taste; fresh garlic is a wonderful alternative if you prefer that punch.
- Chili Powder – Provides a bit of warmth and depth; cumin can be added for additional complexity.
- Salt and Black Pepper – Essential for seasoning; taste and adjust as needed for the perfect balance.
For the Taquitos
- Small Flour or Corn Tortillas – The base for your taquitos; corn tortillas offer a great gluten-free option, just warm them to prevent cracking.
- Cooking Spray or Oil – Helps achieve that crispy texture when baked; olive oil is a healthier alternative!
With these ingredients in hand, you’re all set to create crispy chicken taquitos that will transform your snack game! Happy cooking!
Step‑by‑Step Instructions for Crispy Chicken Taquitos
Step 1: Preheat the Oven
Begin by preheating your oven to 425°F (220°C). While it warms up, prepare a baking sheet by lining it with parchment paper or lightly coating it with cooking spray. This will ensure that your Crispy Chicken Taquitos don’t stick and come out perfectly golden.
Step 2: Prepare the Filling
In a large mixing bowl, combine the cooked shredded chicken, cream cheese, shredded cheese, salsa, garlic powder, chili powder, cumin, salt, and pepper. Mix thoroughly until the ingredients are well blended and creamy. This flavorful filling will be the heart of your Crispy Chicken Taquitos, offering a delicious blend of savory flavors.
Step 3: Warm the Tortillas
To keep your tortillas pliable and prevent cracking, warm them in the microwave for about 20 seconds. This step is crucial for rolling without breaking. Use either small flour or corn tortillas, depending on your preference, and ensure they are stacked neatly to warm evenly.
Step 4: Fill the Tortillas
Take one warmed tortilla and spoon 2–3 tablespoons of your delicious filling onto one side. Carefully roll the tortilla tightly from the filled side while ensuring the filling stays inside. Repeat this for all your tortillas, placing each rolled taquito seam-side down on the prepared baking sheet.
Step 5: Brush with Oil
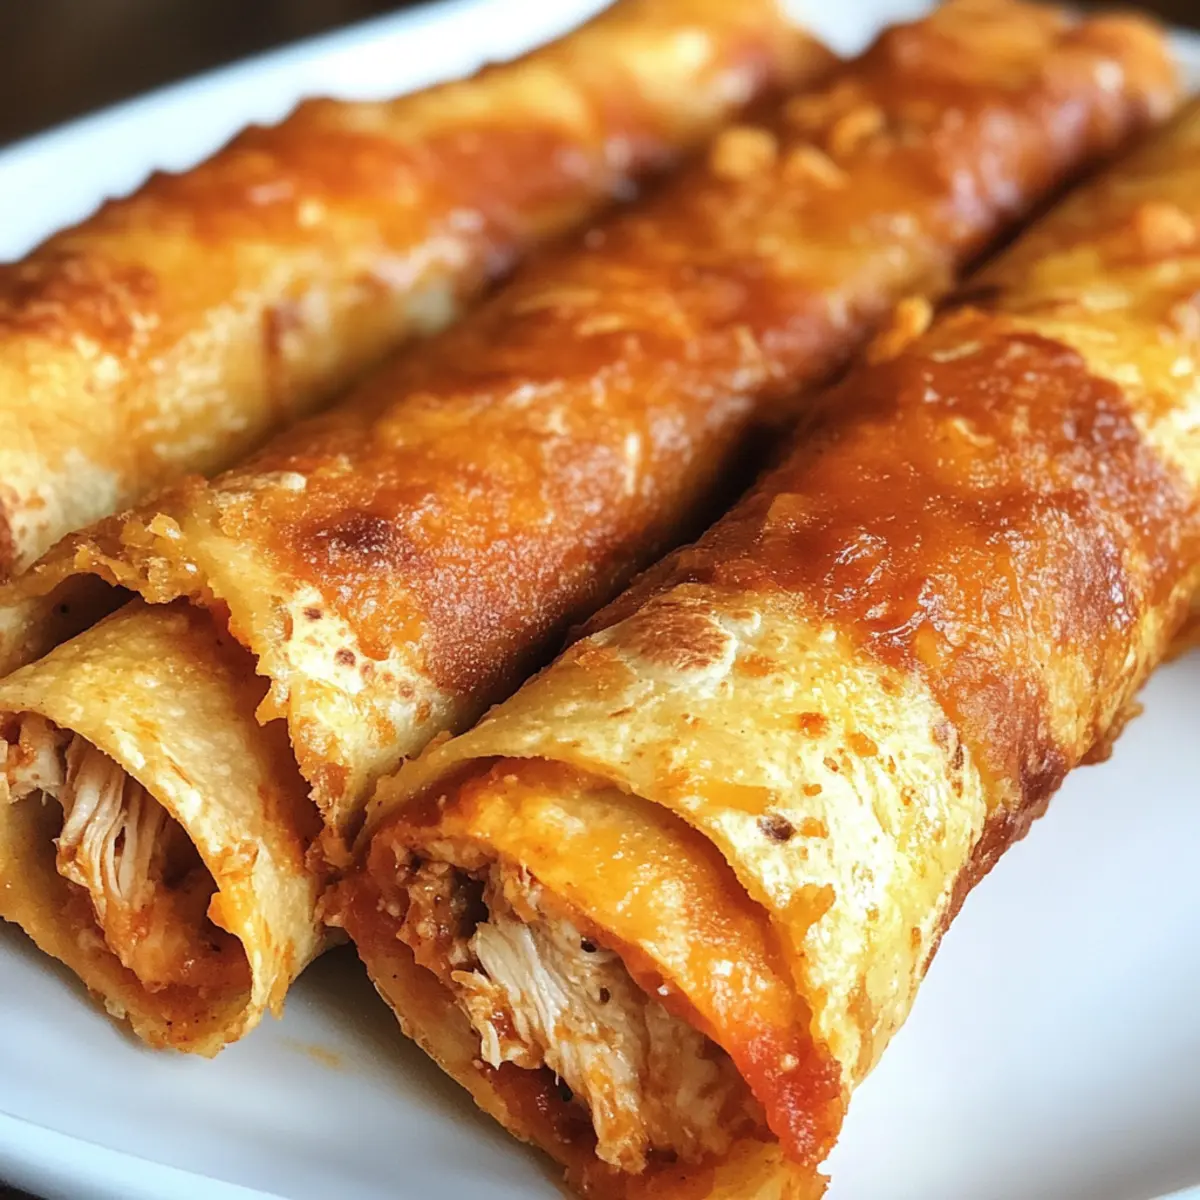
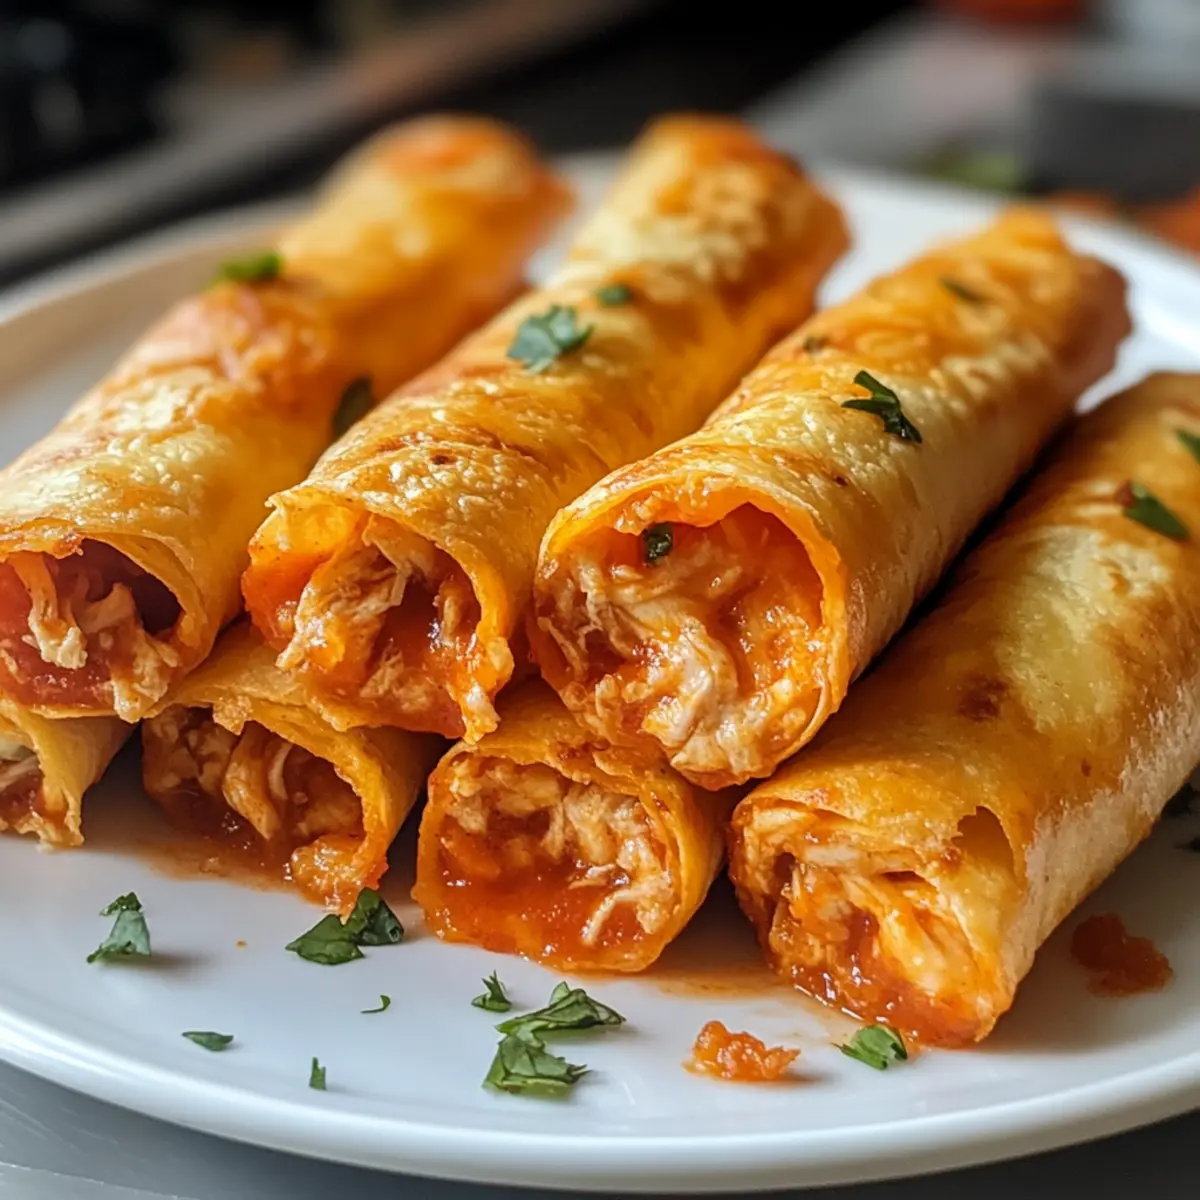
Once all your taquitos are in place, lightly brush the tops with olive oil or spray with cooking spray. This will give your taquitos a crispy texture as they bake, enhancing their golden color and crunchiness. Make sure they are well-coated for best results.
Step 6: Bake the Taquitos
Place the baking sheet in the preheated oven and bake the taquitos for 15–20 minutes. Keep an eye on them as they cook; you’ll want them to turn golden brown and crispy. If you desire extra crispiness, feel free to broil them for an additional 1–2 minutes at the end.
Step 7: Serve and Enjoy
Once baked, remove your Crispy Chicken Taquitos from the oven and let them cool slightly. They are best enjoyed warm with your favorite toppings like sour cream, guacamole, or salsa. Serve them fresh for a delightful snack or appetizer that everyone will love!
Crispy Chicken Taquitos Variations & Substitutions
Feel free to experiment with these tempting twists and adjustments to make the recipe your own!
-
Vegetarian Option: Replace shredded chicken with black beans or lentils for a hearty, meat-free filling.
This variation offers a satisfying protein source while maintaining that beloved creamy texture. -
Gluten-Free: Use corn tortillas instead of flour to keep the dish gluten-free, making it a fantastic option for those with dietary restrictions.
Just be sure to warm them for flexibility when rolling! -
Spicy Kick: Add diced jalapeños or a spoonful of hot sauce to the filling for those who crave a bit of heat.
The combination of spices and jalapeños elevates your snack experience to a delightful fiesta! -
Extra Cheese: Mix in some pepper jack cheese or sprinkle shredded cheese on top before baking for added creaminess and flavor.
This little upgrade ensures every bite is simply irresistible! -
Flavor Boosters: Incorporate diced bell peppers, corn, or fresh cilantro in your filling for added texture and freshness.
These bright ingredients introduce a lovely crunch and vibrant taste to balance the creamy filling. -
Savory Herbs: Enhance flavor further by adding fresh chopped herbs like cilantro or green onions to the mixture.
These herbs elevate flavors to new heights, offering a fresh touch that pairs perfectly with the crispy taquitos. -
Different Dips: Serve with a variety of dips such as guacamole, avocado sauce, or spicy ranch dressing for exciting flavor combinations.
Each dip brings a unique twist, making your snacking experience even more enjoyable!
Explore these variations, and if you’re in the mood for other delicious chicken recipes, check out Hot Honey Chicken or Garlic Parmesan Chicken Meatloaf for more delightful meals that the whole family will love!
Make Ahead Options
These Crispy Chicken Taquitos are perfect for busy home cooks looking to save time during the week! You can assemble the taquitos and refrigerate them for up to 24 hours before baking. Just make sure to keep them tightly covered to prevent the tortillas from drying out. Alternatively, you can freeze the assembled taquitos for up to 3 months—simply place them in a single layer in an airtight container or freezer bag. When you’re ready to enjoy them, bake directly from frozen, adding an extra few minutes to the baking time. This way, you’ll have crispy, delicious taquitos on hand whenever cravings strike, with minimal effort during busy weeknights!
What to Serve with Crispy Chicken Taquitos
Elevate your taquito experience with flavorful sides that will make your meal unforgettable.
-
Creamy Guacamole: This smooth dip brings a fresh, creamy contrast, complementing the crispy texture of the taquitos.
-
Zesty Salsa Verde: Bright and tangy, salsa verde adds a refreshing zing that enhances the savory chicken filling within each bite.
-
Mexican Street Corn Salad: The sweet, crunchy corn with a hint of lime and cheese offers a delightful flavor and texture pairing with your taquitos.
-
Pico de Gallo: Fresh tomatoes, onions, and cilantro come together to add a burst of freshness that balances the richness of the taquitos.
-
Black Bean Salad: A hearty side filled with protein, the earthy beans and vibrant veggies make for a wholesome accompaniment.
-
Cilantro Lime Rice: The fragrant rice infused with lime adds a bright note, making every bite of taquito even more delightful.
-
Chili Lime Chips: These crunchy chips add an extra layer of crunch and zest, perfect for dipping alongside your taquitos.
-
Sweet and Spicy Pickles: Adding a touch of sweetness and heat, these tangy pickles provide a surprising contrast to the savory chicken mixture.
-
Horchata: This sweet, creamy rice drink offers a refreshing complement, perfectly balancing the spices in your crispy chicken taquitos.
Enjoy these sides, and you’ll create a delightful feast that draws everyone to the table!
How to Store and Freeze Crispy Chicken Taquitos
- Fridge: Store leftovers in an airtight container for up to 3 days; reheat in the oven at 350°F (175°C) for 10–15 minutes to regain crispiness.
- Freezer: Freeze taquitos in a single layer on a baking sheet until solid, then transfer to a freezer bag. They can be frozen for up to 3 months.
- Reheating Frozen Taquitos: Bake frozen taquitos directly from the freezer at 425°F (220°C) for 20–25 minutes until crispy and heated through.
- Thawing: For best results, thaw in the fridge overnight before reheating, but baking from frozen works wonderfully too!
Helpful Tricks for Crispy Chicken Taquitos
-
Warm Tortillas First: Warming your tortillas is essential! This prevents cracking, ensuring easy rolling and perfect taquitos.
-
Don’t Overfill: Use 2–3 tablespoons of filling. Overfilling can lead to bursting taquitos during baking, ruining that crispy texture.
-
Even Placement: Arrange the taquitos seam-side down on the baking sheet. This ensures they stay together while cooking, yielding beautiful, crispy chicken taquitos.
-
Watch the Crispiness: Keep an eye on your taquitos in the oven. If they’re not golden brown after 20 minutes, let them go for an extra 1–2 minutes under the broiler for that perfect crunch!
-
Proper Storage: If you have leftovers, store them in an airtight container. Reheat in the oven for the crispiest results—microwaving can make them soggy.
-
Experiment with Fillings: Feel free to customize the filling with extras like vegetables or spices to meet your tastes. This is your chance to get creative with your crispy chicken taquitos!
Crispy Chicken Taquitos Recipe FAQs
What type of chicken is best for the filling?
Absolutely! Using cooked shredded chicken, like that from a rotisserie, is the best choice for flavor and ease. It saves time and adds a savory depth that’s hard to beat. If you’re looking to save even more time, consider using leftovers or making a larger batch ahead of time.
How should I store leftovers?
Crispy Chicken Taquitos can be stored in an airtight container in the fridge for up to 3 days. To keep their crunch, reheat them in the oven at 350°F (175°C) for about 10–15 minutes. This will ensure they regain some of their original crispiness, avoiding the sogginess that can come from microwaving.
Can I freeze taquitos for later?
Very! To freeze Crispy Chicken Taquitos, first lay them on a baking sheet in a single layer and freeze until solid. Once solid, transfer them to a freezer bag, where they can stay good for up to 3 months. When you’re ready to enjoy them, bake them straight from the freezer at 425°F (220°C) for 20–25 minutes until they’re crispy and heated through.
What do I do if my taquitos are too soggy?
If your taquitos are soggy, it could be due to too much moisture in the filling. To troubleshoot, ensure that your salsa is not too watery. Mixing in some breadcrumbs or cornmeal can help absorb excess moisture. Also, avoid overcrowding the baking sheet, allowing for proper air circulation which helps them crisp up nicely.
Are there any dietary considerations for these taquitos?
Absolutely! These Crispy Chicken Taquitos can easily be made gluten-free by using corn tortillas instead of flour. If you or anyone you’re serving has food allergies, be cautious with the cheese and cream cheese substitutes, opting for dairy-free alternatives if needed. Always check labels for any specific allergen information to ensure safety.
Can I customize the filling with different ingredients?
Very! One of the best aspects of these taquitos is their versatility. Feel free to mix in vegetables like diced bell peppers, corn, or even beans for added nutrition. You can also experiment with different cheese varieties like pepper jack for a spicier kick. Just remember to keep the filling balanced so it rolls well without bursting!
Crispy Chicken Taquitos That Will Change Your Snack Game
Ingredients
Equipment
Method
- Preheat your oven to 425°F (220°C) and prepare a baking sheet by lining it with parchment paper or coating it with cooking spray.
- In a large mixing bowl, combine the cooked shredded chicken, cream cheese, shredded cheese, salsa, garlic powder, chili powder, cumin, salt, and pepper. Mix thoroughly until creamy.
- Warm the tortillas in the microwave for about 20 seconds to keep them pliable.
- Spoon 2–3 tablespoons of filling onto one side of each tortilla and roll tightly, seam-side down on the baking sheet.
- Brush the tops lightly with olive oil or spray with cooking spray.
- Bake for 15–20 minutes, watching for golden brown color. Broil for 1–2 minutes for extra crispiness if desired.
- Let them cool slightly before serving with your choice of toppings like sour cream or guacamole.
Leave a Reply