
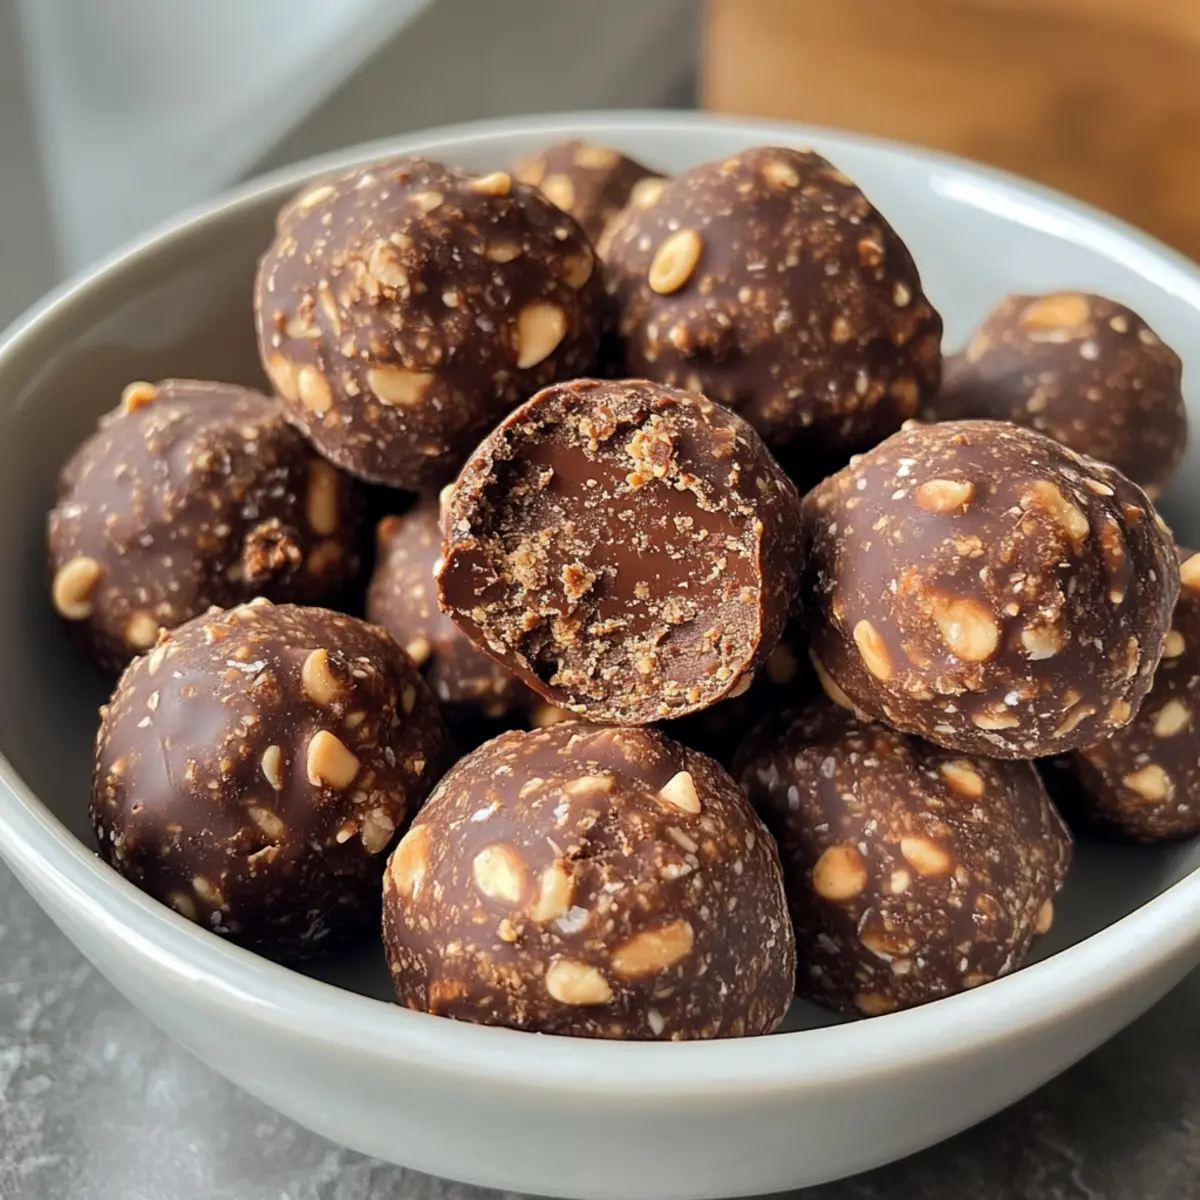
As I stood in the kitchen, the aroma of rich chocolate mingling with the nutty scent of peanut butter enveloped me like a cozy hug. It’s no secret that I’m a sucker for quick, no-bake treats, and these No-Bake Chocolate Peanut Butter Energy Bites are my latest obsession. Packed with protein, they don’t just satisfy my sweet tooth but also energize me for the day ahead. With just a few simple ingredients, these bites come together in a matter of minutes, making them an incredible snack for busy days or a pre-workout boost. Plus, they’re gluten-free, meaning everyone can dive in without a second thought. Curious to see how these chewy delights can become an essential part of your healthy snacking repertoire? Let’s get mixing!

Why Are These Energy Bites a Must-Try?
Simplicity is key! You only need a handful of pantry staples to whip up these delightful treats.
High-Protein goodness will help keep you energized throughout your busy day, making them perfect for workouts or afternoon cravings.
Various Flavors can accommodate all taste buds, whether you fancy Coconut Almond or Pumpkin Spice variations.
No-Bake means you can enjoy these delicious bites without ever turning on the oven—ideal for warm days!
Plus, they’re crowd-pleasers; serve them at gatherings, and watch everyone go back for seconds. Get ready for a healthy snack that delivers satisfaction without the guilt!
Chocolate Peanut Butter Energy Bites Ingredients
• Gather these delicious ingredients to create your energy bites!
For the Base
- Peanut Butter – Creamy and flavorful, it’s the heart of the bites!
- Rolled Oats – Adds fiber and structure; instant oats can work if you prefer a smoother bite.
- Honey or Maple Syrup – Sweetens naturally; for a vegan treat, agave syrup is a great substitute.
- Cocoa Powder – Delivers a rich chocolate flavor; swap in unsweetened chocolate for an intense taste.
For the Mix-Ins
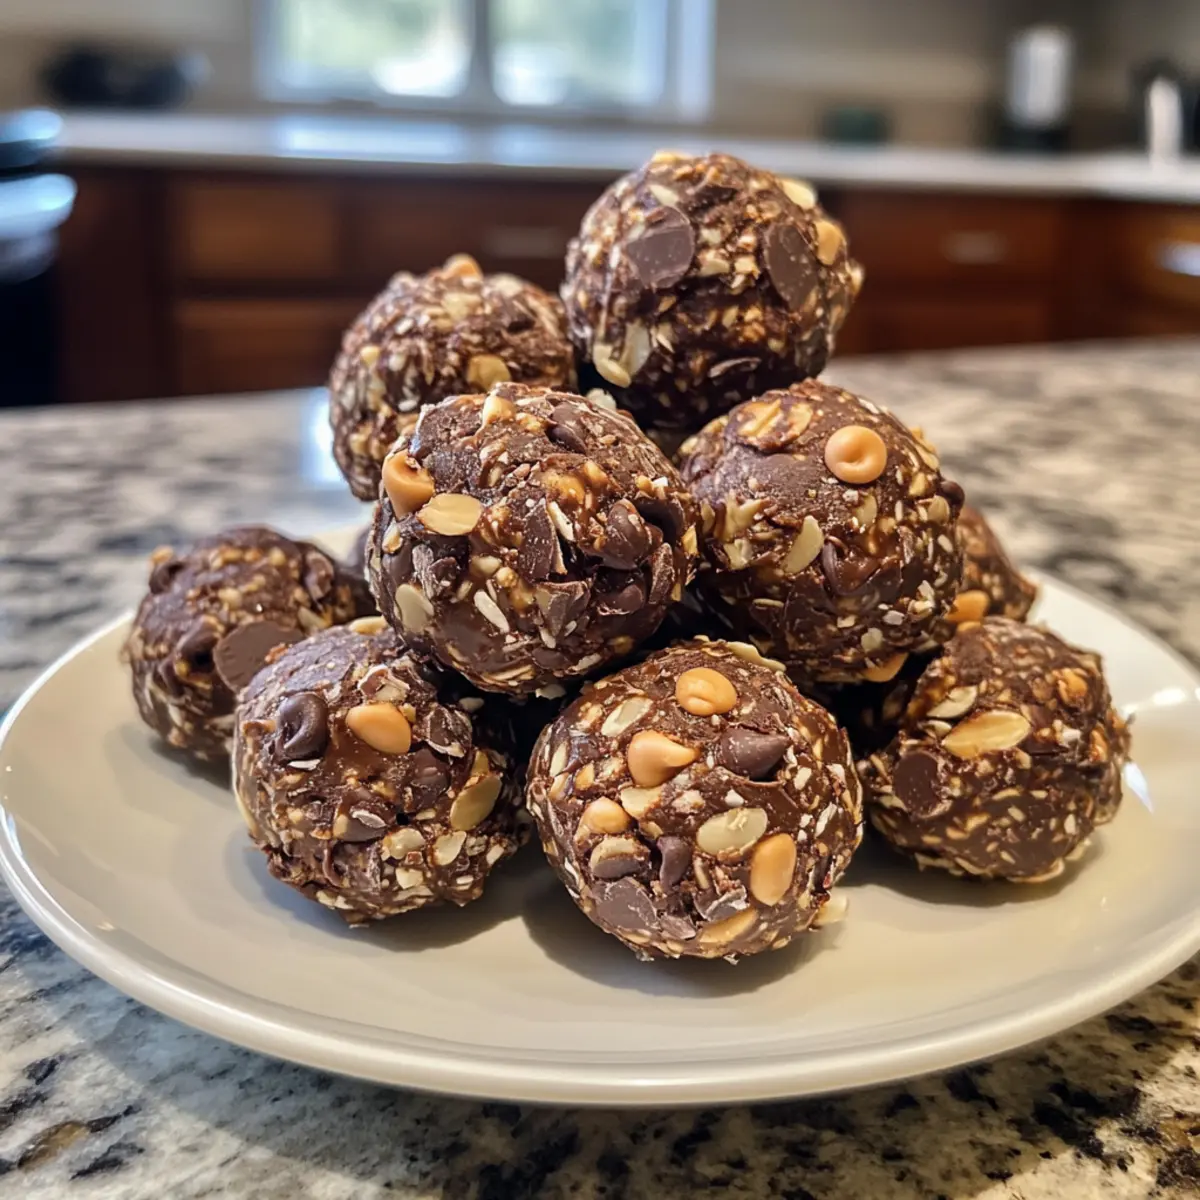
- Mini Chocolate Chips – Optional but highly recommended for an extra chocolatey punch!
- Optional Add-ins (like chia seeds or dried fruit) – Boost nutrition and customize to your taste; use your favorite seeds or nuts for added variety.
With these Chocolate Peanut Butter Energy Bites ingredients, you’re just moments away from a snack that’ll fuel your day!
Step‑by‑Step Instructions for Grilled Apples with Prosciutto and Honey
Step 1: Prepare the Apples
Start by washing and drying 2 large apples. Slice them into ½-inch thick rings, removing the core as you go. A sharp knife will give you clean, even cuts, which helps the apples grill evenly. Once sliced, brush both sides lightly with olive oil to prevent sticking and enhance that beautiful grill mark.
Step 2: Preheat the Grill
While you prepare the apples, preheat your grill to medium-high heat, around 400°F (200°C). This temperature ensures that the apples caramelize quickly, developing a sweet flavor while keeping a slight crunch. If using a grill pan, place it on medium heat to warm up, ensuring it’s ready to create those enticing grill lines.
Step 3: Grill the Apples
Once the grill is hot, carefully place the apple slices on the grates. Grill them for about 4–5 minutes on one side until they have nice char marks, then flip and grill for another 4 minutes. You’re looking for a tender texture without falling apart, showcasing a perfectly grilled appearance.
Step 4: Add the Prosciutto
After grilling the apples, take them off the grill and set them aside on a platter. Next, gently wrap each grilled apple ring with a slice of prosciutto, securing it snugly without covering the entire apple surface. The saltiness of the prosciutto complements the sweetness of the grilled apples beautifully.
Step 5: Drizzle with Honey
To finish off your Grilled Apples with Prosciutto, drizzle a generous amount of honey over the assembled rings. Aim for an even coating that adds a luscious sweetness. The honey will bring all the flavors together and create a delightful glaze that enhances the dish’s presentation and taste.
Step 6: Serve Warm
These delicious Grilled Apples with Prosciutto and Honey can be served warm as an appetizer or a side dish. They’re perfect for outdoor gatherings or cozy dinners. Arrange them on a decorative platter, and enjoy the delightful blend of flavors that will surely impress your guests!
Variations & Substitutions of Chocolate Peanut Butter Energy Bites
Feel free to get creative with your energy bites to suit your taste buds and dietary preferences!
- Nut-Free: Replace peanut butter with sunflower seed butter, ensuring a nut-free snack that still packs a punch.
- Coconut Almond: Swap in almond butter and add shredded coconut for a delightful tropical twist full of flavor.
- Pumpkin Spice: Mix in pumpkin puree and pumpkin spice to create a seasonal favorite that brings fall vibes year-round.
- Protein-Packed: Substitute cocoa powder with your favorite protein powder for an extra boost, perfect for post-workout refueling.
- Sweet Upgrade: Toss in mini chocolate chips or dried fruits for pop of sweetness and added texture that’ll keep you coming back for more.
- Spiced Up: Sprinkle cinnamon or cayenne pepper for a hint of spice that perfectly complements the sweetness of chocolate and peanut butter.
- Texture Tweaks: If you enjoy crunch, consider adding chopped nuts or seeds for added texture and a delicious bite.
- Vegan Friendly: Use maple syrup instead of honey and ensure all your add-ins align with vegan standards for a guilt-free treat.
Feeling inspired? Once you try these Chocolate Peanut Butter Energy Bites, you might also enjoy pairing them with a warm serving of Stuffed Baked Apples or a refreshing drink like Cherry Almond Cream. Each variation unlocks new flavors and textures, making these bites a versatile choice for any healthy snacking occasion!
Make Ahead Options
These No-Bake Chocolate Peanut Butter Energy Bites are perfect for meal prep enthusiasts! You can mix the base ingredients (peanut butter, rolled oats, honey, cocoa powder, and mini chocolate chips) up to 24 hours in advance; simply store the mixture in an airtight container in the refrigerator. This helps maintain the freshness and prevents the oats from becoming too soggy. When ready to enjoy, form the mixture into balls and refrigerate for about 30 minutes until set. You can also freeze the energy bites for up to 3 months. Just remember to thaw them in the fridge before serving, and you’ll have a nutritious snack ready to go whenever those cravings strike!
Expert Tips for No-Bake Energy Bites
- Room Temperature Peanut Butter: Make sure your peanut butter is at room temperature; this ensures easier mixing, resulting in a well-blended texture.
- Adjust Consistency: If your mixture feels too dry and crumbly, add a splash of almond milk. This simple tweak ensures the perfect sticky consistency for your energy bites.
- Mixing Caution: Avoid over-mixing your ingredients. Too much mixing can lead to a dry final product—just mix until combined for optimal chewiness.
- Creative Variations: Feel free to swap peanut butter for almond butter or add in your favorite seeds. These variations will keep your energy snacks exciting and the flavors fresh.
- Chill Time: Allow the energy bites to refrigerate for at least 30 minutes. This crucial step helps them set up nicely and makes them easier to enjoy on-the-go.
How to Store and Freeze Chocolate Peanut Butter Energy Bites
Fridge: Store the energy bites in an airtight container in the refrigerator for up to 1 week. This keeps them fresh and ready for snacking anytime you need an energy boost.
Freezer: If you want to make a larger batch, freeze the energy bites on a baking sheet for about 1–2 hours. Once solid, transfer them to a freezer-safe container or bag for up to 3 months.
Thawing: When you’re ready to enjoy the frozen bites, simply take them out and let them thaw in the fridge for a few hours or at room temperature for about 30 minutes.
Reheating: While these Chocolate Peanut Butter Energy Bites are delicious cold, you can briefly microwave them for about 10–15 seconds for a warm treat, enhancing the flavors for a cozy snack experience!
What to Serve with No-Bake Chocolate Peanut Butter Energy Bites
As you indulge in these delightful energy bites, think of how you can transform your snacking experience into a fulfilling feast.
- Creamy Greek Yogurt: Adds a refreshing tang and pairs perfectly for a protein-packed snack. Top with fresh berries for a vibrant twist.
- Sliced Apples with Cinnamon: The crispness and sweetness of apples complement the chewy bites beautifully, enhancing both flavor and texture.
- Nutty Granola: A sprinkle of crunchy granola brings extra texture and can be served on the side for a satisfying munch.
- Fresh Berries: Juicy strawberries or blueberries on the plate offer a burst of freshness that balances the richness of the bites.
- Tea or Coffee: A warm cup enhances the chocolatey flavor; consider a nutty coffee or herbal tea for a cozy pairing.
- Milkshake: Blend together banana and almond milk for a creamy, sweet shake that pairs wonderfully with the bites, providing an indulgent yet healthy option.
- Dark Chocolate Covered Pretzels: The sweet-salty combination can take your snack time over the top, creating a satisfying flavor contrast.
- Roasted Chickpeas: For a crunchy, savory element, roasted chickpeas add an unexpected yet delightful twist that complements the sweet energy bites.

Chocolate Peanut Butter Energy Bites Recipe FAQs
What type of peanut butter should I use for the best results?
I recommend using natural, creamy peanut butter for these energy bites, as it provides the best texture and flavor. Be cautious with brands that contain added sugars or oils; ideally, you want a product with just peanuts and salt. If you prefer, almond or cashew butter can serve as excellent substitutes for a different nutty taste.
How should I store my energy bites?
After making your energy bites, store them in an airtight container in the refrigerator. They’ll stay fresh and delicious for up to a week. If you want to keep them longer, you can freeze them for up to 3 months. Just be sure to thaw them in the fridge or at room temperature before enjoying!
Can I freeze these energy bites? If so, how?
Absolutely! Freezing these Chocolate Peanut Butter Energy Bites is a fantastic way to preserve them for later. To freeze, place the bites on a baking sheet in a single layer and pop them in your freezer for about 1–2 hours until they are solid. Then, transfer them to a freezer-safe container or a zip-top bag. Don’t forget to label with the date!
What should I do if my mixture is too dry?
If your energy bite mixture feels crumbly and too dry, no worries! Just add a splash of almond milk or water—start with 1 teaspoon and mix well. This simple adjustment will help you achieve the perfect sticky consistency for forming those delightful balls. Remember, the key is to mix until just combined to keep them chewy!
Are there any dietary considerations I should keep in mind?
Absolutely! These energy bites are gluten-free if you use certified gluten-free oats, making them accessible for those with gluten sensitivities. If you’re serving them to kids or someone with allergies, always check their tolerance to peanut butter or any other add-ins. You can easily customize the recipe by using sunflower seed butter instead of peanut butter for a nut-free option.
How can I make these energy bites even healthier?
To enhance their nutritional value, consider adding extras such as chia seeds or flax seeds for a boost in omega-3 fatty acids. You can also swap out regular rolled oats for protein-packed oat flour or mixed seeds to create a more nutrient-dense snack. The more, the merrier when it comes to making these bites your own!
Grilled Apples with Prosciutto and Honey
Ingredients
Equipment
Method
- Wash and dry the apples. Slice them into ½-inch thick rings, removing the core.
- Preheat your grill to medium-high heat (around 400°F / 200°C).
- Brush both sides of apple rings lightly with olive oil.
- Grill the apple slices for about 4-5 minutes on one side, then flip and grill for another 4 minutes.
- Wrap each grilled apple ring with a slice of prosciutto.
- Drizzle honey over the assembled apple rings.
- Serve warm as an appetizer or side dish.
Leave a Reply