
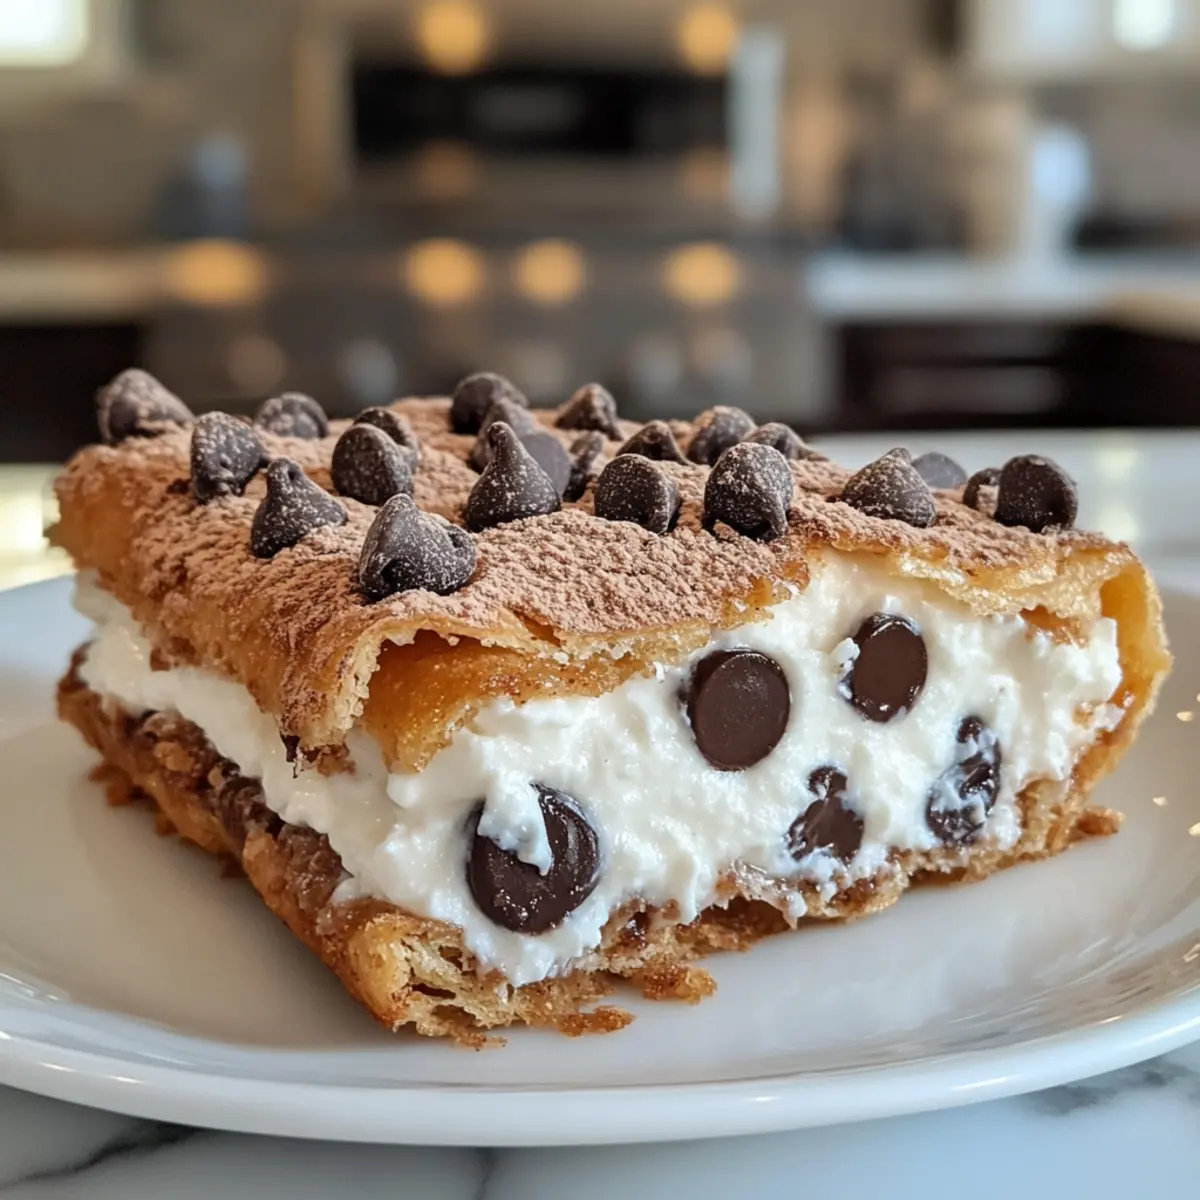
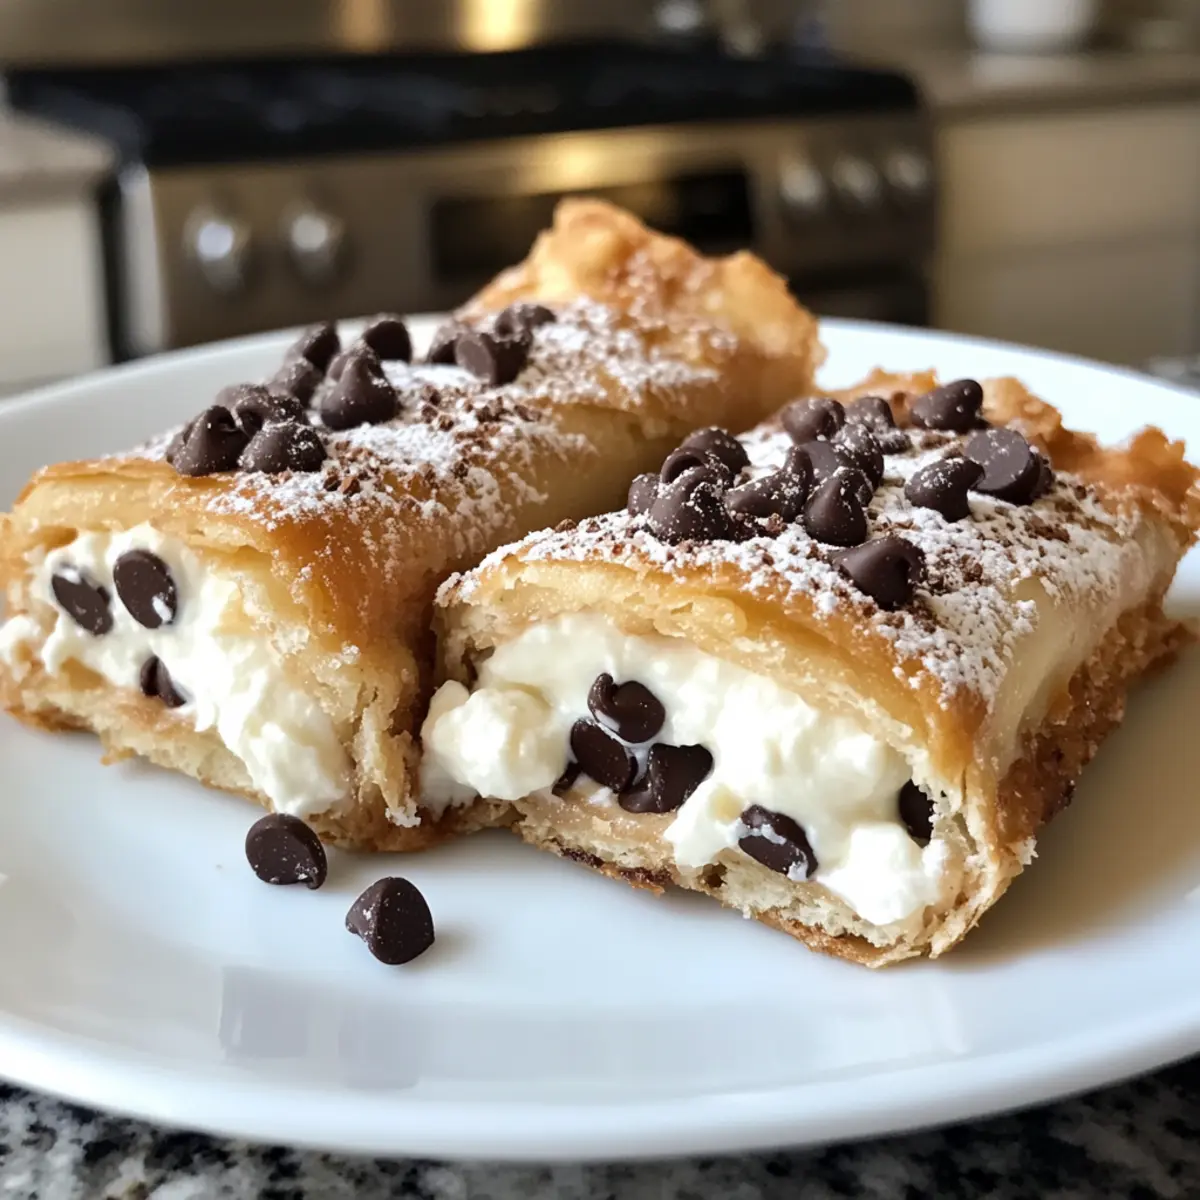
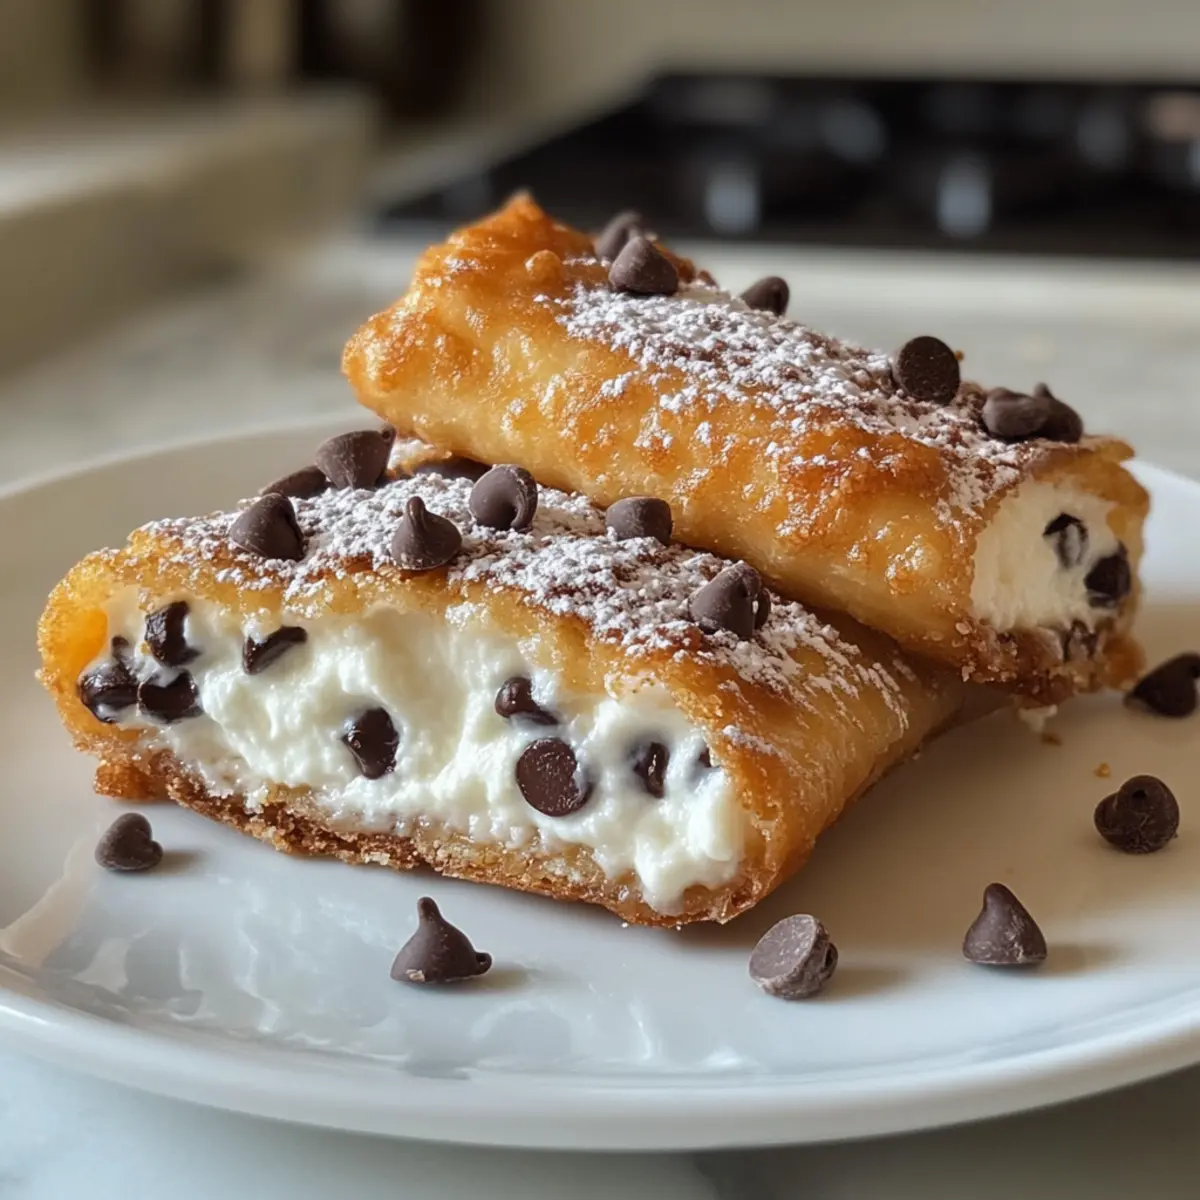
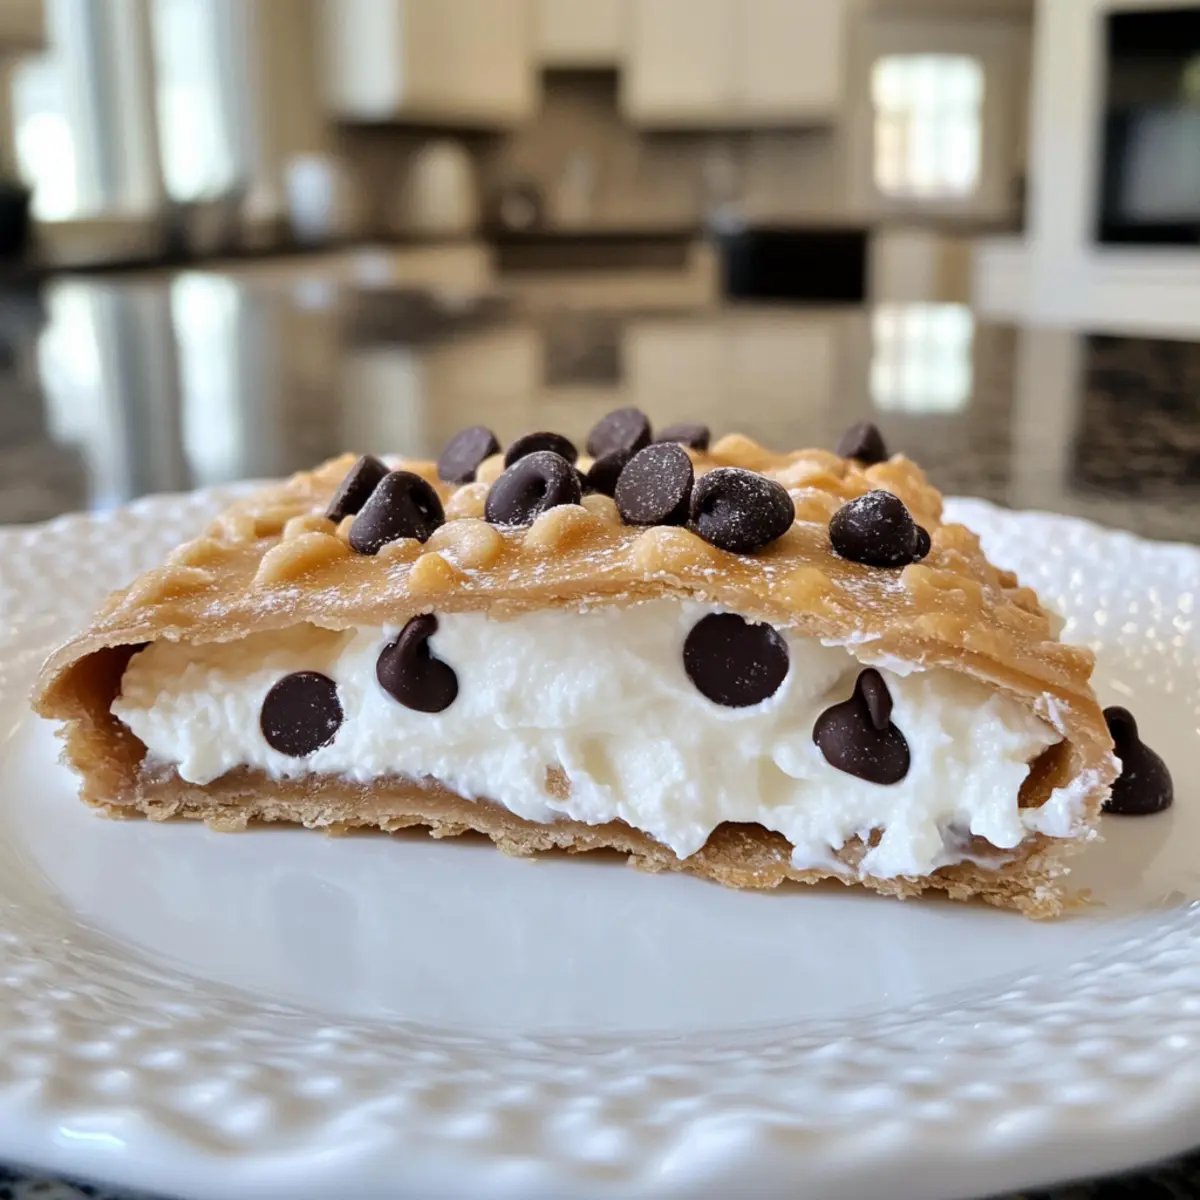
As I stood in my kitchen, a fragrant mix of cinnamon and chocolate danced around me, igniting sweet memories of family gatherings around a table filled with laughter and homemade treats. That’s when the idea struck: why not transform the beloved Italian treat into something accessible and shareable? Enter Classic Cannoli Squares—a delightful twist on the traditional cannoli, capturing all the creamy richness you adore but in a beautiful square format. These easy desserts are quick to whip up, making them perfect for impromptu celebrations or cozy evenings at home. Plus, you can even swap in healthier ingredients for an indulgence that fits your lifestyle. Curious how these squares can bring a taste of Italy to your dessert table? Let’s dive into the recipe!
Why Choose Classic Cannoli Squares?
Deliciously Unique: These Classic Cannoli Squares deliver all the flavors of traditional cannoli in a fun, easy-to-share format.
Quick Preparation: With simple ingredients and straightforward steps, they’re remarkably quick to whip up, making them perfect for last-minute gatherings.
Creamy Indulgence: The rich filling of ricotta, chocolate chips, and a hint of cinnamon creates a heavenly taste that melts in your mouth—just like a homemade dessert should!
Endless Versatility: Feel free to personalize your squares. Try different chocolate types, or even make healthier swaps, like using coconut sugar instead of powdered sugar.
Crowd-Pleasing Treat: These are not just desserts; they’re guaranteed to impress guests and family, making them the highlight of any meal. Pair them with a cup of coffee or your favorite tea for a delightful end to the night!
Classic Cannoli Squares Ingredients
For the Filling
• Ricotta Cheese – This creamy base gives the filling its luscious texture; choose whole milk for a richer taste.
• Powdered Sugar – Sweetens the filling beautifully; coconut sugar is a healthier alternative if desired.
• Vanilla Extract – Use pure extract for the most vibrant flavor enhancement in your creamy mix.
• Cinnamon – Adds a warm, aromatic touch that complements the sweetness.
• Mini Chocolate Chips – These add delicious pockets of richness; consider using dark chocolate chips for a deeper flavor.
For the Crust
• Pre-made Pie Crusts – These save time, but a homemade crust can elevate your Classic Cannoli Squares even further!
• Egg (beaten) – An egg wash creates a beautifully golden finish on the crust.
• Sugar – Sprinkled on top for extra sweetness and an appealing shine.
For Optional Garnishes
• Chopped Pistachios – A delightful crunch that contrasts the creamy filling—perfect for a pop of color!
• Maraschino Cherries – Add a touch of classic sweetness to finish your squares beautifully.
• Extra Chocolate Chips – Sprinkle these on top for chocolate lovers!
Now that you have the Classic Cannoli Squares ingredients ready, let’s roll up our sleeves and dive into the delightful preparation of this creamy Italian dessert!
Step‑by‑Step Instructions for Classic Cannoli Squares
Step 1: Prepare the Filling
In a mixing bowl, combine 15 ounces of well-drained ricotta cheese, 1 cup of powdered sugar, 1 teaspoon of pure vanilla extract, 1 teaspoon of cinnamon, and 1/2 cup of mini chocolate chips. Use a spatula or whisk to blend these ingredients until smooth and creamy, ensuring all the chocolate chips are evenly distributed. This rich filling will form the heart of your Classic Cannoli Squares.
Step 2: Preheat Oven
While the filling is coming together, preheat your oven to 375°F (190°C). This step ensures that your oven is hot enough to create a perfectly golden crust for the Classic Cannoli Squares when they’re ready to bake. Take a moment to prepare your baking dish for the next steps.
Step 3: Roll Out the Pie Crust
Take one pre-made pie crust and gently unroll it into a 9×9-inch baking dish. Press it firmly into the bottom and along the edges with your fingers to ensure it fits snugly, creating an even surface for the filling. This step is essential for a well-structured base that will hold the creamy filling of your Classic Cannoli Squares.
Step 4: Add the Filling
Carefully spoon the ricotta filling over the pressed pie crust, using a spatula to spread it evenly and leaving a small border around the edges. This ensures that the filling doesn’t overflow during baking, allowing the crust to encase the delicious mix beautifully. The filling should look inviting and creamy before the top crust goes on.
Step 5: Prepare the Top Crust
Roll out the second pie crust and place it over the filling layer. Press down the edges to seal tight, trimming any excess dough if necessary. Brush the top with an egg wash made from a beaten egg to give it a stunning golden finish as it bakes. Finally, sprinkle a tablespoon of sugar over the top for extra sweetness and a delightful crunch.
Step 6: Bake
Place your prepared Classic Cannoli Squares in the preheated oven and bake for 30-35 minutes. You’ll know they are done when the crust is beautifully golden brown and the filling is slightly puffed. Keep an eye on the baking process to avoid over-browning; the crust should have an appetizing color that promises a delicious outcome.
Step 7: Cool and Serve
Once baked, remove the dish from the oven and let it cool for at least 30 minutes before cutting into squares. This cooling period allows the filling to set up slightly, making it easier to slice into neat portions. Serve the squares at room temperature, and consider garnishing with chopped pistachios or extra chocolate chips for a lovely presentation!
Variations & Substitutions for Classic Cannoli Squares
Feel free to explore these delightful variations that let your creativity shine while making Classic Cannoli Squares!
-
Dairy-Free: Use dairy-free cream cheese for a vegan-friendly filling. You’ll still enjoy that smooth texture and sweet flavor minus the dairy!
-
Healthy Twist: Substitute coconut sugar for powdered sugar to reduce refined sugars. This simple swap adds a rich, caramel-like taste that complements the filling beautifully.
-
Lemon Zest Addition: Add zest from one lemon to the filling for a refreshing citrus note that brightens up the creamy richness of the cannoli squares.
-
Mascarpone Magic: Swap ricotta for mascarpone cheese for an ultra-creamy and decadent filling. This variation provides a luxurious flavor that feels indulgent yet easy to make.
-
Nutty Flavor: Fold in finely chopped pistachios for a delicious nutty crunch. This elevates the dish and offers a beautiful contrast to the smooth filling, not to mention a charming pop of color!
-
Spicy Cinnamon: For a little heat, sprinkle in a pinch of cayenne or try using Mexican cinnamon instead of regular. You’ll be surprised how a touch of spice enhances the overall flavor profile.
-
Chocolate Lovers: Use mini dark chocolate chips in place of regular; the bittersweet flavor will bring a sophisticated twist to your squares. Pair this with a drizzle of chocolate sauce for an extra indulgent finish.
-
Homemade Crust: If you have more time, whip up a homemade pie crust for a fresh taste. The added effort is worth it, creating a delightful buttery flavor that enhances your Classic Cannoli Squares beautifully.
Experimenting with these variations can take your Classic Cannoli Squares to new heights. And if you love desserts like this, be sure to check out my Choco Chip Cookie Recipe for another tasty treat!
Make Ahead Options
These Classic Cannoli Squares are perfect for busy home cooks looking to save time during the week! You can prepare the filling and assemble the squares up to 24 hours in advance. Simply mix together the ricotta cheese, powdered sugar, vanilla, cinnamon, and chocolate chips, then spread the filling over the crust. Cover it tightly with plastic wrap and refrigerate. When you’re ready to enjoy, roll out the second pie crust, seal the edges, brush with egg wash, sprinkle with sugar, and bake as directed. This way, you’ll ensure these creamy, indulgent squares are just as delicious and fresh while saving you precious time in the kitchen!
Storage Tips for Classic Cannoli Squares
-
Fridge: Store your Classic Cannoli Squares in an airtight container in the refrigerator for up to 3 days to maintain freshness and flavor.
-
Freezer: These squares can also be frozen for up to 2 months. Wrap each square individually in plastic wrap, then place them in a freezer-safe bag or container.
-
Thawing: To enjoy from frozen, thaw overnight in the refrigerator before serving. This helps preserve their creamy filling.
-
Reheating: Warm them gently in the oven at 350°F (175°C) for about 10 minutes if desired, but serve chilled for the best flavor experience.
What to Serve with Classic Cannoli Squares?
Transform your delightful dessert into a complete experience with these perfect pairings for a truly memorable meal.
-
Espresso: The rich, bold flavor of freshly brewed espresso complements the sweet filling beautifully, enhancing the overall dessert experience.
-
Fresh Berries: A mix of strawberries, blueberries, and raspberries adds a burst of tartness that cuts through the creamy richness of the squares, creating a refreshing balance.
-
Vanilla Ice Cream: Serving these squares with a scoop of creamy vanilla ice cream creates a decadent combination that feels indulgent and comforting.
-
Chocolate Sauce: Drizzle warm chocolate sauce over each square for an extra touch of sweetness, making for a visually stunning and delicious presentation.
-
Amaretto: A glass of this sweet Italian liqueur elevates the flavors of the cannoli squares, providing a warm, nutty backdrop that echoes the dessert’s creamy notes.
-
Chopped Pistachios: Garnish with these crunchy nuts, which not only offer a delightful texture contrast but also an appealing pop of color to your dessert platter.
-
Mint Tea: A soothing cup of mint tea provides a refreshing finish that cleanses the palate after the sweet indulgence of the cannoli squares.
-
Almond Biscotti: These twice-baked cookies pair perfectly with the squares, offering a crunchy texture that complements the creamy filling in an enjoyable way.
Tips for the Best Classic Cannoli Squares
-
Well-Drained Ricotta: Ensure you drain the ricotta thoroughly to avoid a watery filling; a thicker filling enhances the overall texture.
-
Keep an Eye on Baking: Watch the squares as they bake to prevent over-browning. They should be golden brown, not too dark.
-
Chill Before Cutting: Allow the squares to cool for at least 30 minutes to firm up. This makes for cleaner, more professional-looking slices.
-
Seal Edges Properly: When placing the top crust, make sure to seal the edges well to contain the delicious filling inside while baking.
-
Experiment with Variations: Don’t hesitate to try different types of chocolate chips or add lemon zest to the filling for a unique twist on your Classic Cannoli Squares!
Classic Cannoli Squares Recipe FAQs
How do I choose the right ricotta cheese?
Absolutely! For the creamiest filling in your Classic Cannoli Squares, opt for whole milk ricotta. This will yield a richer flavor and texture. If you’re looking for a lighter alternative, low-fat ricotta works, but ensure that it is well-drained to prevent a watery filling. Aim for a brand with a smoother consistency for the best results.
How should I store leftover Cannoli Squares?
Very good question! Keep your Classic Cannoli Squares in an airtight container in the refrigerator, and they will stay fresh for up to 3 days. This helps maintain the creaminess of the filling and the crispness of the crust. For longer storage, consider freezing them—details below!
Can I freeze Classic Cannoli Squares?
Absolutely! To freeze, wrap each square individually in plastic wrap, then place them in a freezer-safe bag or container. This helps prevent freezer burn. They can last up to 2 months in the freezer. When you’re ready to enjoy them, simply thaw the squares overnight in the refrigerator.
What should I do if the filling is too watery?
No worries! If your Classic Cannoli Squares filling turns out watery, it’s likely due to un-drained ricotta. To remedy this for future batches, place the ricotta in a fine mesh strainer over a bowl for at least 30 minutes before mixing. This will allow excess liquid to drip away and ensure a thick, creamy filling that holds up beautifully in your squares.
Are these Cannoli Squares suitable for those with food allergies?
Great consideration! These squares contain dairy, eggs, and gluten due to the ricotta and pie crust. If you have lactose intolerance or allergies, you can use lactose-free ricotta or a nut-based cheese as alternatives. For a gluten-free option, consider using gluten-free alternatives for the crust, ensuring everyone can enjoy a slice of these delightful treats!
Can I make Classic Cannoli Squares ahead of time?
Certainly! Prepare these delicious squares a day in advance for added convenience. Once baked, let them cool completely, then store them in an airtight container in the fridge. This not only saves time but also allows the flavors to meld beautifully, making them even more irresistible when you serve them!
Classic Cannoli Squares That Melt in Your Mouth
Ingredients
Equipment
Method
- In a mixing bowl, combine the ricotta cheese, powdered sugar, vanilla extract, cinnamon, and mini chocolate chips. Blend until smooth and creamy.
- Preheat the oven to 375°F (190°C) and prepare your baking dish.
- Roll out one pie crust into a 9x9-inch baking dish, pressing it firmly into the bottom and edges.
- Spoon the ricotta filling over the crust, spreading it evenly and leaving a small border around the edges.
- Roll out the second pie crust and place it over the filling, sealing the edges and trimming excess dough. Brush the top with egg wash and sprinkle with sugar.
- Bake for 30-35 minutes until golden brown and the filling is slightly puffed.
- Let cool for at least 30 minutes before slicing into squares and serving.
Leave a Reply