
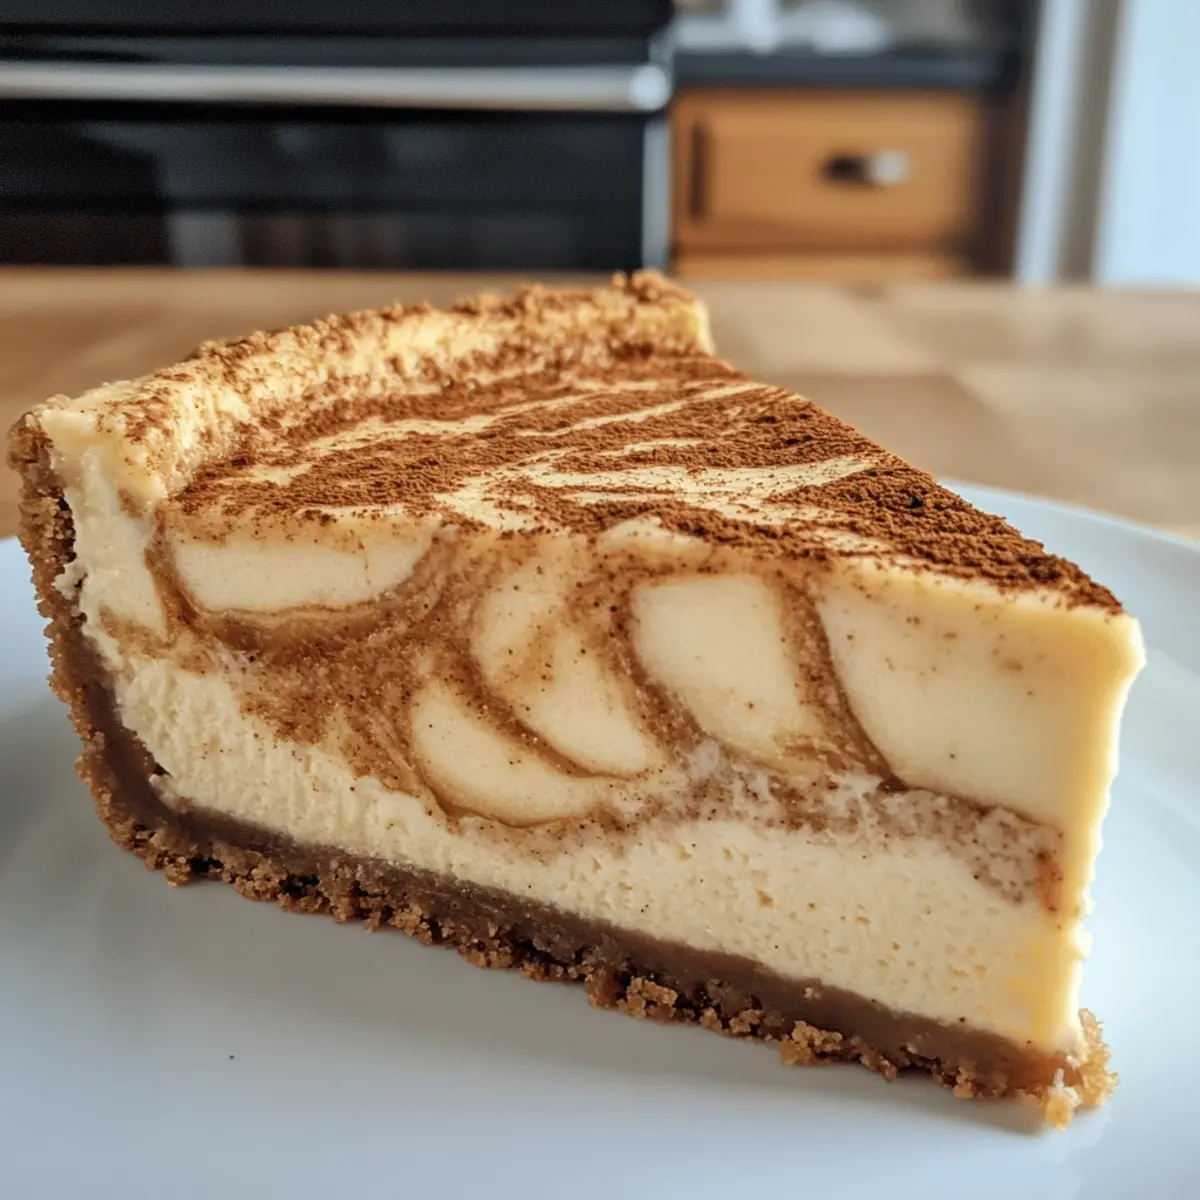
As the leaves begin to change and the aroma of cinnamon fills the air, I can’t help but crave desserts that embrace the warmth of fall. That’s where this Easy Apple Butter Cheesecake comes in—a delightful twist on the classic that transforms the comforting flavors of autumn into a creamy, dreamy treat. This recipe not only skips the hassle of a water bath but also ensures a perfectly rich texture that’s bound to impress at your Thanksgiving table or any cozy gathering. With its luxurious layers and the hint of spiced apple butter, it’s the ideal antidote to fast food nights and a true crowd-pleaser. Curious about how to whip up this sweet slice of heaven? Keep reading to unveil the delight!
Why is this Apple Butter Cheesecake Perfect?
Simplicity at its finest – This cheesecake is incredibly easy to prepare, with no water bath required.
Creamy texture is achieved through the combination of softened cream cheese and sweetened condensed milk, making every bite a luscious experience.
Fall flavors shine with the warm spice of apple butter, allowing you to savor the essence of autumn.
Versatile crust options mean you can customize your cheesecake by using gingersnap or even Biscoff crumbs for extra warmth.
Crowd-pleaser – This cheesecake is destined to impress family and friends alike, making it the perfect addition for your next gathering. For other great fall treats, check out my Spiced Apple Cinnamon Snickerdoodle Cookies or try a Cheesecake Stuffed Baked Apple for variety!
Apple Butter Cheesecake Ingredients
For the Crust
• Graham Cracker Crumbs – Adds structure and a crunchy base; consider using gingersnap or Biscoff cookie crumbs for extra spice.
• Butter (melted) – Binds the crust together; use unsalted butter for better control over salt levels.
For the Cheesecake Filling
• Cream Cheese (softened) – Provides the creamy base for the cheesecake; ensure it’s at room temperature to prevent lumps.
• Sweetened Condensed Milk – Adds sweetness and smoothness; essential for achieving the perfect creamy texture of the apple butter cheesecake.
• Vanilla Extract – Enhances the overall flavor; pure vanilla extract works best for a richer taste.
• Eggs – Provides structure and richness; add them one at a time to maintain a smooth consistency.
• Apple Butter – Gives the cheesecake its signature flavor and lighter texture; opt for a spiced variety or add additional spices for extra warmth.
Step‑by‑Step Instructions for Apple Butter Cheesecake
Step 1: Preheat Your Oven
Begin by preheating your oven to 300°F (150°C). This temperature ensures a slow and even bake for your Apple Butter Cheesecake, which helps achieve that creamy texture. While the oven heats up, you can prepare the crust to save time and keep things efficient.
Step 2: Prepare the Crust
In a medium bowl, combine graham cracker crumbs with melted butter, mixing until fully blended. Press this mixture firmly into the bottom of a 9-inch springform pan, creating an even layer. Bake the crust for 10 minutes, until slightly golden and aromatic. Remove it from the oven and let it cool while you work on the filling.
Step 3: Mix Cream Cheese
In a large mixing bowl, whip the softened cream cheese using a hand mixer or stand mixer on medium speed, until it’s completely smooth and creamy. Be sure to scrape down the sides of the bowl to incorporate all the cream cheese, ensuring a lump-free mixture which is crucial for the smooth texture of the Apple Butter Cheesecake.
Step 4: Add Other Ingredients
Slowly add in the sweetened condensed milk and mix until just combined, followed by the vanilla extract. Then, crack in the eggs, one at a time, mixing on low speed to avoid incorporating too much air. This gradual mixing process ensures the cheesecake filling remains rich and dense, the way it should be.
Step 5: Incorporate Apple Butter
Once the eggs are fully mixed in, add the apple butter. Blend the mixture until it is uniform in color and texture, which typically takes about 1-2 minutes. The apple butter gives this cheesecake its distinctive flavor and lightness, making it a truly comforting treat.
Step 6: Bake the Cheesecake
Pour the apple butter filling over the cooled crust in the springform pan, spreading it evenly. Place the pan in the preheated oven and bake for approximately 1 hour, or until the center is set with only a slight jiggle. This method eliminates the need for a water bath, simplifying the process and leaving you with a beautifully baked cheesecake.
Step 7: Cool and Chill
After baking, turn off the oven and crack the door open to allow the cheesecake to cool slowly for about 30 minutes. This gradual cooling prevents cracks from forming. Once it’s at room temperature, refrigerate the cheesecake for at least 2 hours, though overnight is best, allowing the flavors to meld beautifully before serving.
Make Ahead Options
These Apple Butter Cheesecakes are perfect for busy home cooks looking to save time while still enjoying homemade goodness! You can prepare the crust up to 3 days in advance; just store the pressed crumb mix tightly covered in the refrigerator. The cheesecake filling can also be made a day ahead and kept in the fridge (but don’t pour it into the crust until you’re ready to bake). When you’re ready to serve, simply bake as directed, cool gradually, and refrigerate. This ensures your cheesecake will be just as delicious, with its creamy texture and spiced flavor intact—allowing you to impress guests without the last-minute rush!
Storage Tips for Apple Butter Cheesecake
- Room Temperature: Apple Butter Cheesecake can be left out for up to 2 hours during serving but should be refrigerated afterward to maintain its creamy texture.
- Fridge: Store leftover cheesecake in an airtight container in the fridge for up to 5 days. This helps retain moisture and flavor.
- Freezer: For longer storage, wrap slices tightly in plastic wrap or aluminum foil and freeze for up to 2 months. Thaw overnight in the fridge before serving.
- Reheating: Enjoy cheesecake cold or at room temperature. If desired, gently warm a slice in the microwave for 10-15 seconds to enjoy a softer texture, but be careful not to overheat.
What to Serve with Easy Apple Butter Cheesecake
As the rich, spiced aromas of this cheesecake fill your kitchen, consider how to complement this crowd-pleaser with delightful accompaniments.
-
Whipped Cream: A fluffy, sweet dollop adds lightness and balances the rich cheesecake, enhancing each bite.
-
Caramel Sauce: Drizzling warm caramel over slices brings a touch of indulgence and a sweet contrast to the apple butter’s spices.
-
Cinnamon Sugar Pecans: These buttery, crunchy nuts offer a satisfying texture and a complementary sweet and spicy flavor.
-
Apple Cider: A glass of chilled apple cider captures fall’s essence and refreshes your palate after each creamy bite.
-
Pumpkin Spice Latte: For a warm drink option, this seasonal favorite pairs perfectly with the cozy flavors of apple butter and cheesecake.
-
Cheese Plate: Pair slices with a selection of sharp cheeses, like aged cheddar, to contrast the sweetness and add depth to your dessert experience.
Let your gathering reach new heights as these pairings highlight the creamy heart of your Easy Apple Butter Cheesecake!
Expert Tips for Apple Butter Cheesecake
- Avoid Lumps: Make sure your cream cheese is completely softened and mixed well before adding other ingredients for a smooth filling.
- Prevent Overmixing: Mix the batter on low speed after adding eggs to avoid incorporating too much air, which can lead to cracks.
- Release Air Bubbles: Tap the filled springform pan on the counter gently before baking; this helps release any air bubbles and ensures a smooth top.
- Cool Gradually: After baking, leave the oven door ajar for 30 minutes to let the cheesecake cool slowly, preventing unsightly cracks on the surface.
- Perfect Chill Time: Refrigerate the cheesecake for at least 2 hours, ideally overnight, to set the texture and enhance the flavor of the apple butter cheesecake.
Apple Butter Cheesecake Variations
Feel free to personalize your dessert experience with these delicious twists that amplify flavor or cater to special preferences.
-
Gingersnap Crust: Replace graham cracker crumbs with gingersnap cookies for a spiced, zingy crust that complements the apple butter beautifully.
-
Vegan Option: Swap cream cheese for a vegan cream cheese alternative and use coconut cream in place of sweetened condensed milk for a dairy-free delight.
-
Nutty Bliss: Add finely chopped pecans or walnuts to the crust mixture for an irresistible crunch that adds texture to every bite.
-
Caramel Drizzle: Top each slice with a homemade or store-bought caramel sauce for an extra touch of sweetness and indulgence that will have everyone reaching for more.
-
Apple Cider Spice: Enhance the apple butter flavor by mixing in a splash of apple cider or apple cider vinegar and a hint of cinnamon for a warm, tangy twist.
-
Chocolate Swirl: Before baking, create a beautiful marbled effect by swirling in some melted chocolate or cocoa powder to make a rich, chocolatey version of the cheesecake.
-
Extra Spices: If you crave a bolder spice flavor, incorporate a pinch of allspice or cardamom for that delicious depth reminiscent of cozy fall baked goods.
For other comforting fall recipes, don’t miss out on my scrumptious Strawberry Cheesecake Stuffed Wonton Bites or the warm, inviting Apple Fries Sweet that pair actively with this cheesecake!
Apple Butter Cheesecake Recipe FAQs
What type of apple butter should I use?
Absolutely! For the best flavor, I recommend using a spiced apple butter that enhances the fall essence of this cheesecake. If you can’t find that, a regular apple butter will work, and you can always add a pinch of cinnamon or nutmeg to the filling to create that warm, comforting taste.
How should I store leftover apple butter cheesecake?
Very simply! You can store your leftover cheesecake in an airtight container in the refrigerator for up to 5 days. Just be sure to allow it to sit at room temperature for about 30 minutes before serving again to enhance its creamy texture.
Can I freeze apple butter cheesecake?
Yes! To freeze your cheesecake, individually wrap slices tightly in plastic wrap or aluminum foil. You can keep it in the freezer for up to 2 months. When you’re ready to enjoy a slice, thaw it overnight in the refrigerator, and it will taste just as good!
What if my cheesecake cracks while baking?
Don’t worry! If your cheesecake cracks, it’s usually due to overmixing or too much air incorporated into the batter. To avoid this, mix at a low speed after adding eggs, and cool the cheesecake gradually by leaving the oven door ajar for 30 minutes after baking. This method helps set the texture and minimize cracks.
Is this recipe suitable for those with allergies?
Definitely take caution! This cheesecake contains dairy and eggs, which are common allergens. For a dairy-free version, consider using non-dairy cream cheese and coconut milk. Always check labels for cross-contamination if there’s a severe allergy, especially with the apple butter and other ingredients.
Can I make this cheesecake ahead of time?
Absolutely! In fact, I recommend making this apple butter cheesecake a day or two in advance. It can be stored in the refrigerator, and this resting time allows the flavors to meld beautifully, making each bite a delightful experience at your gathering. Remember, it’s best served chilled!
Creamy Apple Butter Cheesecake: The Ultimate Fall Treat
Ingredients
Equipment
Method
- Preheat your oven to 300°F (150°C).
- Combine graham cracker crumbs with melted butter in a medium bowl. Press into the bottom of a 9-inch springform pan and bake for 10 minutes. Let cool.
- In a large mixing bowl, whip the softened cream cheese until smooth and creamy.
- Slowly add the sweetened condensed milk and mix until combined. Add the vanilla extract and then the eggs one at a time, mixing on low speed.
- Add the apple butter and blend until uniform in color and texture.
- Pour the filling over the cooled crust and bake for approximately 1 hour, until the center is set with a slight jiggle.
- Turn off the oven, crack the door open, and let cool for 30 minutes. Refrigerate for at least 2 hours, preferably overnight.
Leave a Reply