
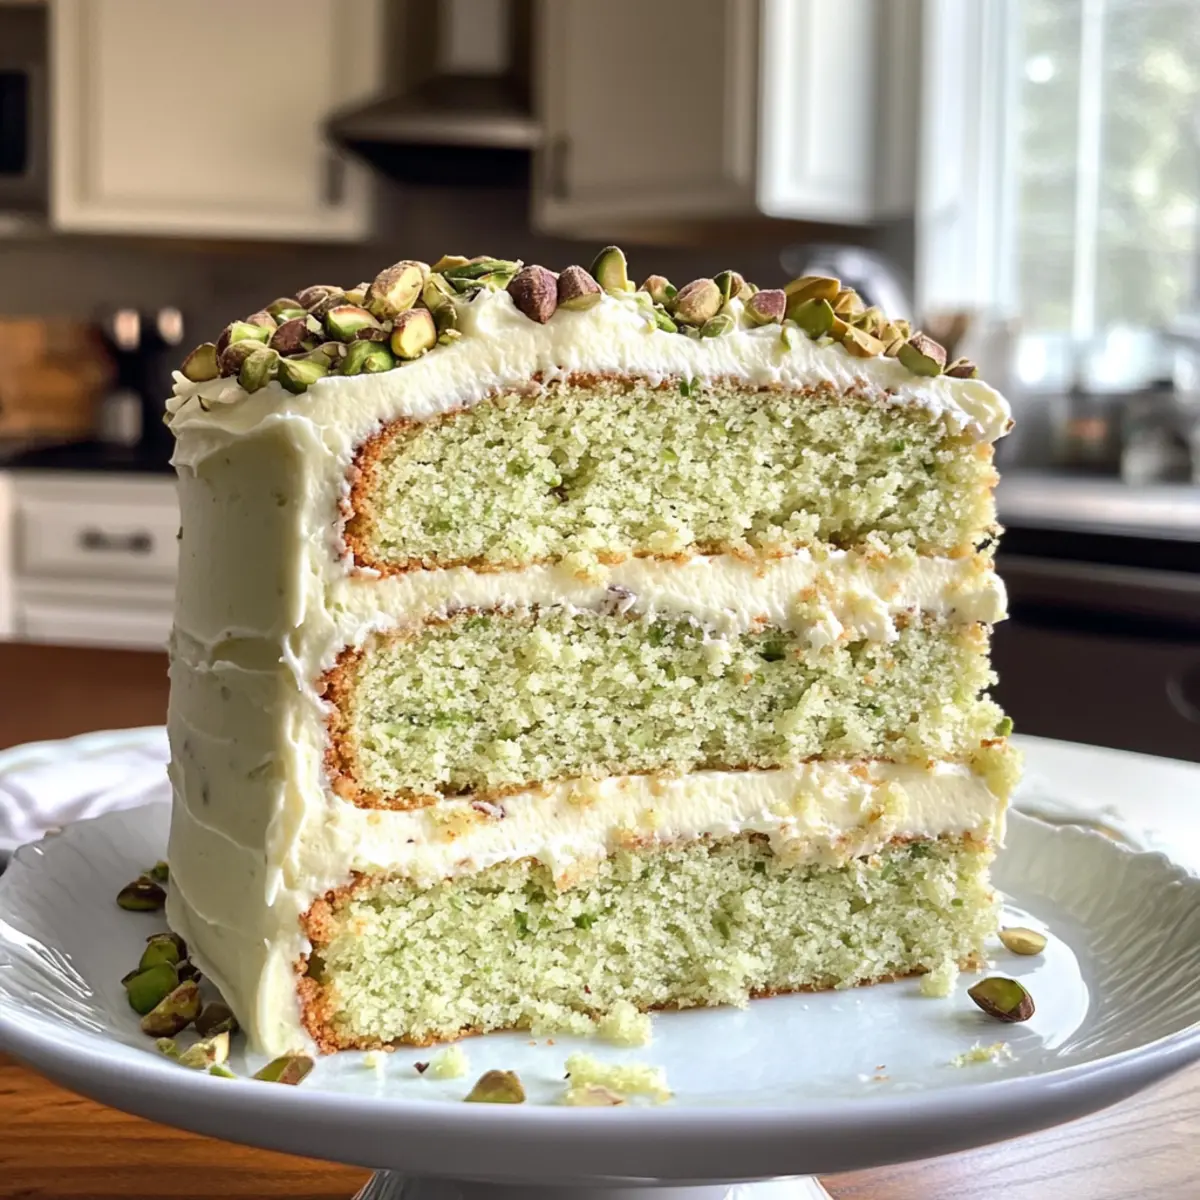
The sweet aroma of freshly ground pistachios filled the air as I contemplated my latest baking adventure. My excitement surged at the thought of creating a Pistachio Mascarpone Layer Cake, a dessert luxurious enough to elevate any gathering. Picture this: light layers of nutty pistachio sponge caressed by velvety mascarpone cream, each slice revealing an enchanting medley of textures that is simply irresistible. Not only is this cake a showstopper for celebrations, but its simple preparation also allows any home-chef to whip it up with ease. With each forkful, you’ll impress friends and family while savoring the decadent flavor that lingers long after the last bite. Ready to indulge in this nutty delight and discover the secret to the perfect celebration cake? Let’s get baking!
Why is this cake a showstopper?
Sumptuous Flavors: Rich pistachios meld with silky mascarpone cream, creating a dessert that captivates your taste buds.
Crowd-Pleasing Appeal: Perfect for birthdays or cozy gatherings, this cake dazzles everyone with its layers of flavor.
Easy Preparation: Simple steps ensure that even novice bakers can achieve impressive results.
Versatile Serving Options: Perfectly pairs with coffee, tea, or sparkling wine, making it a versatile addition to any menu.
Stunning Presentation: Visually attractive with its lovely layers and garnishes, it’s a cake that demands attention!
Every bite promises indulgence; this Pistachio Mascarpone Layer Cake might just become your new go-to celebration dessert!
Pistachio Mascarpone Layer Cake Ingredients
-
For the Cake
-
Shelled Pistachios – Adds nutty flavor and richness; essential for cake and decoration. Substitute with other nuts like almonds for a different taste.
-
All-Purpose Flour – Provides structure to the cake; gluten-free flour can be substituted for a gluten-free version.
-
Baking Powder – Acts as a leavening agent to help the cake rise.
-
Salt – Enhances flavor; use sea salt for a subtle difference.
-
Unsalted Butter – Creates a tender crumb; can replace with coconut oil for a dairy-free option.
-
Granulated Sugar – Sweetens the cake; can substitute with brown sugar for extra moisture.
-
Eggs – Essential for binding and leavening; use flax eggs for a vegan alternative.
-
Whole Milk – Adds moisture and richness; use almond or oat milk for a dairy-free version.
-
Vegetable Oil – Keeps the cake moist; can be replaced with melted coconut oil.
-
Vanilla Extract – Adds flavor; consider substituting with almond extract for a different aroma.
-
For the Frosting
-
Mascarpone Cheese – Key ingredient for the frosting; use cream cheese mixed with heavy cream as a substitute if unavailable.
-
Powdered Sugar – Sweetens the mascarpone cream frosting; ensure it’s sifted for smoothness.
-
Heavy Cream – Used for whipping into the mascarpone frosting; can swap with a non-dairy cream alternative.
-
For Decoration
-
Chopped Pistachios – Enhances visual appeal and adds crunch; use them generously for a splendid finish.
With these ingredients gathered, you’re well on your way to creating a stunning Pistachio Mascarpone Layer Cake that will truly shine at your next celebration!
Step‑by‑Step Instructions for Pistachio Mascarpone Layer Cake
Step 1: Prep Dry Ingredients
Begin by preheating your oven to 350°F (175°C). In a food processor, finely grind the shelled pistachios until they resemble a flour-like consistency. In a mixing bowl, whisk together the ground pistachios, all-purpose flour, baking powder, and salt. This blend will bring a nutty richness to your Pistachio Mascarpone Layer Cake and should be set aside for later.
Step 2: Cream Butter and Sugar
In a large mixing bowl, cream 1 cup of unsalted butter and 1 cup of granulated sugar using an electric mixer on medium speed. Beat until the mixture is light and fluffy, about 3-5 minutes. Then, add in 4 eggs one at a time, ensuring each egg is well incorporated before adding the next. The mixture should be smooth and pale, laying a luscious base for your cake.
Step 3: Combine Wet Ingredients
Slowly mix in 1 cup of whole milk, 1/3 cup of vegetable oil, 2 teaspoons of vanilla extract, and an additional teaspoon of almond extract to the creamed butter and sugar. Blend on low speed until everything is combined, and the mixture reaches a pourable consistency. This step adds moisture and an aromatic hint to your Pistachio Mascarpone Layer Cake batter.
Step 4: Mix Batter
Gently fold the dry ingredients into the wet mixture using a spatula, taking care not to overmix. You want to combine the ingredients just until no dry flour remains visible. The batter should be thick yet smooth, filled with the delightful aroma of pistachios — this is your cake’s inner layer of flavor bursting to life.
Step 5: Bake
Divide the batter evenly among three greased 8-inch round baking pans. Smooth the tops with a spatula for an even bake. Place the pans in the preheated oven and bake for 22-25 minutes. The cakes will be done when the tops are golden brown, and a toothpick inserted in the center comes out clean. Watch carefully to avoid overbaking!
Step 6: Cool Layers
Once baked, remove the cake layers from the oven and allow them to cool in the pans for 10 minutes. Carefully transfer the layers to a wire rack to cool completely. Make sure the layers are cooled thoroughly before frosting to prevent the mascarpone cream from melting, ensuring a beautiful finish for your Pistachio Mascarpone Layer Cake.
Step 7: Prepare Frosting
In a chilled mixing bowl, whip 1 cup of heavy cream using an electric mixer until soft peaks form. Gradually add in 1 cup of mascarpone cheese, 1 cup of powdered sugar, and 1 teaspoon of vanilla extract. Beat on low until fully combined, and then increase speed to medium-high, whipping until the frosting is smooth and fluffy. This rich cream will envelop your cake in delicious decadence.
Step 8: Assemble Cake
To assemble your Pistachio Mascarpone Layer Cake, place the first cake layer on a serving plate. Spread a generous layer of mascarpone frosting on top. Repeat this process with the second layer, followed by the final cake layer. Once stacked, frost the top and sides with the remaining mascarpone cream, smoothing it evenly for a polished and tempting look.
Step 9: Chill
Finally, refrigerate the assembled cake for at least 2 hours before serving. This allows the flavors to meld beautifully and helps the frosting set. When ready to serve, garnish the top with chopped pistachios for added crunch and visual appeal, making your Pistachio Mascarpone Layer Cake a stunning centerpiece for any celebration.
Make Ahead Options
These Pistachio Mascarpone Layer Cake components can be prepped in advance for a stress-free baking experience! You can bake the cake layers up to 24 hours ahead of time; simply wrap them in plastic wrap and refrigerate to maintain their moisture and freshness. The mascarpone frosting can also be prepared 1-2 days in advance and stored in an airtight container in the fridge. When you’re ready to assemble, just let the frosting sit at room temperature for about 15 minutes before spreading. Assembling the cake right before serving ensures it stays fresh and the flavors meld beautifully, allowing you to enjoy a delightful dessert without the last-minute rush!
Pistachio Mascarpone Layer Cake Variations
Embrace your creativity and customize this delightful cake to your liking with these fun options!
- Nutty Alternatives: Swap pistachios with hazelnuts or walnuts for a unique flavor twist. Each nut brings its own character, making the cake a delightful surprise for the palate.
- Fruity Layers: Incorporate a layer of fruit jam, like raspberry or apricot, between the cake layers. This adds a lovely sweet-tart contrast that brightens each bite, elevating the indulgence even further.
- Flavored Extracts: Experiment with seasonal extracts in the frosting, like orange or lemon, for a refreshing summer vibe. Just a few drops can transform the profile and open up a world of flavors!
- Vegan Option: Replace milk and eggs with flax eggs and almond milk for a completely vegan delight. The result is just as moist and flavorful, allowing everyone to join in the celebration.
- Gluten-Free Twist: Use a high-quality gluten-free flour blend to make this cake accessible to everyone. You won’t sacrifice taste or texture; it’s a thoughtful change that’ll please all your guests!
- Decadent Toppings: Top the cake with dark chocolate ganache instead of mascarpone frosting for an indulgent twist. This rich addition elevates the cake’s allure while offering an irresistible contrast to the pistachios.
- Spiced Delight: Add a pinch of cinnamon or cardamom to the cake batter for a unique aromatic twist. The warmth from these spices complements the nuttiness beautifully, creating a cozy scent that fills your kitchen.
- Lemon Zest Frosting: Incorporate grated lemon zest into your mascarpone frosting for a zesty kick. The citrusy brightness balances the richness of the cake perfectly, providing a refreshing contrast that’ll leave everyone wanting more.
The joy of baking comes from making a recipe your own, so have fun mixing and matching these variations! And if you find yourself inspired by sweet combinations, check out recipes like Crab Cake Egg or indulge in some delightful Strawberry Shortcake Cake as beautiful companion desserts for your Pistachio Mascarpone Layer Cake. Happy baking!
What to Serve with Pistachio Mascarpone Layer Cake
Creating a memorable meal is so much easier when you have delightful accompaniments to pair with your stunning dessert masterpiece.
-
Creamy Mashed Potatoes: The buttery richness of mashed potatoes complements the nutty notes of the cake, adding a comforting savory element to your meal.
-
Fresh Arugula Salad: With its peppery taste, this salad brings a crisp freshness that balances the sweetness of the cake, making it a refreshing side.
-
Sparkling Wine: A glass of bubbly will elevate your dessert experience, providing a delightful contrast to the cake’s creamy components.
-
Vanilla Bean Ice Cream: The smooth, creamy ice cream adds an extra layer of decadence while ensuring each bite is indulgently satisfying.
-
Chocolate-Dipped Strawberries: These juicy berries introduce a sweet-tart flavor that acts as a perfect counterpoint to the rich mascarpone.
-
Herbed Quinoa: Light and fluffy, quinoa studded with fresh herbs offers a nutty flavor that syncs beautifully with the cake.
-
Dark Chocolate Mousse: Rich and airy, this dessert provides a gorgeous contrast while enhancing the nutty flavor profile.
-
Chai Tea: A warm cup of spiced chai will deepen the sensory experience, inviting comforting flavors that harmonize with the cake’s profile.
Pairing any of these delightful sides will transform your Pistachio Mascarpone Layer Cake into the centerpiece of a beautifully balanced meal!
Storage Tips for Pistachio Mascarpone Layer Cake
Fridge: Store leftover cake in an airtight container in the fridge for up to 3 days to keep it fresh and moist.
Freezer: Freeze individual cake layers wrapped tightly in plastic wrap and then aluminum foil for up to 2 months. Thaw in the fridge before serving.
Reheating: If serving chilled, you can gently bring the cake to room temperature for about 30 minutes before slicing to enhance its flavors.
Decorations: When storing, avoid adding chopped pistachios on top until just before serving to maintain their crunch in your Pistachio Mascarpone Layer Cake.
Expert Tips for Pistachio Mascarpone Layer Cake
-
Finely Ground Pistachios: Ensure pistachios are ground to a fine powder to prevent a paste-like texture in the batter, ensuring a light cake.
-
Cool Layers Properly: Allow cake layers to cool completely on a wire rack. This prevents the frosting from melting and maintains the cake’s integrity.
-
Gentle Frosting Handling: When preparing the mascarpone frosting, mix gently to keep it airy and fluffy, creating a smooth finish for your cake.
-
Check for Doneness: Use a toothpick to check for doneness when baking. If it comes out clean, your Pistachio Mascarpone Layer Cake is ready to cool!
-
Decorative Touches: Don’t skimp on garnishing with chopped pistachios! They not only enhance the cake’s visual appeal but also add a satisfying crunch.
Pistachio Mascarpone Layer Cake Recipe FAQs
What kind of pistachios should I use?
Absolutely! For the best flavor, use fresh, unsalted shelled pistachios. Look for vibrant green color and avoid those with dark spots or any signs of rancidity. If you’re unable to find fresh pistachios, roasted pistachios can also work, but be cautious about added salt.
How should I store leftover cake?
To keep your Pistachio Mascarpone Layer Cake fresh, store it in an airtight container in the fridge for up to 3 days. Ensure it’s well-sealed to prevent it from drying out. If you have a slice or two left, you can wrap them in plastic wrap and place them in a container for easy access.
Can I freeze the cake layers?
Very! To freeze your Pistachio Mascarpone Layer Cake layers, wrap them tightly in plastic wrap, then in aluminum foil. Properly wrapped, they can last for up to 2 months in the freezer. When you’re ready to enjoy, simply thaw the layers in the fridge overnight before assembling them with the frosting.
What if the cake layers domed while baking?
If your cake layers dome up, don’t worry! You can easily trim the tops with a serrated knife once they are completely cool. Just slice off the domed part to create a flat surface for even stacking. This ensures a more professional appearance when assembling your cake!
Are there any dietary considerations for this recipe?
Absolutely! If you’re catering to those with dietary restrictions, you can make several adjustments. Use gluten-free all-purpose flour for a gluten-free version. For a dairy-free option, replace heavy cream and mascarpone cheese with coconut cream and a dairy-free cream cheese blend.
How do I avoid a runny mascarpone frosting?
To ensure your mascarpone frosting is perfectly fluffy and not runny, start by whipping the heavy cream to soft peaks before gradually adding in the mascarpone and powdered sugar. Also, make sure all ingredients are well-chilled beforehand, and avoid overmixing during preparation. This will yield a lovely, spreadable consistency that holds up beautifully!
Pistachio Mascarpone Layer Cake: Indulge in Pure Bliss
Ingredients
Equipment
Method
- Preheat your oven to 350°F (175°C) and finely grind the shelled pistachios in a food processor. In a mixing bowl, whisk together ground pistachios, all-purpose flour, baking powder, and salt. Set aside.
- In a large mixing bowl, cream 1 cup of unsalted butter and 1 cup of granulated sugar using an electric mixer until light and fluffy, about 3-5 minutes. Add in 4 eggs one at a time, ensuring each is incorporated well.
- Slowly mix in 1 cup of whole milk, 1/3 cup of vegetable oil, 2 teaspoons of vanilla extract, and 1 teaspoon of almond extract. Blend on low speed until combined.
- Gently fold the dry ingredients into the wet mixture using a spatula, mixing only until no dry flour is visible. The batter should be thick but smooth.
- Divide the batter evenly among three greased 8-inch round baking pans. Smooth the tops and bake for 22-25 minutes. Check with a toothpick.
- Once baked, cool the cake layers in the pans for 10 minutes before transferring to a wire rack to cool completely.
- In a chilled bowl, whip 1 cup of heavy cream until soft peaks form. Gradually add 1 cup of mascarpone cheese, 1 cup of powdered sugar, and 1 teaspoon of vanilla extract, mixing until smooth.
- To assemble, place the first layer on a serving plate and spread a layer of mascarpone frosting. Repeat with the second layer, then add the final cake layer. Frost the top and sides.
- Refrigerate the assembled cake for at least 2 hours before serving, and garnish with chopped pistachios.
Leave a Reply