
As I rummaged through the fridge, searching for that sweet something to satisfy my cravings, a light bulb moment struck—what if I could whip up a delightful Healthy No-Bake Cheesecake in a Jar? This recipe is a brilliant way to indulge in rich, creamy cheesecake without the hours of baking or those added calories. Using Greek yogurt, it strikes the perfect balance between indulgence and health, making it a quick treat that fits easily into any meal prep routine. Imagine diving into a jar filled with velvety filling, a crunchy graham cracker crust, and a luscious cherry topping that sings of summer bliss. Not only is this dessert incredibly easy to make, but it also offers a healthier twist on a classic favorite, perfect for impressing guests or simply treating yourself! Ready to dig into this guilt-free dessert? Let’s get started!
Why Is This Cheesecake in a Jar Special?
Guilt-Free Indulgence: This no-bake cheesecake provides a satisfying treat without the extra calories.
Quick and Easy: With just a few simple steps, you can whip up this delicious treat effortlessly.
Versatile Flavors: Feel free to swap the cherry topping for your favorite fruits, like blueberries or strawberries.
Healthier Twist: Thanks to Greek yogurt, it packs in the protein and cuts down on sugar, making it a smarter dessert choice.
Crowd-Pleasing Appeal: Serve these jars at your next gathering and watch them disappear—they’re sure to impress!
You could also check out our recipes for Pumpkin Cheesecake Truffles for a delightful seasonal treat.
No-Bake Cheesecake in a Jar Ingredients
• Discover the delightful components for a guilt-free dessert!
For the Cherry Topping
- Pitted Cherries – Adds a burst of natural sweetness; feel free to substitute with any fresh or frozen berries for variety.
- Pure Maple Syrup – Sweetens the cherry compote and cheesecake; you can also use honey or agave syrup if preferred.
- Fresh Lemon Juice – Brings acidity to balance sweetness; bottled lemon juice works well in a pinch.
- Water – Thins the compote for a smoother texture; omit if you prefer a thicker sauce.
- Corn Starch – Thickens the cherry topping; can be replaced with arrowroot powder or omitted for a thinner sauce.
For the Cheesecake Filling
- Cream Cheese – Provides richness to the filling; consider light cream cheese or vegan cream cheese as alternatives.
- Plain Full-Fat Greek Yogurt – The creamy base that adds protein; regular yogurt or a dairy-free alternative can also be used.
- Butter – Binds the graham cracker crust together; substitute with coconut oil for a dairy-free option.
For the Crust
- Graham Cracker Crumbs – Gives that classic crunchy texture to the crust; opt for gluten-free graham crackers for a gluten-free option.
This no-bake cheesecake in a jar is not just a treat but a cherished memory waiting to happen. Now, let’s get ready to assemble this delicious dessert!
Step‑by‑Step Instructions for Healthy No-Bake Cheesecake in a Jar
Step 1: Prepare Cherry Topping
In a medium saucepan, combine pitted cherries, pure maple syrup, fresh lemon juice, water, and corn starch. Cook over medium heat for about 5-10 minutes, stirring occasionally, until the mixture thickens and becomes glossy. You want to see a bubbling texture as it cooks. Once done, remove from heat and set aside to cool while you work on the cheesecake filling.
Step 2: Make Cheesecake Filling
In a mixing bowl, blend softened cream cheese and plain full-fat Greek yogurt until smooth and creamy, using an electric mixer on medium speed for about 2-3 minutes. Gradually add maple syrup and lemon juice, blending everything together until well combined and there are no lumps. Once smooth, refrigerate the cheesecake filling for about 10 minutes to firm it up slightly.
Step 3: Prepare Graham Cracker Crust
Melt butter in a microwave-safe bowl or small saucepan, then combine it with graham cracker crumbs in a mixing bowl until the mixture resembles wet sand. Use a fork to combine thoroughly. This mixture will create the delightful crunchy base for your no-bake cheesecake in a jar, so make sure it’s evenly mixed before moving on to the next step.
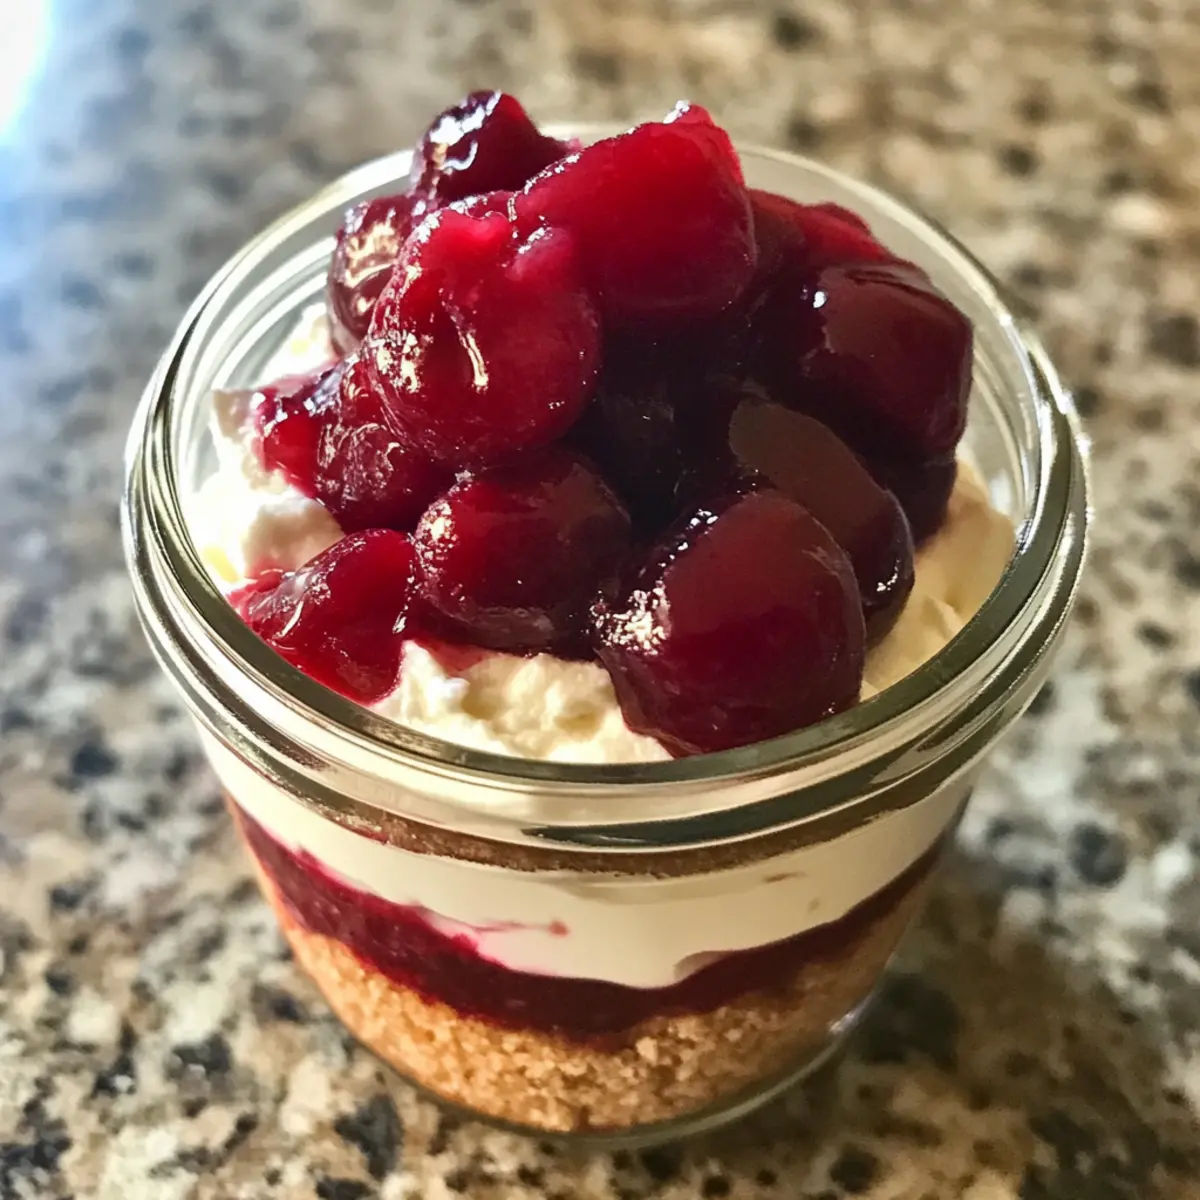
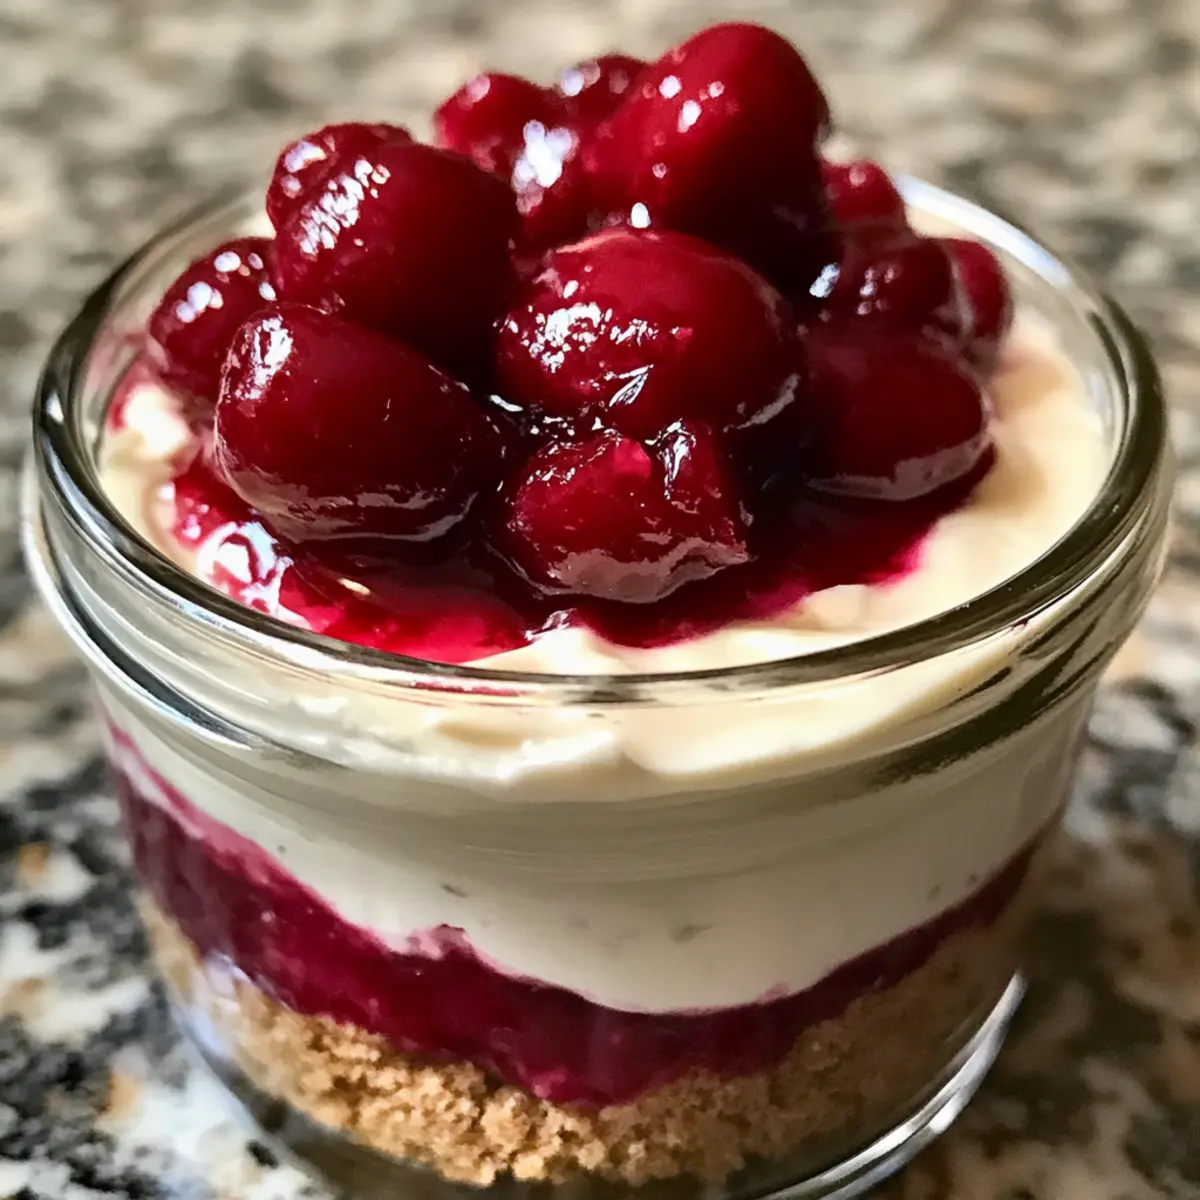
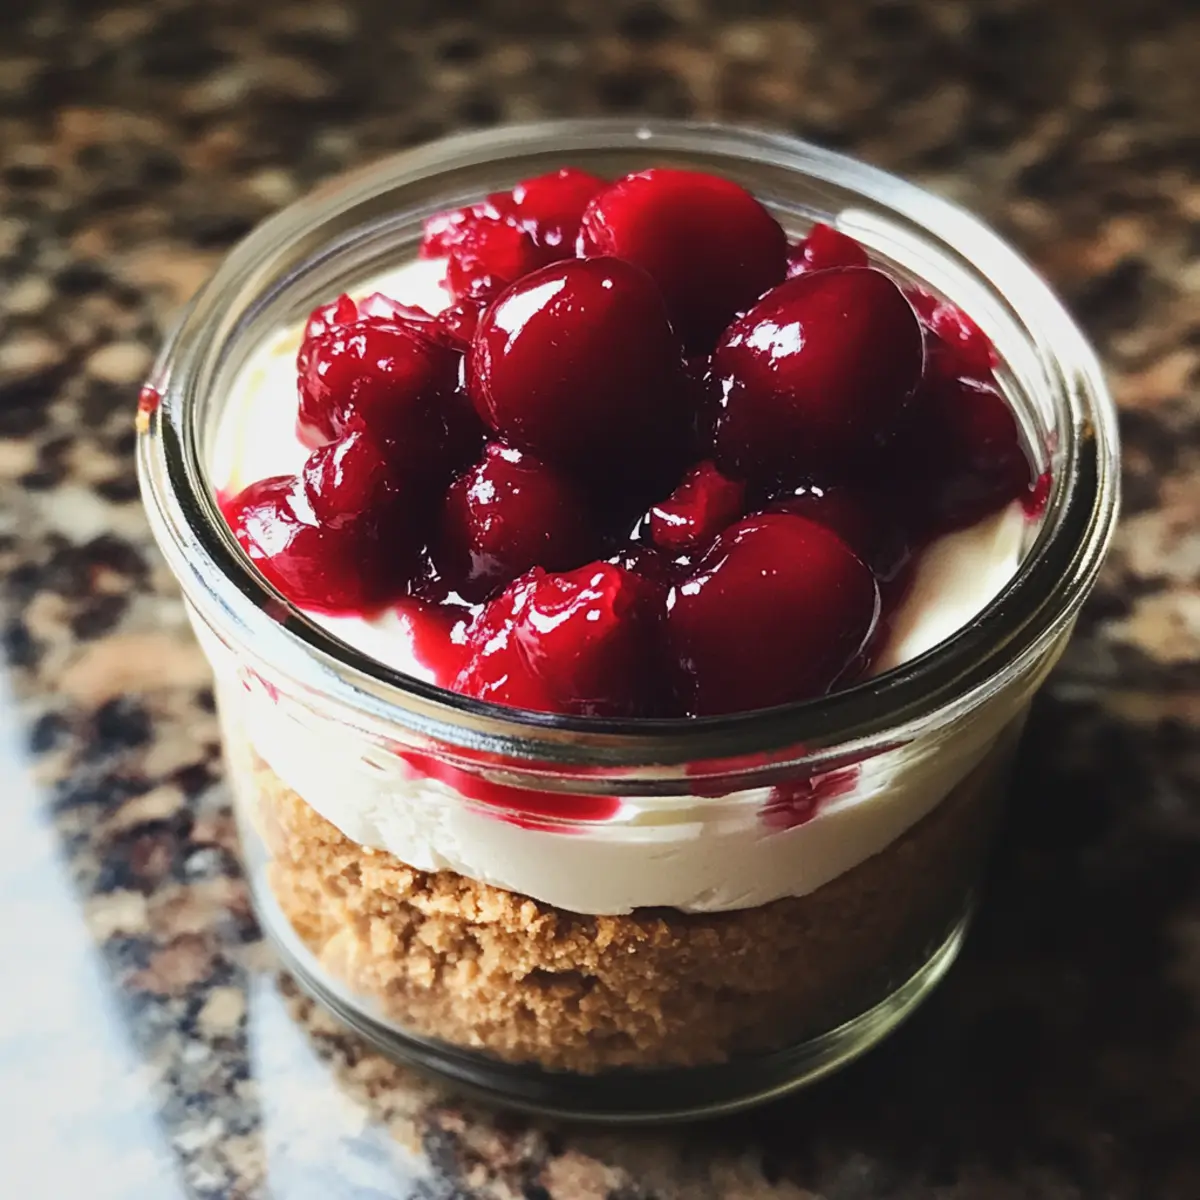
Step 4: Assemble Cheesecake Jars
Grab your individual jars and evenly distribute the graham cracker crust mixture into each one, pressing it down gently with the back of a spoon to form a firm base. Next, spoon in a generous layer of the cheesecake filling on top of the crust, smoothing it out with a spatula or the back of a spoon for an even layer.
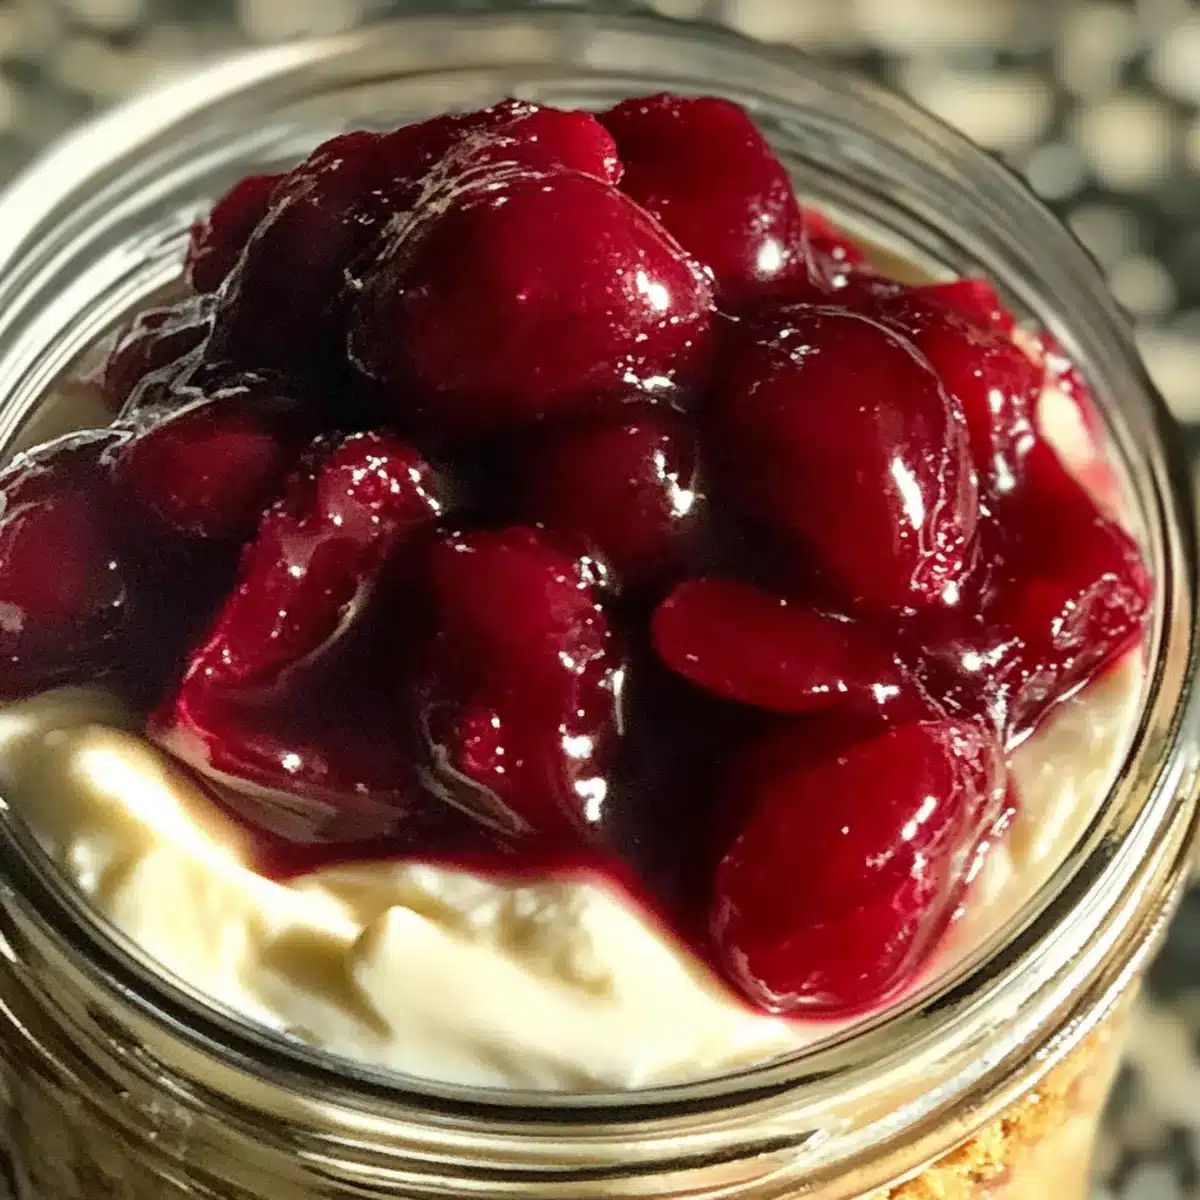
Step 5: Top with Cherry Compote
After the cherry topping has cooled, evenly spoon it over the cheesecake filling in each jar. You want to create a nice, luscious layer of cherry compote, letting it drip slightly over the edges for a beautiful presentation. Each jar is now showing a lovely array of textures and colors, making them appetizing to look at.
Step 6: Chill and Set
Place the assembled jars in the refrigerator and allow them to chill for at least 1 hour. This time in the fridge will help the cheesecake filling set properly, so it holds its shape when you dig in. If you want a firmer cheesecake, feel free to leave them chilling a little longer—overnight is even more delightful!
Make Ahead Options
Prepare your No-Bake Cheesecake in a Jar in advance to save time and enjoy a delicious dessert any day of the week! You can make the graham cracker crust and cheesecake filling up to 24 hours ahead. Simply prepare the crust and filling as detailed in the recipe, then store them separately in airtight containers in the refrigerator to maintain freshness. The cherry topping can also be made in advance and stored for up to 3 days. When you’re ready to serve, just layer the filling into your jars, add the cherry compote, and let them chill briefly if needed. This way, you’ll have an effortlessly elegant dessert that tastes as good as fresh, all with minimal last-minute effort!
Storage Tips for No-Bake Cheesecake in a Jar
Fridge: Store the cheesecake jars in the refrigerator for up to 3 days. Make sure they are covered with a lid or plastic wrap to maintain freshness.
Freezer: For longer storage, freeze the jars without the fruit topping for up to 3 months. Wrap each jar tightly in plastic wrap and then foil to prevent freezer burn.
Thawing: When ready to enjoy, thaw the cheesecake jars in the fridge overnight, then add your favorite fruit topping just before serving.
Serving Cold: This no-bake cheesecake tastes best chilled, so serve directly from the fridge for a refreshing dessert experience!
What to Serve with Healthy No-Bake Cheesecake in a Jar
Elevate your dessert experience with these delightful pairings that enhance the creamy bliss of your cheesecakes!
- Fresh Berries: Add a zing of flavor with sliced strawberries or blueberries, enhancing the cheesecake’s sweetness and texture.
- Whipped Cream: A dollop of lightly sweetened whipped cream offers a silky contrast to the rich filling, creating a decadent balance.
- Honey Drizzle: A touch of honey over the cheesecake adds a natural sweetness, complementing the flavors without overpowering them.
Pair your jars with a warm cup of herbal tea for a cozy treat after dinner. The soothing flavors of chamomile or peppermint perfectly round off the meal.
- Chocolate Shavings: A sprinkle of dark chocolate shavings can add an indulgent touch, pleasing chocolate lovers and enhancing the dessert’s visual appeal.
- Coconut Flakes: Toasted coconut flakes provide a tropical twist and lovely crunch, adding depth to the dessert’s creamy layers.
- Pistachio Crumble: This nutty topping presents a delightful contrast in texture while introducing a slightly savory note that balances the sweetness.
- Mint Leaves: Garnishing with fresh mint leaves adds a refreshing taste and a pop of color, making your jars look as good as they taste.
Enjoy these pairings to transform a simple dessert into a delightful multi-sensory experience!
Expert Tips for No-Bake Cheesecake in a Jar
-
Chill Time: For a firmer texture, chill the jars for at least 2 hours or even overnight before serving.
-
Lump-Free Filling: Use a hand mixer to ensure the cheesecake filling is silky smooth, avoiding any lumps that can affect the texture.
-
Layering: For an attractive presentation, layer the ingredients carefully, allowing the cherry compote to peak over the cheesecake filling in each jar.
-
Graham Cracker Substitutes: If avoiding gluten, opt for gluten-free graham crackers to create the crust without sacrificing flavor or crunch.
-
Flavor Variations: Don’t be shy—experiment with different fruit toppings like blueberries or even a dollop of chocolate ganache to make this no-bake cheesecake uniquely yours!
No-Bake Cheesecake in a Jar Variations
Get ready to embark on a flavorful journey as you customize this delicious dessert to meet your tastes and dietary needs!
-
Berry Bliss: Swap out cherries for a mix of blueberries, strawberries, or raspberries for a burst of fruity flavor. Each berry brings its unique twist, making it fun to explore!
-
Chocolate Delight: For a decadent twist, add cocoa powder into the cheesecake filling or drizzle chocolate ganache on top. Chocolate lovers will swoon over this rich variation.
-
Dairy-Free Indulgence: Use dairy-free cream cheese and yogurt to create a vegan-friendly cheesecake. Enjoy the same creamy texture without the dairy!
-
Citrus Zest: Incorporate orange or lime zest for a refreshing citrus note. This adds a bright and zesty flavor that perfectly balances the sweetness.
-
Nutty Crunch: Mix some crushed nuts like almonds or walnuts into the graham cracker crust for added texture and a nutty flavor profile. It’s a delightful surprise in every bite!
-
Spicy Kick: Add a dash of cinnamon or a sprinkle of nutmeg into the cheesecake filling for a warm spice note. It’s a cozy twist perfect for any occasion!
-
Guilt-Free Sweetener: Replace maple syrup with a low-calorie sweetener to further cut down on sugar while maintaining that sweet satisfaction.
-
Tropical Escape: Top your cheesecake with coconut flakes or use coconut yogurt instead of Greek yogurt for a tropical flair. Every bite will remind you of a sunny paradise!
These variations offer endless possibilities, making each jar unique. Enjoy experimenting! If you’re looking for more sweets, consider trying our Pumpkin Cheesecake Truffles for a seasonal treat or Strawberry Cheesecake Stuffed for something extra delightful!
Healthy No-Bake Cheesecake in a Jar Recipe FAQs
What type of cherries should I use for the topping?
I recommend using fresh pitted cherries for a delightful burst of flavor, but you can absolutely substitute any fresh or frozen berries, such as blueberries or strawberries, for a different twist on this no-bake cheesecake.
How long can I store the no-bake cheesecake in the refrigerator?
These adorable jars can be stored in the fridge for up to 3 days. Just make sure to cover them tightly with a lid or plastic wrap to keep them fresh and delicious!
Can I freeze the cheesecake jars? If so, how?
Absolutely! To freeze, simply assemble the jars without the fruit topping, as it may not freeze well. Wrap each jar tightly in plastic wrap and then in foil to prevent freezer burn. They can be frozen for up to 3 months. When you’re ready to enjoy, thaw them in the refrigerator overnight and top with your fruit just before serving.
What should I do if my cheesecake filling is too lumpy?
If you find yourself with a lumpy filling, try mixing it longer with a hand mixer or even a blender for a smoother texture. If you’re pressed for time and it’s still a bit grainy, you can always sub the filling into a pie crust instead—it’s forgiving and delicious nonetheless!
Is this cheesecake suitable for those with dietary restrictions?
Yes! This no-bake cheesecake in a jar is made using Greek yogurt, which is a healthier alternative to traditional cheesecake, and it’s vegetarian as well. If you need it to be gluten-free, just swap the graham cracker crumbs for gluten-free options. For dairy-free needs, you can use non-dairy cream cheese and yogurt substitutes, making it a versatile dessert for everyone!
How should I serve the cheesecake for the best experience?
Serve these delightful jars chilled from the fridge for a refreshing dessert experience. For an added touch, you might drizzle a bit of extra maple syrup on top or garnish with mint leaves to make it visually appealing and even more enticing!
Decadent No-Bake Cheesecake in a Jar That's Guilt-Free
Ingredients
Equipment
Method
- In a medium saucepan, combine pitted cherries, pure maple syrup, fresh lemon juice, water, and corn starch. Cook over medium heat for about 5-10 minutes, stirring occasionally, until thickened and glossy.
- In a mixing bowl, blend softened cream cheese and plain Greek yogurt until smooth. Gradually add maple syrup and lemon juice, blending until well combined. Refrigerate for about 10 minutes.
- Melt butter, then mix with graham cracker crumbs until it resembles wet sand. Ensure it's well combined.
- Evenly distribute the graham cracker crust into jars, pressing down gently to form a base.
- Spoon in a layer of the cheesecake filling on top of the crust, smoothing it out.
- Once cooled, spoon the cherry topping over the cheesecake filling in each jar.
- Place jars in the refrigerator and chill for at least 1 hour before serving.
Leave a Reply