
As I stood in my kitchen, the aroma of sizzling garlic filled the air, taking me back to a cozy tapas bar in Spain. It’s a culinary escape I often crave, and that’s how Loaded Bravas Tots came to life. This fun recipe combines the comforting crunch of crispy tater tots with the vibrant flavors of a smoky bravas sauce and creamy manchego cheese. Not only are these bite-sized treats a crowd-pleaser, but they’re also incredibly easy to whip up for any gathering. With vegetarian options available, you can cater to all your friends and family. So, whether you’re hosting game night or simply looking to elevate your snack game, these Loaded Bravas Tots could be your next favorite go-to. Ready to dive into a fusion of Spanish-American delight?
Why Are Loaded Bravas Tots a Must-Try?
Irresistible flavor explosion: The combination of crispy tater tots and smoky bravas sauce creates a burst of flavors that will leave your taste buds dancing.
Crowd-pleasing goodness: Perfect for parties or gaming nights, these tasty bites are sure to wow your guests.
Quick and easy prep: With simple baking and a few fresh ingredients, you’ll have a delicious dish ready in no time!
Vegetarian-friendly options: Easily adapt this recipe by swapping bacon for caramelized onions, making it suitable for all diets.
For even more hearty comfort food, check out my Loaded Baked Potato recipe!
Versatile indulgence: Customize toppings like garlic aioli or fresh herbs to match your preferences and impress everyone at your table.
Loaded Bravas Tots Ingredients
For the Tater Base
- Frozen Tater Tots – A crispy base that ensures every bite is full of texture; feel free to substitute with homemade potato bites for a personal touch.
For the Bravas Sauce
- Olive Oil – Essential for sautéing onions and garlic, adding richness to the sauce; extra virgin olive oil boosts the flavor intensity.
- Onion – Brings sweetness and depth to the sauce; shallots can be subbed for a more delicate taste.
- Garlic – Delivers aromatic and savory notes; freshly minced garlic elevates the flavor profile.
- Sweet Smoked Paprika – The key spice that infuses warmth and sweetness into the sauce; regular paprika works in a pinch but adjust for depth.
- Hot Smoked Paprika – Enhances the heat; adjust based on your spice tolerance, or omit it for milder taste.
- Cayenne Pepper – Optional kick for spice enthusiasts; use sparingly or omit for a non-spicy delight.
- Tomato Puree – Forms a rich base for the sauce; crushed tomatoes can be used for a chunkier texture.
- Roasted Red Peppers – Adds natural sweetness to the sauce; homemade versions offer a sweeter profile, but jarred ones work well for ease.
- Sugar – Balances the sauce’s acidity; adjust or omit according to your personal taste.
- Sherry Vinegar – Imparts tang and complexity; red wine vinegar serves as an excellent substitute.
- Salt & Black Pepper – Fundamental for seasoning; adjust levels based on your palate.
For the Toppings
- Shredded Manchego Cheese – Delivers a creamy, rich topping that’s a staple of Spanish cuisine; cheddar is a suitable replacement if needed.
- Cooked Bacon (optional) – Adds a crunchy, savory layer; caramelized onions cater to vegetarian preferences beautifully.
- Sour Cream/Garlic Aioli – Introduces a creamy finish; opt for a plant-based alternative for vegan adaptations.
- Chopped Parsley/Chives – Fresh herbs for a burst of flavor and color; substitute with whatever fresh herb you prefer.
- Smoked Paprika for Garnish – Elevates presentation and taste; a light dusting before serving is all you need.
Step‑by‑Step Instructions for Loaded Bravas Tots
Step 1: Preheat and Prepare
Begin by preheating your oven to 425°F (220°C) and greasing a 24-cup mini muffin tin with cooking spray or olive oil. This will ensure that your Loaded Bravas Tots don’t stick when it’s time to remove them from the pan. Set your prepared muffin tin aside so it’s ready for the next steps of this flavorful journey.
Step 2: Bake Tater Tots
Place two frozen tater tots in each muffin cup, filling the entire tray. Bake the tater tots in the preheated oven for 10 minutes, allowing them to soften slightly. You’ll know they’re ready when they begin to puff up but are not yet crispy. Once softened, remove them from the oven and prepare for the next step.
Step 3: Shape Tater Tots into Cups
Using the back of a spoon, carefully press down on the softened tater tots to mold them into cup shapes. Make sure they’re firmly pressed to hold their shape during baking. Return the muffin tin to the oven and bake for an additional 15 minutes, or until the tater tots are golden brown and crispy, bringing your Loaded Bravas Tots to life.
Step 4: Sauté Aromatics
While the tater tots are baking, heat a couple of tablespoons of olive oil in a small saucepan over medium heat. Add the chopped onion and sauté for about 5 minutes until it becomes translucent. Then, stir in the minced garlic and continue cooking for another minute until fragrant, filling your kitchen with a warm aroma.
Step 5: Create the Bravas Sauce
Stir both sweet and hot smoked paprika into the sautéed onions and garlic, along with cayenne pepper for an extra kick if desired. Follow this with the tomato puree and roasted red peppers. Allow the mixture to simmer for 10 minutes, letting the flavors meld together and thicken into a rich bravas sauce that will elevate your Loaded Bravas Tots.
Step 6: Blend the Sauce
Once thickened, carefully transfer the bravas sauce to a blender to achieve a smooth consistency. Blend until silky and uniform, then mix in sugar and sherry vinegar, adjusting seasoning with salt and pepper to taste. This delightful sauce will be the star of your Loaded Bravas Tots when it’s time to serve.
Step 7: Add Cheese and Return to Oven
Remove the crispy tater tot cups from the oven and generously fill each cup with shredded manchego cheese. Place the muffin tin back in the oven for 2-3 minutes, or until the cheese melts beautifully. You’ll want that gooey, cheesy goodness to provide perfect contrast to the crispy tater tots.
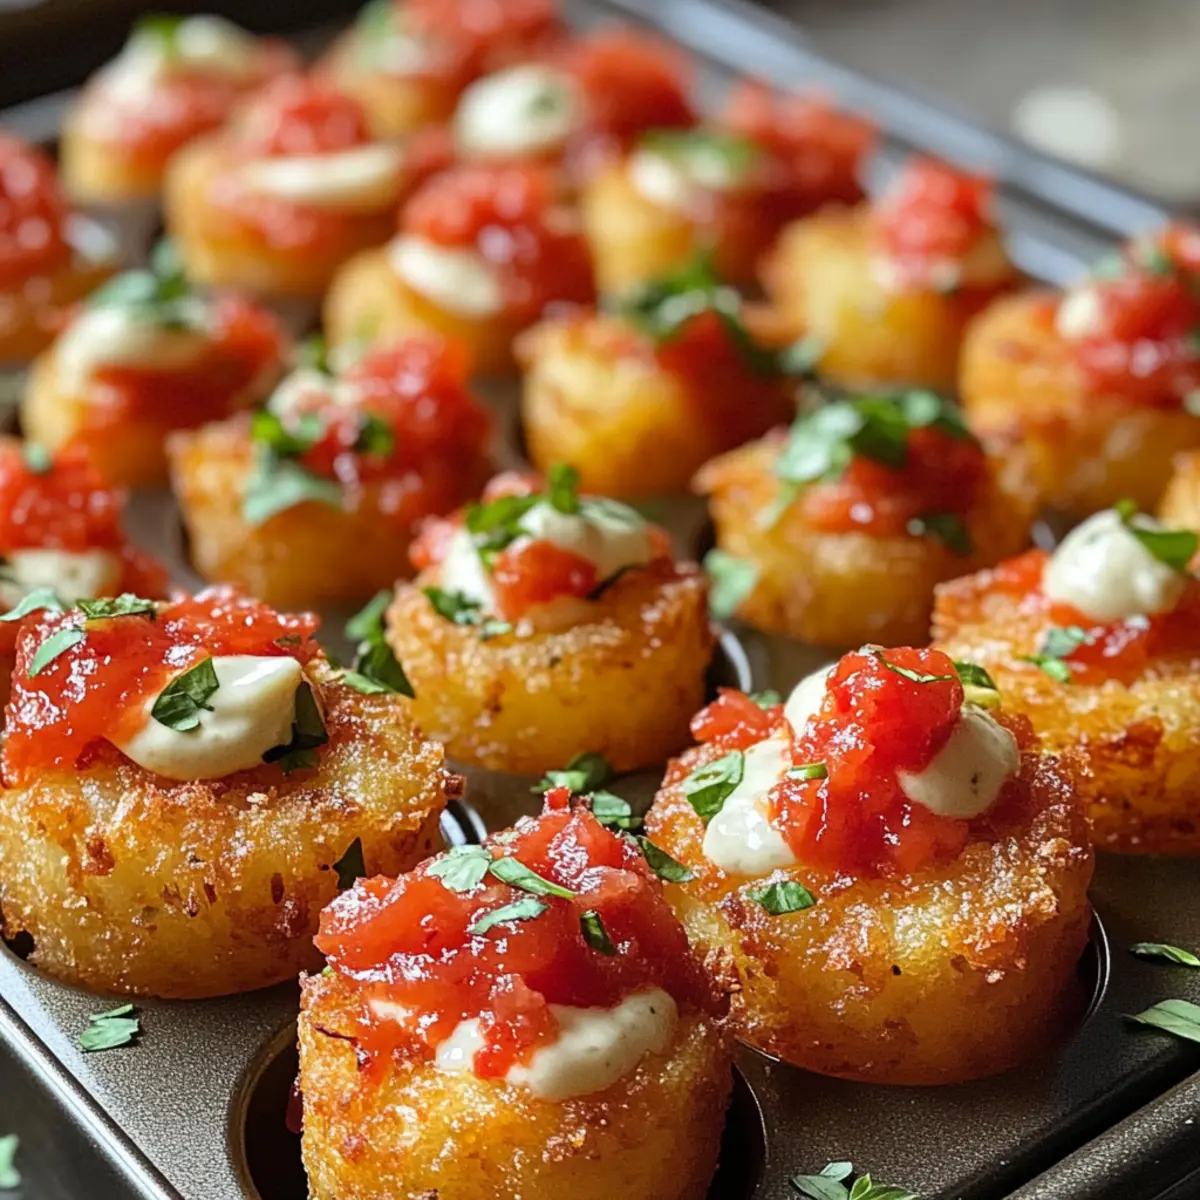
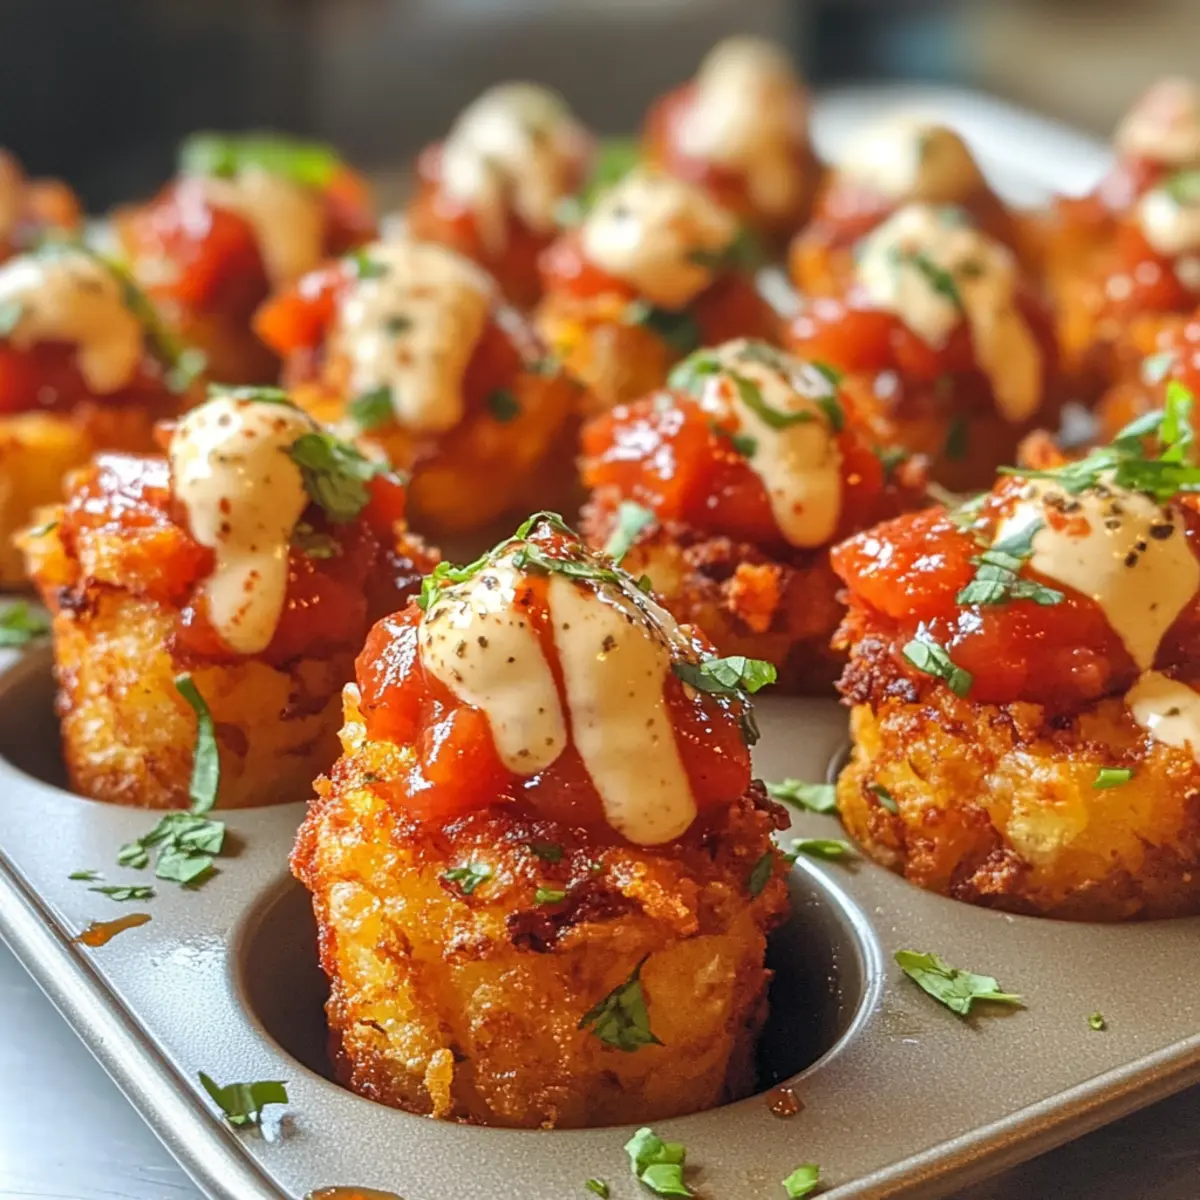
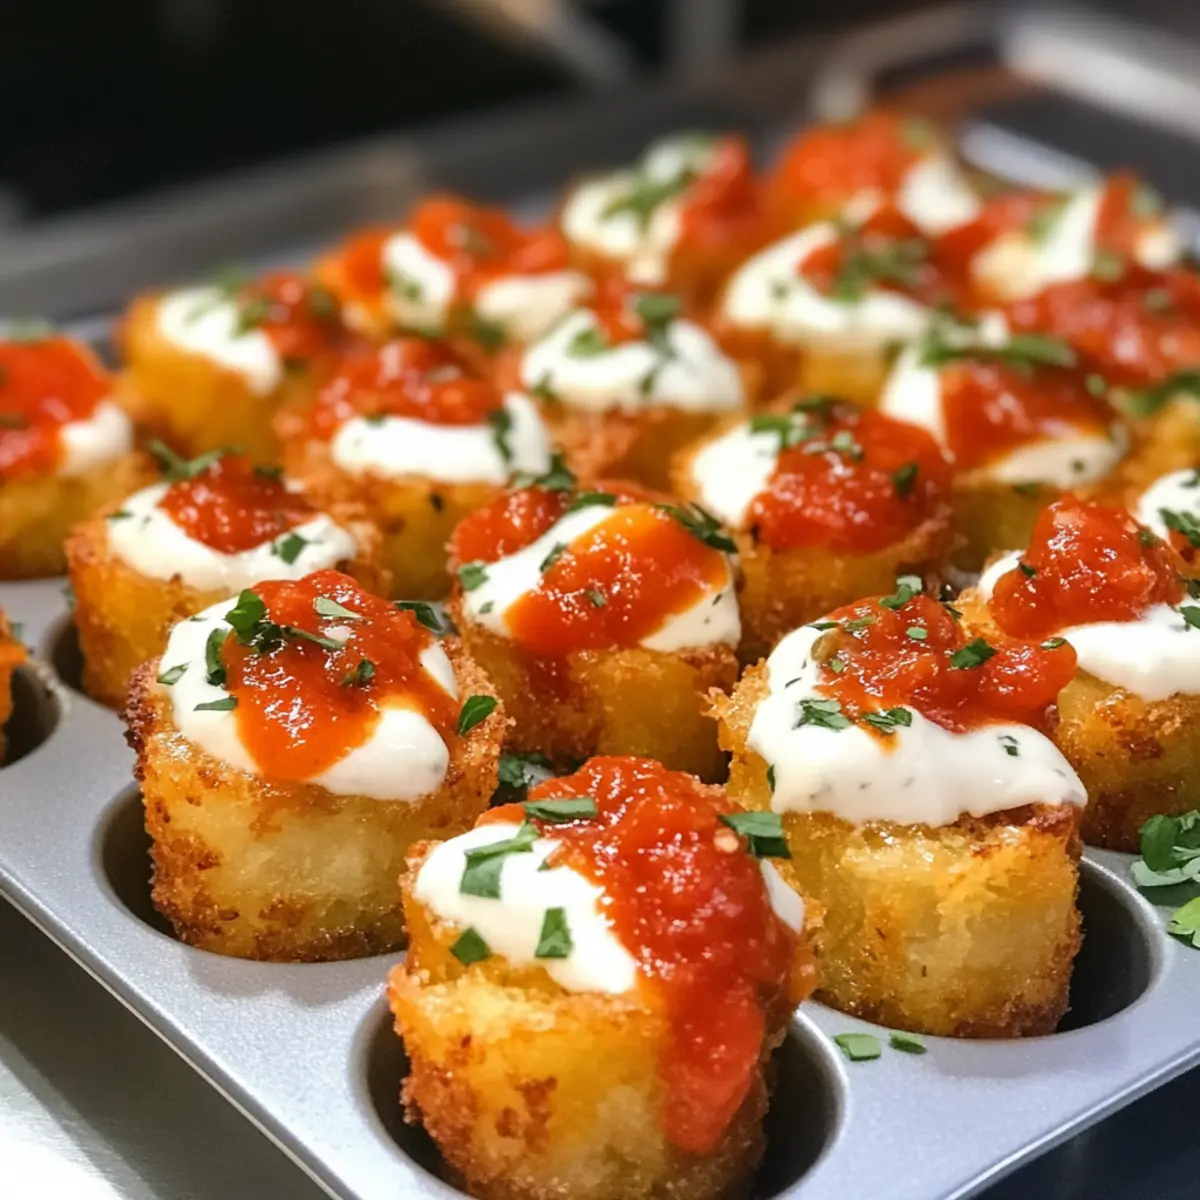
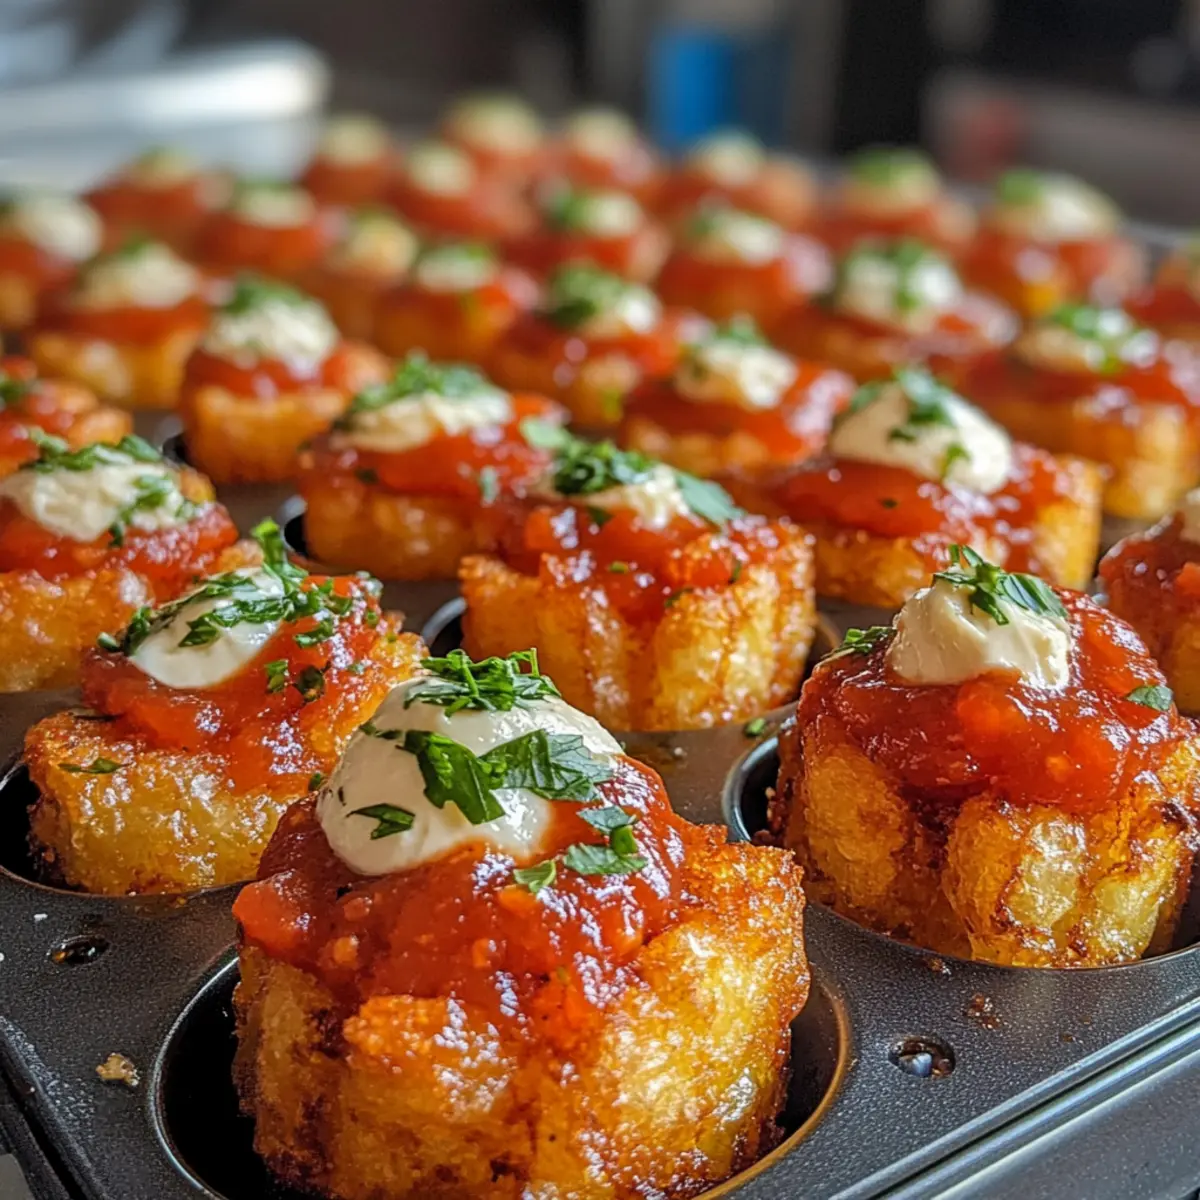
Step 8: Garnish and Serve
Once your Loaded Bravas Tots are ready, top each one with a generous spoonful of rich bravas sauce. Add dollops of sour cream or garlic aioli for creaminess and, if desired, sprinkle crumbled bacon or caramelized onions for a savory crunch. Finish with fresh herbs and a light dusting of smoked paprika for color, then serve warm and enjoy the delightful flavors!
Make Ahead Options
Loaded Bravas Tots are a fantastic choice for busy home cooks looking to save time while impressing guests! You can prepare the bravas sauce up to 24 hours in advance; simply blend the sauce and store it in an airtight container in the refrigerator to enhance flavors overnight. For optimal crispiness, bake the tater tot cups and fill them with cheese just before serving. However, you can shape the tater tots into cups and refrigerate them for up to 3 days; just be sure to cover them well to retain crispness. When ready to serve, fill with cheese and bake until golden, topping with bravas sauce and garnishes for that fresh flavor!
How to Store and Freeze Loaded Bravas Tots
Fridge: Store leftover Loaded Bravas Tots in an airtight container for up to 3 days to keep them fresh.
Freezer: For longer storage, freeze cooked and cooled Loaded Bravas Tots in a single layer on a baking sheet, then transfer to a freezer bag for up to 2 months.
Reheating: When ready to enjoy, reheat in the oven at 375°F (190°C) for about 10-15 minutes until crispy again. This method helps maintain their delicious texture.
Topping Storage: Keep toppings like sour cream and bravas sauce separate when storing leftovers to prevent sogginess; add them fresh when ready to serve.
What to Serve with Loaded Bravas Tots?
Warm, lively flavors make for an unforgettable meal, and these loaded delights are just the beginning of your culinary adventure.
- Crispy Cilantro Lime Rice: Light and zesty rice balances the rich, cheesy tots with a refreshing touch.
- Grilled Corn on the Cob: Sweet, charred corn adds a touch of summer freshness and pairs beautifully with the smoky bravas sauce.
- Mixed Greens Salad: A vibrant salad with tangy vinaigrette helps cut through the richness, offering a pleasant contrast.
- Spicy Queso Dip: Creamy and cheesy, this dip enhances flavor and makes the meal feel extra festive and indulgent.
- Chilled Sangria: Fruity and refreshing, sangria complements the spice of the bravas sauce and turns any gathering into an occasion.
- Chocolate Churros: For dessert, these crispy, sweet churros provide a delightful finish to your Spanish-inspired feast.
With these pairings, you’ve created a memorable meal that elevates your Loaded Bravas Tots to star status!
Expert Tips for Loaded Bravas Tots
-
Press Firmly: Make sure to press the tater tots firmly into the muffin cups to help them hold their shape during baking and prevent breakage.
-
Crispiness Check: For extra crispiness, don’t skip the second baking after molding the tater tots into cups; this step is crucial for achieving that perfect crunch.
-
Individual Toppings: If storing leftovers, keep the toppings separate to maintain texture. Reheat in the oven instead of the microwave for the best results.
-
Make-Ahead Sauce: Consider preparing the bravas sauce a day in advance. This allows the flavors to deepen and enhances the overall taste of your Loaded Bravas Tots.
-
Monitor Spice Level: When adjusting the heat, remember that more cayenne or hot paprika will intensify the spiciness. Start with lesser amounts and gradually add more to suit your taste.
Loaded Bravas Tots: Endless Customizations
Create your own perfect version of this delicious dish by trying out these fun and tasty variations!
- Vegetarian Option: Omit the bacon and load up on caramelized onions for a savory twist that everyone will love.
- Cheese Swap: Replace manchego cheese with cheddar or pepper jack for a different flavor kick and melting experience.
- Extra Veggies: Toss in diced bell peppers or green onions into the bravas sauce for added color and flavor.
- Spice It Up: Increase the heat by adding chopped fresh jalapeños or a dash of chili flakes to the sauce for an extra kick!
- Creamy Non-Dairy: Use plant-based cream or cashew sour cream as a delicious alternative for a vegan-friendly topping.
- Crispy Topping: For added crunch, try topping with crispy fried onions or even crushed tortilla chips before serving.
- Herb Infusion: Experiment with different herbs like dill or cilantro instead of parsley for a unique flavor profile in your presentation.
- Sauce Variety: Swap bravas sauce for a zesty chipotle aioli or any favorite dipping sauce for an exciting flavor twist.
Dive into any of these adaptations to create your ideal Loaded Bravas Tots, and don’t forget to give a shoutout to my Loaded Baked Potato recipe—a great pairing for all your party needs!
Loaded Bravas Tots Recipe FAQs
How do I select the perfect frozen tater tots?
Absolutely! When choosing frozen tater tots, look for brands that use whole potatoes or have fewer additives. The ideal tots should be golden brown and free of dark spots or freeze burn. Check the packaging for a crispy guarantee, as it makes all the difference in your Loaded Bravas Tots!
What is the best way to store leftover Loaded Bravas Tots?
Very! Leftover Loaded Bravas Tots should be placed in an airtight container and stored in the refrigerator for up to 3 days. To keep them fresh, ensure they’re fully cooled before sealing.
Can I freeze Loaded Bravas Tots?
Yes, you can! To freeze your Loaded Bravas Tots, first allow them to cool completely. Lay them in a single layer on a baking sheet and freeze until solid. Then, transfer them to a freezer bag, squeezing out as much air as possible. They can be stored for up to 2 months. When you’re ready to enjoy them, reheat in the oven at 375°F (190°C) for about 10-15 minutes until crispy.
What should I do if my tater tots don’t hold their shape?
If your tater tots are breaking apart, make sure you press them down firmly in the muffin tins before the second bake. Using the back of a spoon to shape and compact the tater tots helps maintain their integrity. Additionally, ensure you’re using properly frozen tater tots, as thawed ones can lose structure.
Are there any dietary considerations for Loaded Bravas Tots?
Absolutely! For gluten-free options, make sure the frozen tater tots are labeled gluten-free. You can easily customize the recipe for vegetarian diets by omitting bacon and adding caramelized onions. For nut allergies, ensure that the cooking oil and any condiments used are free from cross-contamination.
Can I prepare bravas sauce in advance?
Of course! Making the bravas sauce ahead of time is a fantastic idea. You can prepare it up to a day before serving. Simply let it cool and store it in an airtight container in the refrigerator. When ready to use, just heat it on the stove and then pour it over your baked Loaded Bravas Tots for optimal flavor!
Loaded Bravas Tots: Irresistibly Cheesy Party Delight
Ingredients
Equipment
Method
- Preheat your oven to 425°F (220°C) and grease a 24-cup mini muffin tin with cooking spray or olive oil.
- Place two frozen tater tots in each muffin cup and bake for 10 minutes.
- Press down on the softened tater tots to mold them into cup shapes and return to the oven for an additional 15 minutes.
- Heat olive oil in a saucepan over medium heat and sauté chopped onion for 5 minutes until translucent, then add minced garlic for another minute.
- Stir in the sweet and hot smoked paprika along with cayenne pepper. Add tomato puree and roasted red peppers, and simmer for 10 minutes.
- Transfer the bravas sauce to a blender, blend until smooth, and mix in sugar and sherry vinegar, adjusting seasoning as needed.
- Fill each tater tot cup with shredded manchego cheese and bake for 2-3 minutes until melted.
- Top each loaded bravas tot with bravas sauce, sour cream or garlic aioli, and garnish with herbs and smoked paprika before serving.
Leave a Reply