
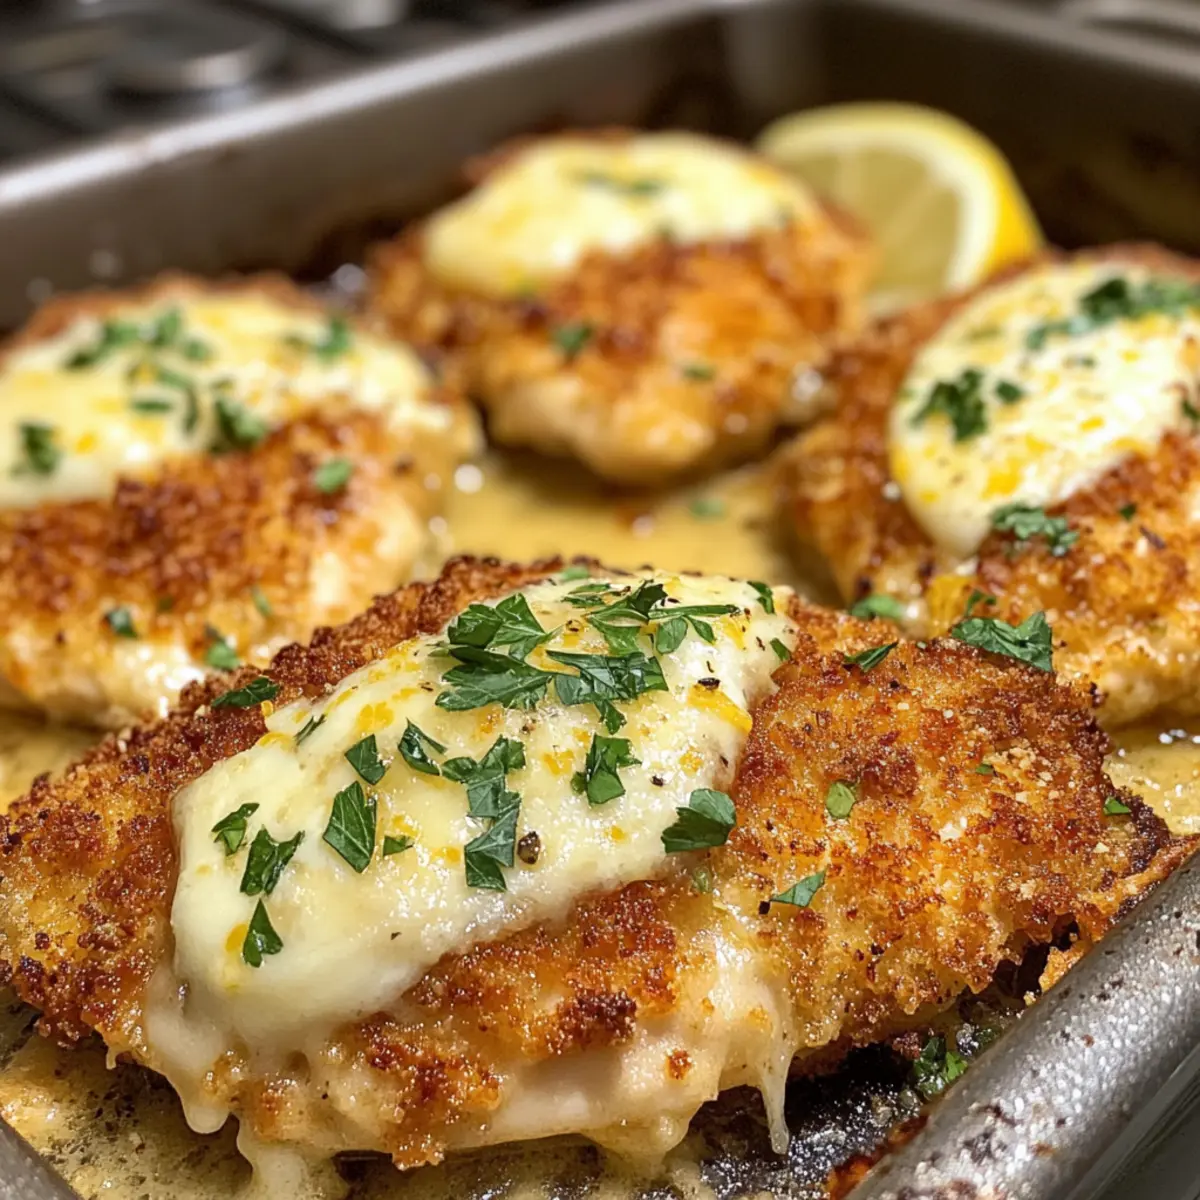
You won’t believe how a simple chicken dinner can elevate your weeknight meals! Crispy Lemon Chicken Romano brings a delightful twist to your dinner table, enveloping tender chicken cutlets in a golden panko and romano cheese crust. This dish not only delights the senses with its bright citrus notes and savory cheese, but it’s also a fantastic option for busy evenings, taking just 30 minutes to prepare. Packed with high protein and an irresistible crunch, it’s the kind of comfort food that makes every bite feel like a warm hug. Whether you’re serving it up to the family or impressing guests, this dish is sure to leave everyone craving more. Are you ready to fall in love with this Italian-inspired delight?

Why is Lemon Chicken Romano a must-try?
Irresistible Crunch: The crispy panko and romano cheese crust elevates the chicken to new heights, creating a texture that’s simply addictive.
Bright Flavor: Fresh lemon zest combines with savory cheese for an exquisite balance that’s both refreshing and comforting.
Quick & Easy: Ready in just 30 minutes, it’s perfect for busy weeknights when you crave something special without the fuss.
Versatile Dish: Whether paired with vegetables or served alongside a light pasta, this dish adapts beautifully to any side you choose. For more delicious chicken ideas, try Hot Honey Chicken or Street Corn Chicken.
Crowd Pleaser: This recipe is destined to impress family and friends alike, making it a great choice for casual gatherings or special occasions.
Lemon Chicken Romano Ingredients
• Here’s everything you need to make this crispy delight!
For the Chicken
- Chicken Breasts – Boneless and skinless for a tender and high-protein dish; pound them to an even thickness.
- Egg – Essential for binding the breadcrumbs; a beaten egg helps the crust stick better.
For the Coating
- All-Purpose Flour – Helps in achieving a crispy crust; can be omitted for gluten-free options.
- Panko Bread Crumbs – The secret to that irresistible crunch; substitute with regular breadcrumbs if needed.
- Romano Cheese – Adds a salty, tangy kick; feel free to replace it with parmesan for a different flavor.
- Garlic Powder – Enhances flavor depth; fresh garlic can be used for a more vibrant taste.
For the Cheese
- Whole Milk Mozzarella Cheese – Adds that creamy, melty texture; provolone can replace it for a sharper flavor.
- Provolone Cheese – Optional, but it provides an extra layer of deliciousness.
For the Flavor
- Fresh Oregano – Brightens the dish; dried oregano is a fine substitute if fresh isn’t available.
- Lemon Zest – Infuses the chicken with a fresh citrus flavor; always use fresh lemon for optimal brightness.
- Salt and Pepper – Essential for seasoning; adjust to your preferred taste.
For Frying
- Olive Oil – Ideal for frying, providing richness; canola oil also works if you prefer.
For Serving
- Lemon Wedges – Perfect for spritzing on the chicken to enhance that lemon flavor.
- Fresh Parsley (Optional) – A lovely garnish that adds a touch of color and freshness to your plate.
Each ingredient comes together to create a unforgettable Lemon Chicken Romano, a comforting dish that you will love preparing!
Step‑by‑Step Instructions for Lemon Chicken Romano
Step 1: Preheat and Prepare
Begin by preheating your oven to 350°F (175°C) to get it ready for the crispy Lemon Chicken Romano. While it heats up, pat your chicken cutlets dry with paper towels and season them lightly with salt. Allow the seasoned cutlets to rest for about 10 minutes, which helps enhance their flavor and juiciness.
Step 2: Create the Coating Mixture
In one bowl, whisk together the egg and flour until well blended. In a separate bowl, combine panko breadcrumbs, grated romano cheese, fresh oregano, lemon zest, garlic powder, and pepper. Mix these ingredients thoroughly so that the flavorful elements can coat the chicken evenly, ensuring every bite of your Lemon Chicken Romano is packed with taste.
Step 3: Dredge the Chicken
Take each seasoned chicken cutlet and dredge it first in the egg mixture, making sure it’s fully coated, then transfer it to the breadcrumb mixture. Press the panko mixture onto the chicken to ensure it adheres well, creating that delicious crispy layer. Set the breaded cutlets aside on a plate, ready for frying.
Step 4: Heat the Skillet
In a large non-stick skillet, heat about 1/4 cup of olive oil over medium-high heat. To test if the oil is hot enough, sprinkle a few breadcrumbs into the skillet—if they sizzle immediately, you’re ready to fry. Carefully place half of the breaded chicken cutlets in the skillet, allowing them to fry for about 2 minutes on each side until they are golden brown.
Step 5: Transfer to Baking Sheet
Once the first batch of chicken cutlets achieves a beautiful golden color, use tongs to transfer them to a baking sheet lined with parchment paper. This allows excess oil to drip off, ensuring your Lemon Chicken Romano remains light and crispy while you cook the rest of the cutlets in the skillet.
Step 6: Fry Remaining Chicken
In the same skillet, add a little more olive oil if needed, and repeat the frying process with the remaining chicken cutlets. Again, fry until they are golden brown on both sides, about 2 minutes each. As these finish up, remember to keep the first batch warm in the oven while you wrap up.
Step 7: Add Cheese and Bake
Top each fried cutlet with a generous mound of mozzarella and provolone cheese while they’re still warm. Carefully place the baking sheet in the preheated oven and bake for about 8 to 10 minutes, or until the cheese is melted and bubbly, and the chicken reaches an internal temperature of 165°F (74°C).
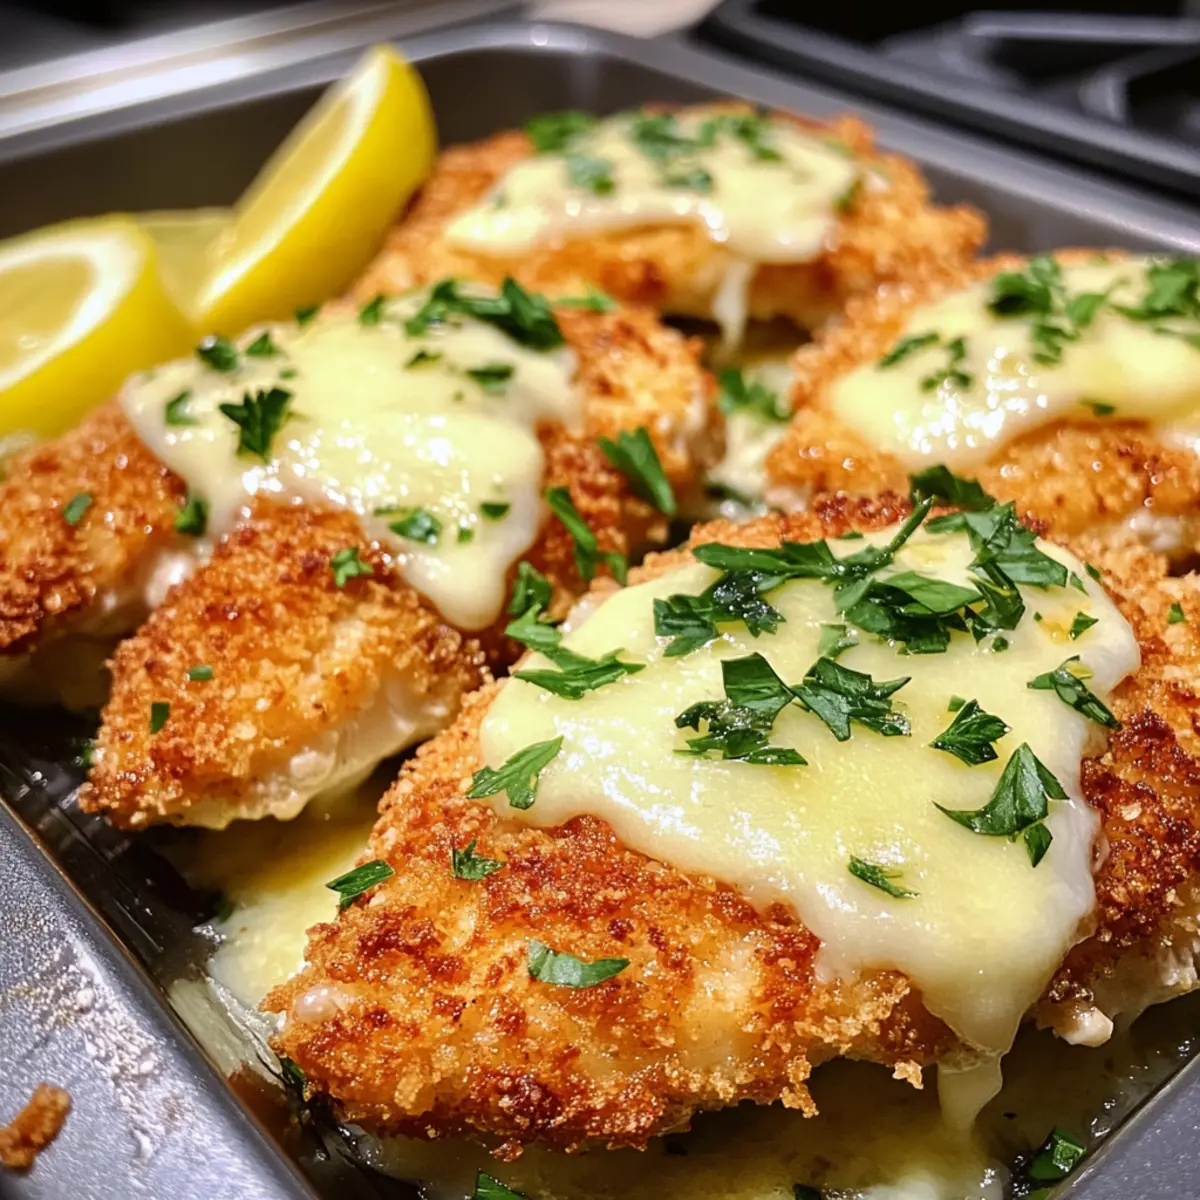
Step 8: Garnish and Serve
Once baked, remove your Lemon Chicken Romano from the oven and let it rest for a minute. Garnish with fresh oregano and parsley for a pop of color. Serve warm with lemon wedges on the side, giving each bite a refreshing squeeze of citrus to enhance the delightful flavors of this comforting dish.
Lemon Chicken Romano Variations
Feel free to get creative with your Lemon Chicken Romano, as these tasty twists are sure to delight your taste buds!
- Vegetarian Option: Swap chicken for thinly sliced eggplant coated in the same crispy mixture for a comforting vegetarian dish.
- Spinach Layer: Add a layer of fresh spinach or arugula under the cheese to introduce vibrant greens and elevate flavor.
- Cheese Blend: Experiment with a mix of cheddar and mozzarella for a unique, cheesy flavor that complements the lemon zest beautifully.
- Spicy Kick: Sprinkle some crushed red pepper flakes into the breadcrumb mixture for an invigorating zing that adds warmth to every bite.
- Lemon Herb Twist: Infuse the egg mixture with fresh herbs like basil or thyme to enhance the aromatic experience of this delicious dish.
- Garlic Lovers: Substitute garlic powder with finely minced fresh garlic for an even more aromatic and robust flavor.
- Gluten-Free: Use gluten-free panko breadcrumbs and omit the flour for a crunchy, gluten-free version that everyone will enjoy.
- Nutty Crunch: Incorporate finely chopped nuts or seeds into the panko mixture for added crunch and a nutty flavor that pairs perfectly with the creamy cheese.
For more mouthwatering chicken ideas, don’t miss out on trying Garlic Parmesan Chicken Meatloaf or the delightful Sticky Garlic Chicken Noodles. Each variation promises to enhance your culinary journey with exciting flavors!
Make Ahead Options
These Crispy Lemon Chicken Romano cutlets are perfect for meal prep enthusiasts! You can bread the chicken and refrigerate it for up to 24 hours in advance, which helps the flavors meld beautifully. Simply prepare the egg mixture and panko coating, then dredge the chicken cutlets, placing them on a baking sheet lined with parchment paper before chilling. When you’re ready to cook, just heat the oil, fry, and bake as instructed. To maintain that delightful crispiness, avoid pre-cooking the chicken and fry it fresh right before serving. This way, you’ll enjoy all the comforting, zesty flavors when it’s time to dig in!
What to Serve with Crispy Lemon Chicken Romano
Imagine a vibrant table set for a comforting meal, where each dish enhances the bright, zesty chicken guided by warmth and love.
-
Garlic Mashed Potatoes: Creamy and buttery, these mashed potatoes provide a rich contrast to the crispy chicken, making every bite a delight.
-
Steamed Asparagus: The tender-crisp texture and earthy flavor of asparagus make for a fresh, vibrant complement that brightens your plate.
-
Light Arugula Salad: Peppery arugula drizzled with lemon vinaigrette offers a refreshing crunch, cutting through the richness of the cheese.
-
Herbed Couscous: Fluffy couscous mixed with herbs and lemon zest echoes the dish’s flavors while adding a light, fluffy texture.
-
Roasted Vegetables: Colorful medleys of roasted peppers, zucchini, and carrots bring sweetness and beautiful presentation, enhancing the meal’s appeal.
-
Lemon Wedges: Don’t forget these! A simple squeeze of lemon brightens the dish further, adding a punch of freshness to every juicy bite.
-
Chardonnay: A chilled glass of Chardonnay complements the chicken’s flavors perfectly, enhancing both the richness and citrus notes beautifully.
Expert Tips for Lemon Chicken Romano
-
Even Thickness: Make sure your chicken cutlets are pounded to an even thickness. This ensures they cook uniformly, avoiding dry or undercooked sections.
-
Don’t Overcrowd: When frying, work in batches to prevent overcrowding the skillet. This guarantees optimal crispiness and perfect frying results for your Lemon Chicken Romano.
-
Check Temperature: Use an instant-read thermometer to ensure chicken reaches 165°F (74°C). This keeps your dish juicy without risking dryness.
-
Let It Rest: After frying, allow the chicken to sit for a minute before serving. This lets the flavors settle and maintains crispiness.
-
Fresh Ingredients: Always use fresh lemon zest and herbs. Fresh ingredients enhance the flavor profile, making each bite of Lemon Chicken Romano truly unforgettable.
Storage Tips for Lemon Chicken Romano
-
Fridge: Store leftover Lemon Chicken Romano in an airtight container for up to 3 days. Make sure to allow it to cool before sealing to preserve freshness.
-
Freezer: For longer storage, freeze the chicken for up to 2 months. Wrap each cutlet tightly in plastic wrap, followed by aluminum foil, to prevent freezer burn.
-
Reheating: To maintain its crispy texture, reheat the chicken in a preheated oven at 350°F (175°C) for about 10-15 minutes. This will keep the crust deliciously crunchy.
-
Airtight: When storing, ensure the container is airtight to prevent moisture from making the crust mushy. Enjoy every last bite of this comforting dish!

Lemon Chicken Romano Recipe FAQs
How do I select ripe lemons for this recipe?
Absolutely! For the best flavor, choose lemons that are firm, bright yellow, and slightly fragrant. Avoid any that have dark spots or feel overly soft. They should feel heavy for their size, indicating juiciness.
What’s the best way to store leftover Lemon Chicken Romano?
I recommend placing leftovers in an airtight container in the refrigerator. They will keep fresh for up to 3 days. Always allow the chicken to cool completely before sealing it up to maintain its tasty texture.
Can I freeze Lemon Chicken Romano? If so, how?
Yes, you can! To freeze your Lemon Chicken Romano, wrap each chicken cutlet tightly in plastic wrap, making sure no air can get in. Then, place them in a heavy-duty freezer bag or wrap them in aluminum foil. They will be good for up to 2 months. Just remember to label them with the date!
What do I do if the breading isn’t sticking to the chicken?
Very! If you find the breading isn’t adhering properly, try dredging the chicken in a mixture that includes flour before the egg; this provides a better base for the breadcrumbs. Additionally, pressing the panko mixture onto the chicken firmly can help it adhere better.
Are there any dietary considerations I should keep in mind?
Definitely! If you have gluten sensitivities, you can omit the all-purpose flour and use gluten-free panko breadcrumbs instead. For a dairy-free option, try substituting nutritional yeast or a dairy-free cheese in place of the Romano and mozzarella. Always check ingredient labels to ensure compatibility with allergies.
How can I reheat the leftovers to keep them crispy?
To recapture that delicious crunch, preheat your oven to 350°F (175°C). Place the chicken on a baking sheet and heat for about 10–15 minutes. Avoid the microwave, as it can make the crust soggy. This way, every bite of your Lemon Chicken Romano will be just as delightful as when you first made it!
Zesty Lemon Chicken Romano: Crisp, Comforting Delight
Ingredients
Equipment
Method
- Preheat your oven to 350°F (175°C) and pat your chicken cutlets dry with paper towels. Season lightly with salt and let rest for about 10 minutes.
- In a bowl, whisk together the egg and flour. In another bowl, combine panko breadcrumbs, grated romano cheese, fresh oregano, lemon zest, garlic powder, and pepper.
- Dredge each seasoned chicken cutlet in the egg mixture, then the breadcrumb mixture, pressing to adhere. Set aside on a plate.
- Heat 1/4 cup of olive oil in a large skillet over medium-high heat. Fry half the breaded chicken cutlets for about 2 minutes on each side until golden brown.
- Transfer fried chicken to a baking sheet lined with parchment paper to drain excess oil.
- Repeat frying with remaining chicken cutlets, keeping the first batch warm in the oven.
- Top each fried cutlet with mozzarella and provolone cheese, then bake for 8 to 10 minutes until cheese is melted.
- Garnish with fresh oregano and parsley, and serve warm with lemon wedges.
Leave a Reply