
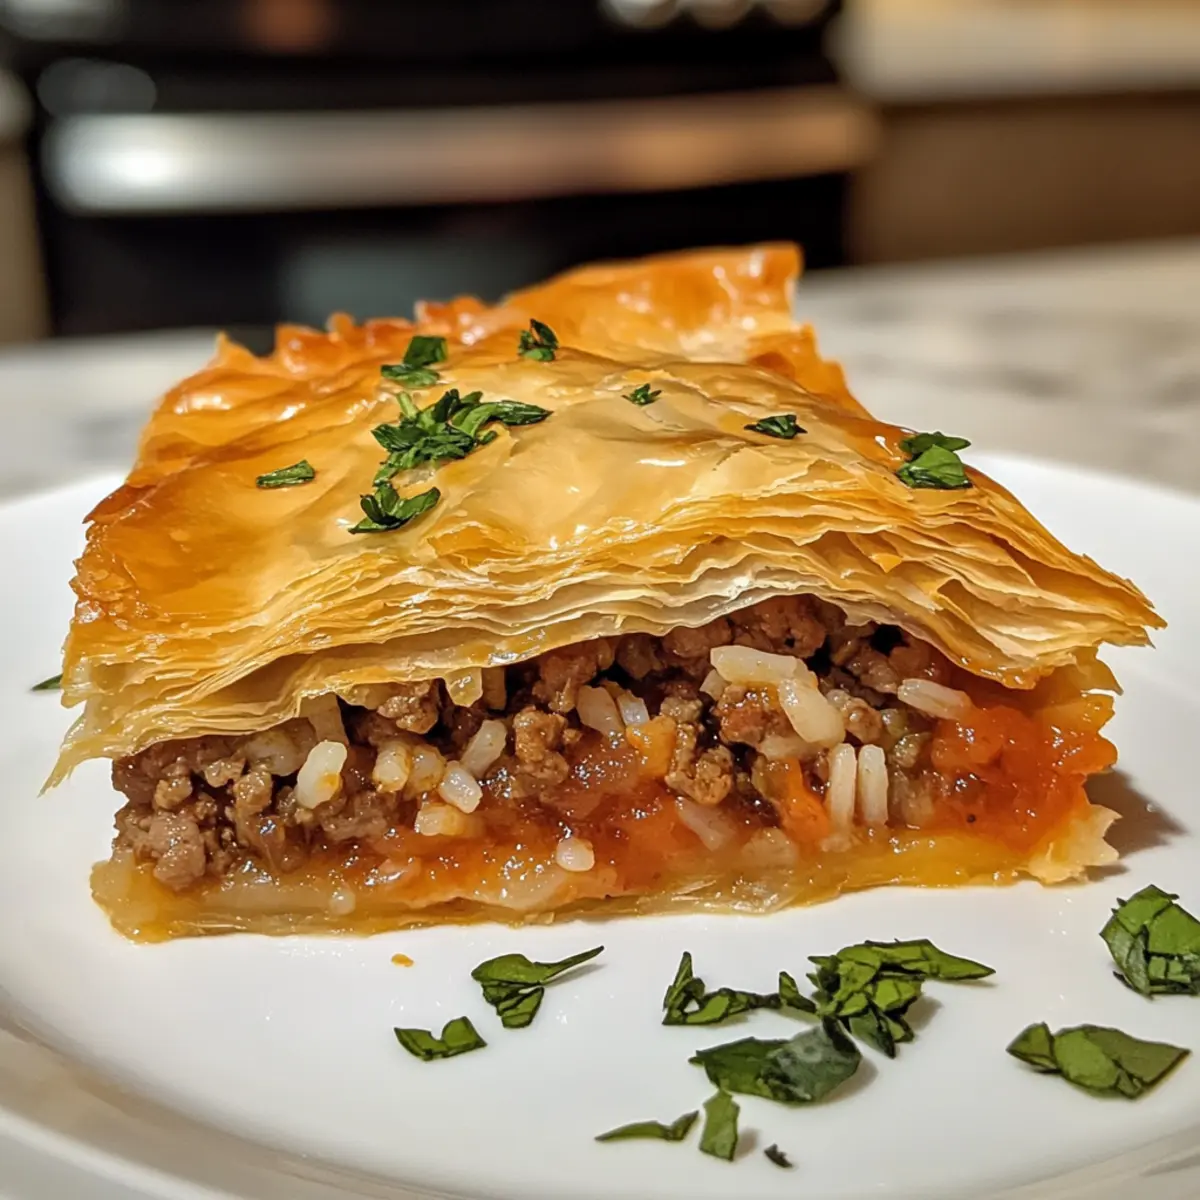
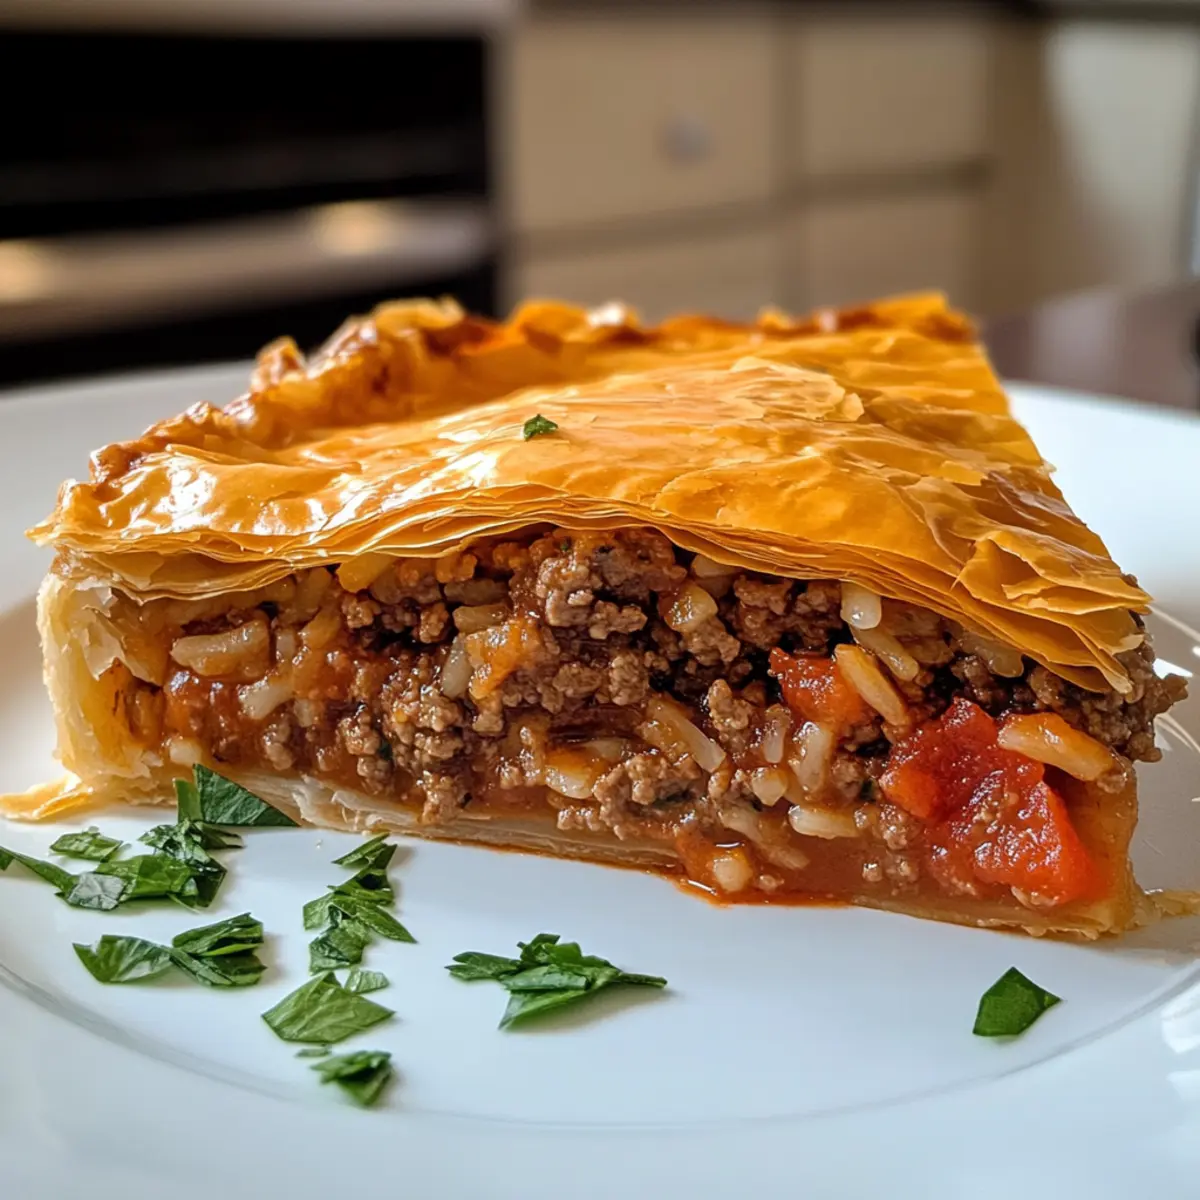
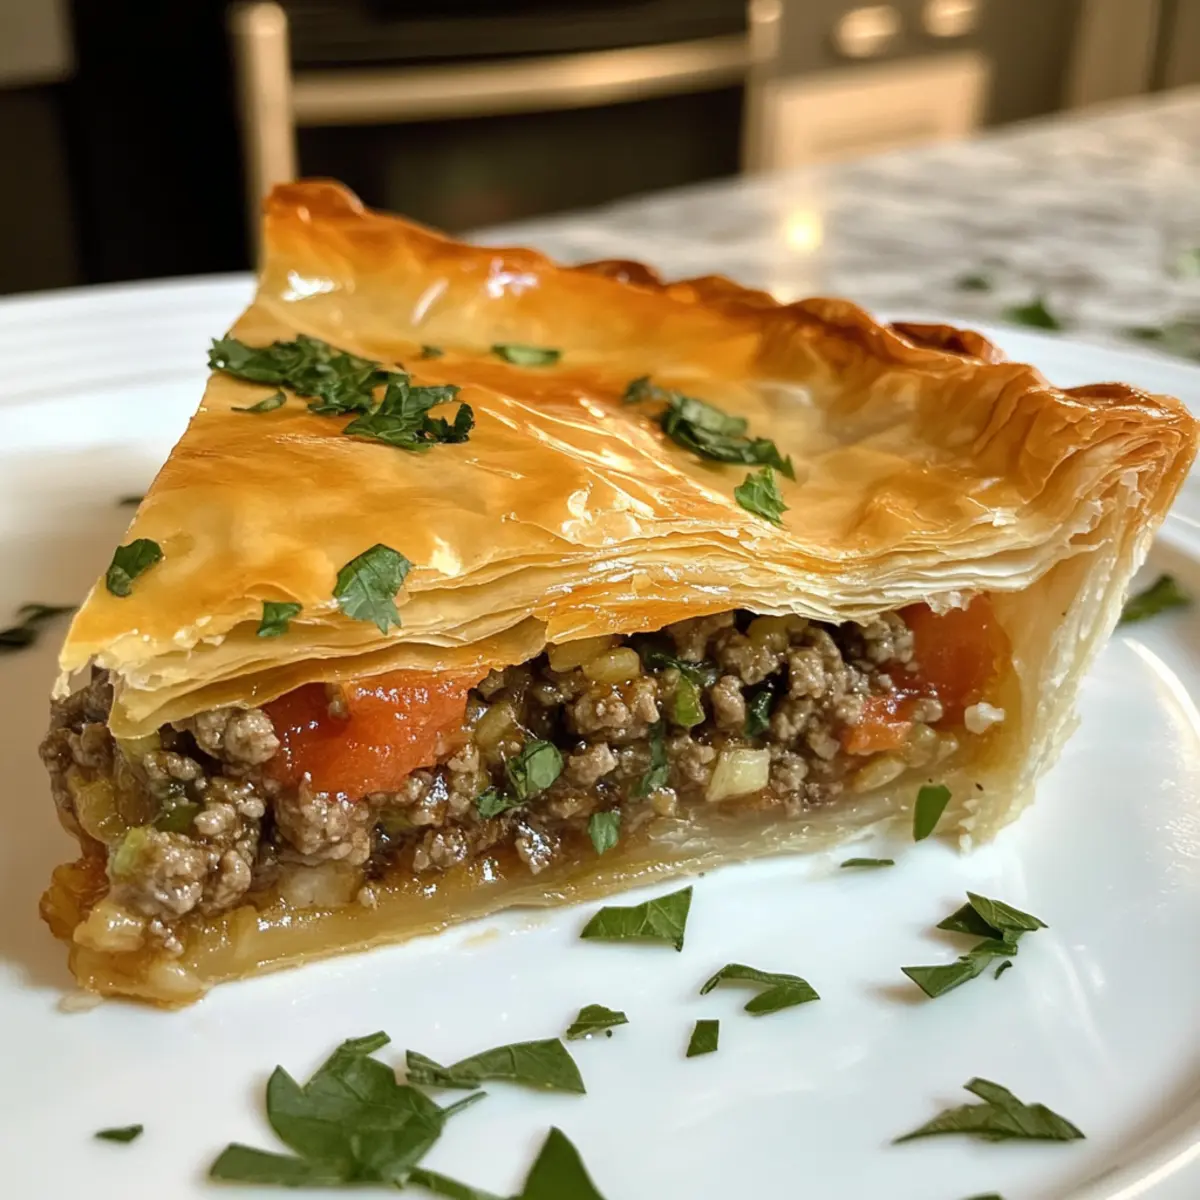
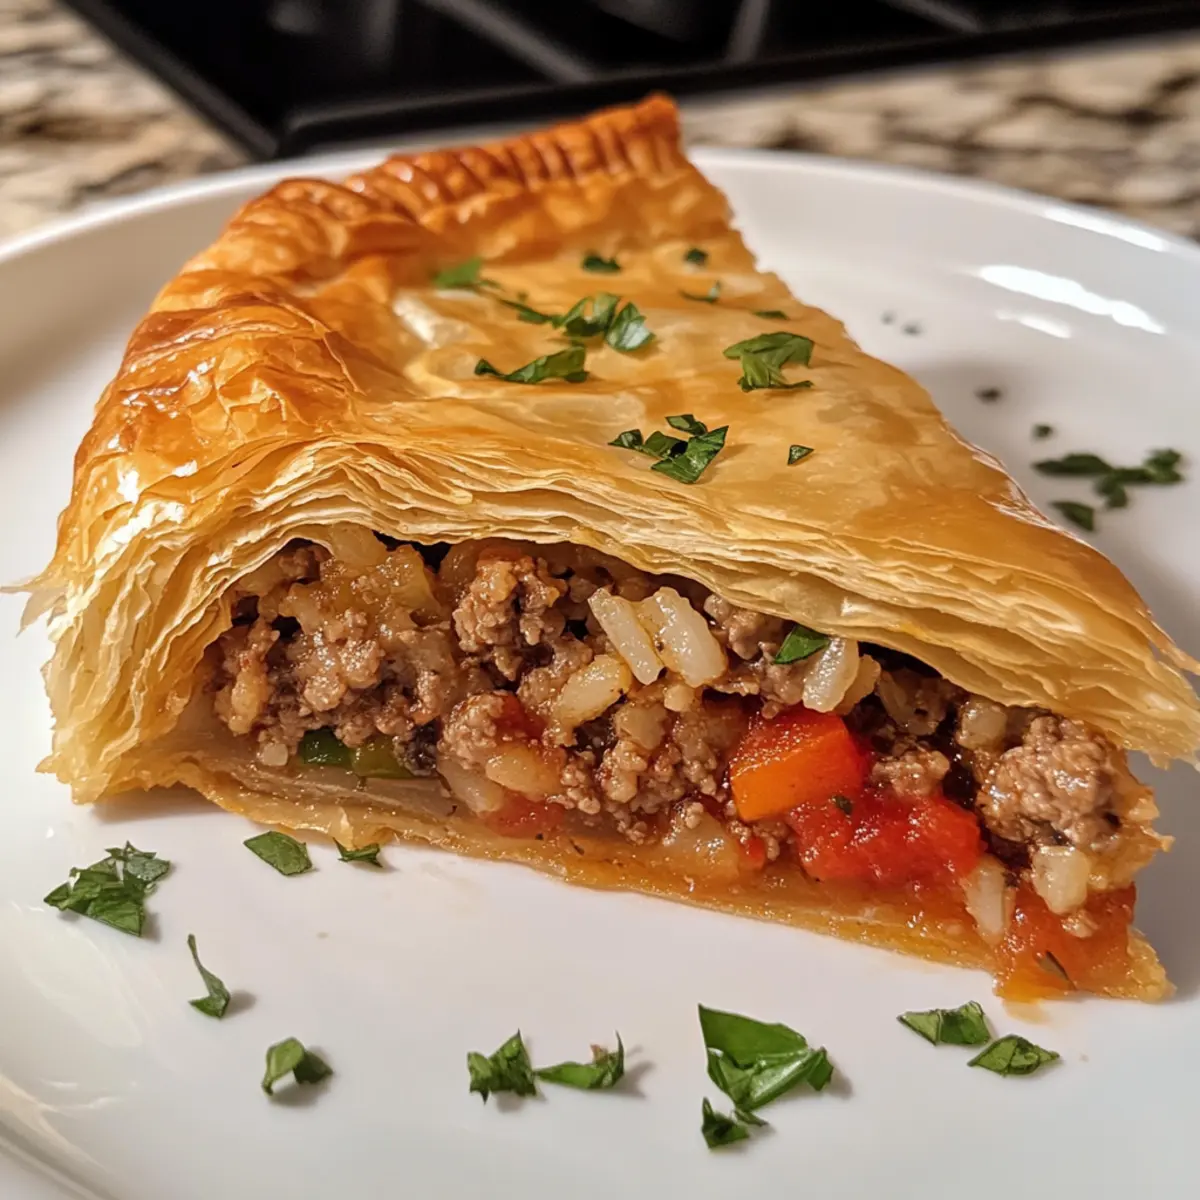
As the sun sets and the aroma of buttery phyllo fills the kitchen, my mind drifts to the magic that is Kreatopita. This traditional Greek meat pie beautifully melds crunchy pastry with a savory filling of seasoned beef and rice, bringing a taste of the Mediterranean to your table. The best part? This Kreatopita recipe is not only a comforting dish that warms the heart but also a convenient make-ahead meal that transforms busy weeknights into culinary delights. Whether you’re hosting a festive gathering or simply treating yourself, each slice will envelop your senses in home-cooked goodness. Curious about how to create this delightful pie? Let’s dive in!
Why is Kreatopita a Must-Try?
Irresistible Comfort: There’s nothing quite like the cozy embrace of a flaky pastry filled with a savory meat mixture.
Versatility: Whether you choose classic ground beef or opt for ground lamb, pork, or even a vegetarian twist with mushrooms, you can customize this recipe to your taste.
Make-Ahead Magic: Perfect for busy weeknights, you can prepare this dish in advance and bake it when you’re ready—ensuring warm, delicious meals on demand.
Crowd-Pleasing: Ideal for gatherings or family dinners, this pie is sure to impress your guests and become a cherished dish in your home.
Pair this delightful Kreatopita with a fresh Greek salad or a dollop of tzatziki for the ultimate Mediterranean experience. If you’re looking for more inspiration, try our Street Corn Chicken for another delicious, easy meal!
Kreatopita Recipe Ingredients
For the Filling
- Ground Beef – This main protein source provides a rich flavor; consider ground lamb or pork for a unique twist.
- Onion – Adds sweetness and depth; finely chop for even cooking.
- Uncooked Rice – Absorbs flavors and adds texture; prefer white rice for quicker cooking, or pre-cook brown rice for an alternative.
- Tomato Sauce – Provides moisture and acidity to the filling; substitute with crushed tomatoes for a chunkier version.
- Oregano – Essential for traditional Greek flavor; fresh oregano elevates the taste further.
- Salt & Pepper – Necessary for seasoning; adjust according to taste.
For the Crust
- Phyllo Dough – Creates that signature crispy, flaky crust; cover sheets to keep them moist before use.
- Butter/Oil – Used to brush phyllo layers, enhancing their crispness; melted butter adds a richer flavor.
For Garnishing
- Fresh Parsley/Dill – Adds a hint of freshness when serving; optional, but highly recommended!
- Lemon Wedges – A squeeze adds a delightful citrusy brightness; serve on the side for extra zing.
Crafting this Kreatopita recipe not only fills your home with heavenly aromas but also creates memories that will bring smiles at the dinner table!
Step‑by‑Step Instructions for Kreatopita Recipe
Step 1: Sauté Base
Heat a splash of oil in a large skillet over medium heat. Add the finely chopped onion and sauté for about 5 minutes, or until it becomes soft and translucent. Stir in the ground beef, breaking it apart as it cooks, and brown until fully cooked, approximately 8–10 minutes.
Step 2: Combine Filling
With the ground beef browned, stir in the uncooked rice, tomato sauce, oregano, salt, and pepper. Add a splash of water, mix well, and let the mixture simmer for 10 minutes over low heat. The rice should absorb the flavors and swell while the filling becomes aromatic and thick.
Step 3: Prepare Phyllo Layers
Preheat your oven to 180°C (350°F). While the oven heats, brush a large baking dish with melted butter or oil. Next, take five sheets of phyllo dough and lay them one-by-one in the dish, brushing each layer generously with butter to ensure a crispy and flaky texture in your Kreatopita.
Step 4: Fill and Top
Once the filling has cooled slightly, spoon it into the prepared baking dish, spreading it evenly over the phyllo base. Take the remaining phyllo sheets, layer them on top of the filling, and brush each layer with melted butter, ensuring the edges are tucked in to secure the filling tightly inside.
Step 5: Bake
Carefully place the assembled Kreatopita into the preheated oven and bake for 40–45 minutes. Keep an eye on it, and look for a deep golden-brown color on the phyllo, indicating a perfectly crispy top. Once done, remove it from the oven and allow it to rest for a few minutes before slicing.
How to Store and Freeze Kreatopita
Fridge: Store leftover Kreatopita in an airtight container in the fridge for up to 3 days to maintain freshness and flavor.
Freezer: If you want to save some for later, freeze the unbaked assembled Kreatopita wrapped tightly in plastic wrap and aluminum foil for up to 2 months.
Reheating: To enjoy your frozen Kreatopita, thaw it overnight in the refrigerator and then bake in a preheated oven at 180°C (350°F) until heated through and the crust is crispy, about 25-30 minutes.
Make-Ahead: You can assemble the Kreatopita ahead of time and store it covered in the refrigerator for up to a day before baking.
Expert Tips for Making Kreatopita
-
Cool the Filling: Allow the filling to cool slightly before adding it to the phyllo. This helps maintain the structural integrity of the crust.
-
Choose Your Meat Wisely: If using a richer meat like ground lamb, drain excess fat to avoid sogginess in the filling and ensure a perfect texture.
-
Handle Phyllo with Care: Phyllo sheets are delicate and can tear easily. If they do rip, don’t worry! Layer the torn pieces together, as they’ll bake beautifully.
-
Storage Savvy: If you’re making your Kreatopita ahead of time, you can store the unbaked version in the refrigerator, covered, for up to a day for the best results.
-
Butter for Flakiness: Brush each layer of phyllo generously with melted butter or oil for a rich, crispy texture. It truly makes a difference in the final taste of your Kreatopita recipe!
Make Ahead Options
These Kreatopita preparations are perfect for meal prep enthusiasts! You can assemble the entire pie up to 24 hours in advance. Simply prepare the filling and layer it with phyllo dough, then cover tightly with plastic wrap and refrigerate until ready to bake. This not only shaves off baking time when you’re busy, but it also allows the flavors to meld beautifully. When you’re ready to serve, preheat your oven and bake the Kreatopita directly from the fridge—just add an extra 5-10 minutes to the bake time to ensure it’s heated through. Enjoy warm, delicious bites that taste just as good as when freshly made!
What to Serve with Kreatopita?
Dive into a delightful culinary adventure by creating an entire meal that perfectly accompanies this comforting Greek treasure.
-
Greek Salad: Bursting with fresh cucumbers, tomatoes, olives, and feta, it provides a crisp and refreshing contrast to the flaky pie.
-
Tzatziki Sauce: This creamy yogurt dip infused with cucumber and garlic adds a cool, tangy element that pairs beautifully with the rich filling.
-
Warm Pita Bread: Soft and pillowy, warm pita is perfect for scooping up every last bite of Kreatopita, enhancing the meal’s heartiness.
-
Roasted Vegetables: A medley of seasonal roasted vegetables, drizzled with olive oil, complements the savory flavors and adds vibrant colors to your table.
-
Lemon Wedges: Fresh lemon squeezed over the slice adds a zesty brightness, enhancing the savory meat and rice filling harmoniously.
-
Sparkling Water with Mint: A refreshing drink, this adds a hint of sparkle and minty freshness, enhancing the flavors of this Mediterranean feast.
Creating a complete meal is a joyful way to express love and warmth, making each bite of your homemade Kreatopita even more memorable.
Kreatopita Recipe Variations
Feel free to get creative and customize this delightful dish to suit your taste buds!
-
Lamb Swap: Use ground lamb instead of beef for a rich, gamey flavor that’s traditional in many Greek households. Its unique taste will transport your senses straight to the Mediterranean.
-
Pork Upgrade: Ground pork is another fantastic alternative. This meat offers a slightly sweeter flavor, making your Kreatopita irresistible to anyone at the table.
-
Vegetarian Delight: Replace the meat with a mixture of sautéed mushrooms and spinach for a hearty vegetarian option. The umami from the mushrooms paired with the greens provides a satisfying taste.
-
Spicy Kick: Add red pepper flakes or diced jalapeños to the filling for a spicy twist. This adds not just heat but also a vibrant flavor that will awaken your palate.
-
Mini Bites: Create mini Kreatopita in muffin tins for easy appetizers or party snacks. Just be sure to adjust the baking time for bite-sized portions!
-
Rice Choices: Experiment with brown rice or quinoa in place of white rice for extra fiber and a nutty flavor. Each brings a unique texture that complements the meat filling wonderfully.
-
Herb Variations: Try different herbs like thyme or rosemary in place of oregano for a fresh twist. Each herb offers a distinct aroma that invites curiosity.
-
Cheesy Richness: Incorporate feta cheese with the meat filling for an extra tangy flavor. The creamy texture and salty taste of feta enhance every bite of your Kreatopita.
If you’re inspired to explore more recipes, be sure to check out our Chicken Mein for another comforting option, or try our sweet Vanilla Pumpkin Marshmallow coffee syrup for a delightful drink pairing!
Kreatopita Recipe FAQs
What kind of meat can I use for the filling?
Absolutely! The traditional version uses ground beef, but you can replace it with ground lamb or pork for a different flavor profile. For a lighter version, ground turkey or chicken works nicely, and for a vegetarian option, sautéed mushrooms and spinach are fantastic substitutes.
How should I store the Kreatopita once it’s baked?
To keep your Kreatopita delicious, store any leftovers in an airtight container in the refrigerator for up to 3 days. Just be sure to let it cool completely before sealing it up to help maintain its texture.
Can I freeze Kreatopita? If so, how?
Very! If you’d like to save some for later, you can freeze the unbaked assembled Kreatopita. Just wrap it tightly in plastic wrap and aluminum foil, and it will keep well in the freezer for up to 2 months. When you’re ready to enjoy it, simply thaw it overnight in the refrigerator, then bake as usual until golden and crispy.
What should I do if my phyllo dough tears?
No worries! If your phyllo sheets tear, just layer the torn pieces together. They will bake up beautifully, and no one will notice any imperfections in your Kreatopita. Just be sure to still brush each layer with melted butter for that crispy texture.
How can I tell if my Kreatopita is fully baked?
You’ll know your Kreatopita is ready when the top is golden brown and crispy, which typically takes about 40-45 minutes at 180°C (350°F). It’s a good idea to keep an eye on it during the bake to prevent over-browning.
Is Kreatopita safe for pets?
While the ingredients in Kreatopita are generally safe for pets, it’s best to avoid giving them foods that contain onions or excessive seasoning. If you’d like to share small pieces, ensure they are free of any spices and make sure it’s in moderation. Always consult your vet if you have specific dietary concerns for your pets.
Kreatopita Recipe: Savory Greek Meat Pie for Cozy Nights
Ingredients
Equipment
Method
- Heat a splash of oil in a large skillet over medium heat. Add the finely chopped onion and sauté for about 5 minutes, or until it becomes soft and translucent.
- Stir in the ground beef, breaking it apart as it cooks, and brown until fully cooked, approximately 8–10 minutes.
- With the ground beef browned, stir in the uncooked rice, tomato sauce, oregano, salt, and pepper. Add a splash of water, mix well, and let the mixture simmer for 10 minutes over low heat.
- Preheat your oven to 180°C (350°F). While the oven heats, brush a large baking dish with melted butter or oil.
- Take five sheets of phyllo dough and lay them one-by-one in the dish, brushing each layer generously with butter.
- Once the filling has cooled slightly, spoon it into the prepared baking dish, spreading it evenly over the phyllo base.
- Layer the remaining phyllo sheets on top of the filling, brushing each layer with melted butter, ensuring the edges are tucked in to secure the filling tightly inside.
- Carefully place the assembled Kreatopita into the preheated oven and bake for 40–45 minutes.
- Once done, remove it from the oven and allow it to rest for a few minutes before slicing.
Leave a Reply