
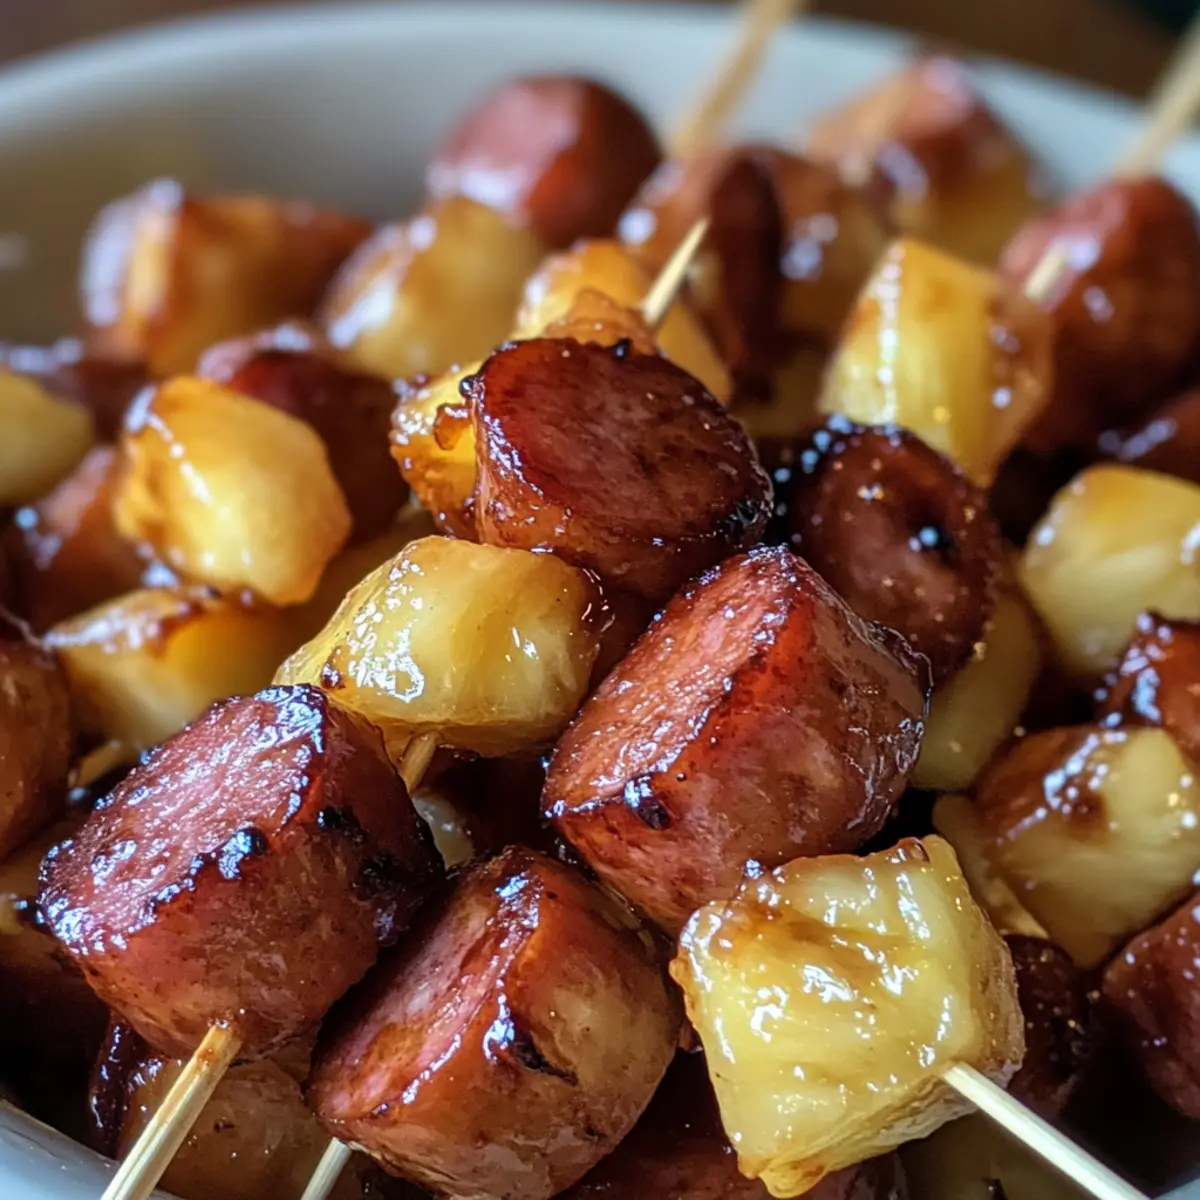
As I stood by the kitchen counter, the scent of sizzling kielbasa and sweet pineapple wafted through the air, instantly transporting me to joyful gatherings filled with laughter and delicious bites. These Glazed Kielbasa Pineapple Bites are a delightful fusion of sweet and savory flavors that never fail to impress at any get-together. With only 25 minutes of preparation, these bites come together quickly, making them the ideal appetizer for last-minute parties or cozy family game nights. The juicy pineapple chunks perfectly complement the hearty kielbasa, creating a crowd-pleasing dish that even the pickiest eaters will love. Plus, they’re gluten-friendly, so everyone can enjoy them hassle-free! Curious about how to whip up this enticing treat from scratch? Let’s dive into the flavorful world of Kielbasa Pineapple Bites and discover the joy of homemade goodness!

Why are Kielbasa Pineapple Bites irresistible?
Simplicity at its finest: These irresistible bites are quick to whip up, taking only 25 minutes from start to finish. Crowd-Pleaser: A delightful blend of sweet pineapple and savory kielbasa makes them a hit at any gathering. Versatile options: Substitute with your favorite proteins or sauces for a personal twist. Gluten-Friendly: Enjoy with peace of mind, as they cater to various dietary needs. For an extra treat, pair them with refreshing drinks, just like my Strawberry Cheesecake Bites or your choice of dipping sauce!
Kielbasa Pineapple Bites Ingredients
For the Bites
• Kielbasa – The main protein source giving these bites their hearty flavor; feel free to swap it for turkey kielbasa if you’re seeking a lighter option.
• Pineapple Chunks – These add a burst of sweetness and moisture; using fresh pineapple can elevate the flavor to new heights!
• Toothpicks – Essential for assembly and serving; choosing wooden, plain toothpicks helps avoid burning.
For the Glaze
• Teriyaki Sauce – Offers a savory depth to the bites; gluten-free soy sauce works as a perfect substitute.
• Sweet Chili Sauce – This thick, sweet, and mildly spicy sauce enhances every bite; if you’re out, honey or a ketchup-sriracha mix might work in a pinch.
• Honey – A natural sweetener that rounds out the glaze; maple syrup makes a fabulous vegan alternative.
• Pineapple Juice – Bring your glaze to life with this fruity addition; use juice saved from your canned pineapple chunks for ease.
These Kielbasa Pineapple Bites not only tantalize your taste buds, but they also make entertaining a breeze!
Step‑by‑Step Instructions for Kielbasa Pineapple Bites
Step 1: Soak Toothpicks
Begin by soaking wooden toothpicks in water for about 20 minutes to prevent burning during baking. This step is crucial for ensuring that the toothpicks remain intact while the Kielbasa Pineapple Bites bake in the oven. Meanwhile, gather your ingredients and equipment to keep your prep seamless.
Step 2: Preheat Your Oven
Set your oven to preheat at 425°F (220°C) while you prepare the baking sheet. Line a baking sheet with parchment paper to create a non-stick surface for the bites. The parchment paper ensures easy cleanup, allowing you to focus on assembling your delicious Kielbasa Pineapple Bites.
Step 3: Assemble the Bites
Take a toothpick and skewer one piece of kielbasa followed by a chunk of pineapple. Repeat this process, creating pairs until you’ve used up your ingredients. The combination of savory kielbasa with sweet pineapple is what makes these bites irresistible. Arrange the assembled bites on your lined baking sheet, leaving space between each for even cooking.
Step 4: Prepare the Glaze
In a mixing bowl, combine the teriyaki sauce, sweet chili sauce, honey, and reserved pineapple juice. Stir well until the ingredients are fully mixed and the glaze is smooth. This sweet and savory mixture will enhance the flavor of your Kielbasa Pineapple Bites, adding a delightful coating that caramelizes as they bake.
Step 5: Coat the Bites
Using a brush or spoon, generously coat each assembled bite with your prepared glaze. Take care not to get glaze on the exposed toothpick parts, as this may burn during baking. This sticky coating will create a flavorful crust while baking, ensuring that every bite is packed with flavor.
Step 6: Bake to Perfection
Place the baking sheet in the preheated oven and bake for 15-20 minutes. Keep an eye on the bites, and look for a slight caramelization of the glaze as they cook. You want them to be heated through and lightly browned. Once done, remove them from the oven and allow to cool for a few moments before serving.
Step 7: Serve and Enjoy
Carefully remove the toothpicks from the bites, if desired, or serve them directly on the toothpicks for easy eating. These Kielbasa Pineapple Bites are best enjoyed warm, making them an excellent choice for parties or family gatherings, inviting everyone to indulge in their deliciousness.
Make Ahead Options
These Kielbasa Pineapple Bites are perfect for busy cooks looking to save time and streamline meal prep! You can assemble the bites up to 24 hours in advance; simply skewer the kielbasa and pineapple onto the toothpicks, then refrigerate them covered until ready to bake. For the glaze, mix the teriyaki sauce, sweet chili sauce, honey, and pineapple juice ahead of time and store it in an airtight container in the fridge for up to 3 days. When you’re ready to serve, just coat the assembled bites with the glaze and bake at 425°F (220°C) for 15-20 minutes until heated through. This way, you can enjoy delicious flavors with minimal last-minute effort!
Kielbasa Pineapple Bites Variations
Feel free to get creative and make this dish your own with these delightful twists!
-
Spicy Chorizo: Replace kielbasa with chorizo for a fiery flavor burst. Feel the heat as the chorizo elevates these bites to a new level of savory goodness.
-
Veggie Additions: Toss in some bell peppers or onions alongside the pineapple for added color and crunch. This not only enhances the visuals but also adds nutritious veggies to the mix.
-
Grilled Perfection: Skip the oven and fire up the grill instead! Grilling will add a smoky, charred taste that perfectly complements the sweetness of the pineapple.
-
Maple Sweetener: Substitute honey with maple syrup for a vegan-friendly option. The rich, warm notes of maple syrup will provide a new layer of flavor that’s simply heavenly.
-
Peanut Sauce Twist: For a nutty flavor, drizzle some peanut sauce over the bites before serving. This unexpected addition gives a delightful twist that will surprise your guests.
-
Shortcut Sauce: In a pinch, use a store-bought sweet and sour sauce instead of making a glaze. It speeds up the process without sacrificing the deliciousness.
-
Fruit Variants: Switch out pineapple for mango chunks for a tropical flair. The juicy mango adds a bright sweetness that pairs beautifully with the kielbasa.
-
Dipping Delight: Serve with a creamy dip, like ranch or spicy mayo, to elevate your appetizer experience. Dipping brings a fun element that everyone loves, especially kids!
With so many ways to customize these Kielbasa Pineapple Bites, you’ll never have a dull moment in the kitchen! For an extra delicious experience, don’t forget to check out our Strawberry Cheesecake Bites that complement these tasty morsels at any gathering!
How to Store and Freeze Kielbasa Pineapple Bites
Fridge: Store leftover Kielbasa Pineapple Bites in an airtight container for up to 3 days. Make sure they cool completely before sealing to prevent moisture buildup.
Freezer: For long-term storage, freeze assembled bites (without glazing) on a baking sheet before transferring to a freezer-safe bag. They can last up to 2 months in the freezer.
Reheating: Reheat in the oven at 350°F (175°C) for 10-15 minutes until heated through. Avoid microwaving, as it can make the bites soggy.
Make-Ahead: You can prepare Kielbasa Pineapple Bites a few hours in advance and keep them in the fridge before baking for a hassle-free cooking experience!
Expert Tips for Kielbasa Pineapple Bites
- Glaze Control: Make sure to coat your bites evenly with glaze to achieve that delicious caramelized finish. Avoid overlapping pieces too much.
- Ingredient Variations: Feel free to experiment with different sauces or proteins, like substituting kielbasa with chorizo for a spicier kick!
- Watch the Timer: Keep an eye on your bites in the oven; if you notice the glaze darkening too quickly, lower the temperature slightly to avoid burning.
- Prepare in Advance: You can assemble the Kielbasa Pineapple Bites a few hours ahead and store them in the fridge until you’re ready to bake, making entertaining stress-free!
- Perfect Pairing: Serve these bites with a refreshing cocktail or tangy dipping sauce to elevate the flavor experience!
What to Serve with Easy Glazed Kielbasa Pineapple Bites
Elevate your gathering with delightful sides and drinks that perfectly complement the sweet and savory flavors of these enticing bites.
-
Creamy Coleslaw: This refreshing side adds crunch and creaminess, balancing the sweetness of the kielbasa and pineapple.
-
Garlic Breadsticks: Soft, buttery breadsticks served warm provide a comforting, chewy texture that pairs beautifully with the bites’ glaze.
-
Grilled Vegetables: A medley of colorful veggies adds a smoky element, enhancing the rich flavors while introducing a fresh dimension.
-
Crispy Potato Wedges: The savory, spiced nature of potato wedges offers a satisfying crunch that contrasts nicely with the soft, juicy bites.
-
Coconut Rice: This subtly sweet and creamy rice acts as a perfect base, soaking up any leftover sauce while adding tropical flair.
-
Refreshing Lemonade: A chilled glass of lemonade serves as a bright, citrusy drink that cuts through the richness, keeping guests refreshed.
-
Chocolate Chip Cookies: For dessert, these classic cookies bring a nostalgic sweetness that perfectly rounds out the meal, delighting both kids and adults.
These suggestions will ensure your Kielbasa Pineapple Bites shine while providing a memorable dining experience for everyone involved!

Kielbasa Pineapple Bites Recipe FAQs
How do I select ripe pineapple for this recipe?
Absolutely! When choosing a pineapple, look for one that’s fragrant at the base and has a slight give when squeezed. The skin should be vibrant and free of dark spots or blemishes, indicating freshness. A ripe pineapple will yield sweet, juicy flavors, enhancing your Kielbasa Pineapple Bites!
How should I store leftover Kielbasa Pineapple Bites?
You can store leftover Kielbasa Pineapple Bites in an airtight container in the refrigerator for up to 3 days. Make sure they cool completely before sealing to avoid moisture buildup, which could make them soggy. Reheat in the oven for the best texture before serving!
Can I freeze Kielbasa Pineapple Bites for later use?
Certainly! To freeze, assemble the bites without glazing and place them on a baking sheet in a single layer to freeze them individually. Once frozen, transfer the bites to a freezer-safe bag and they can be kept for up to 2 months. To enjoy, simply bake them from frozen; add a few extra minutes to the baking time.
What should I do if the glaze is burning while baking?
Very good question! If you notice the glaze darkening too quickly, lower the oven temperature slightly to around 400°F (200°C) and keep a close eye on them. You might also want to cover the bites with aluminum foil for the last few minutes to prevent further browning. This way, you can ensure that they cook through without burning!
Are Kielbasa Pineapple Bites suitable for gluten-free diets?
Yes, they absolutely can be! By using gluten-free soy sauce in place of traditional teriyaki sauce and ensuring all other ingredients are gluten-free, your Kielbasa Pineapple Bites will be safe for those with gluten sensitivities. Just double-check labels, especially on sauces to avoid any hidden gluten.
Can I prepare these bites ahead of time?
Yes, you can! Prepare the Kielbasa Pineapple Bites a few hours in advance and keep them covered in the fridge until you’re ready to bake. This makes hosting easy and stress-free, allowing you to enjoy time with your guests instead of spending it all in the kitchen.

Savor Sweet and Savory Kielbasa Pineapple Bites at Home
Ingredients
Equipment
Method
- Soak wooden toothpicks in water for about 20 minutes.
- Preheat your oven to 425°F (220°C) and line a baking sheet with parchment paper.
- Assemble the bites by skewering a piece of kielbasa followed by a chunk of pineapple on a toothpick.
- In a mixing bowl, combine teriyaki sauce, sweet chili sauce, honey, and pineapple juice until smooth.
- Coat each assembled bite generously with the glaze, avoiding glaze on the toothpick ends.
- Bake in the preheated oven for 15-20 minutes until heated through and lightly browned.
- Serve warm, removing toothpicks if desired, or serve on toothpicks for easy eating.
Leave a Reply