
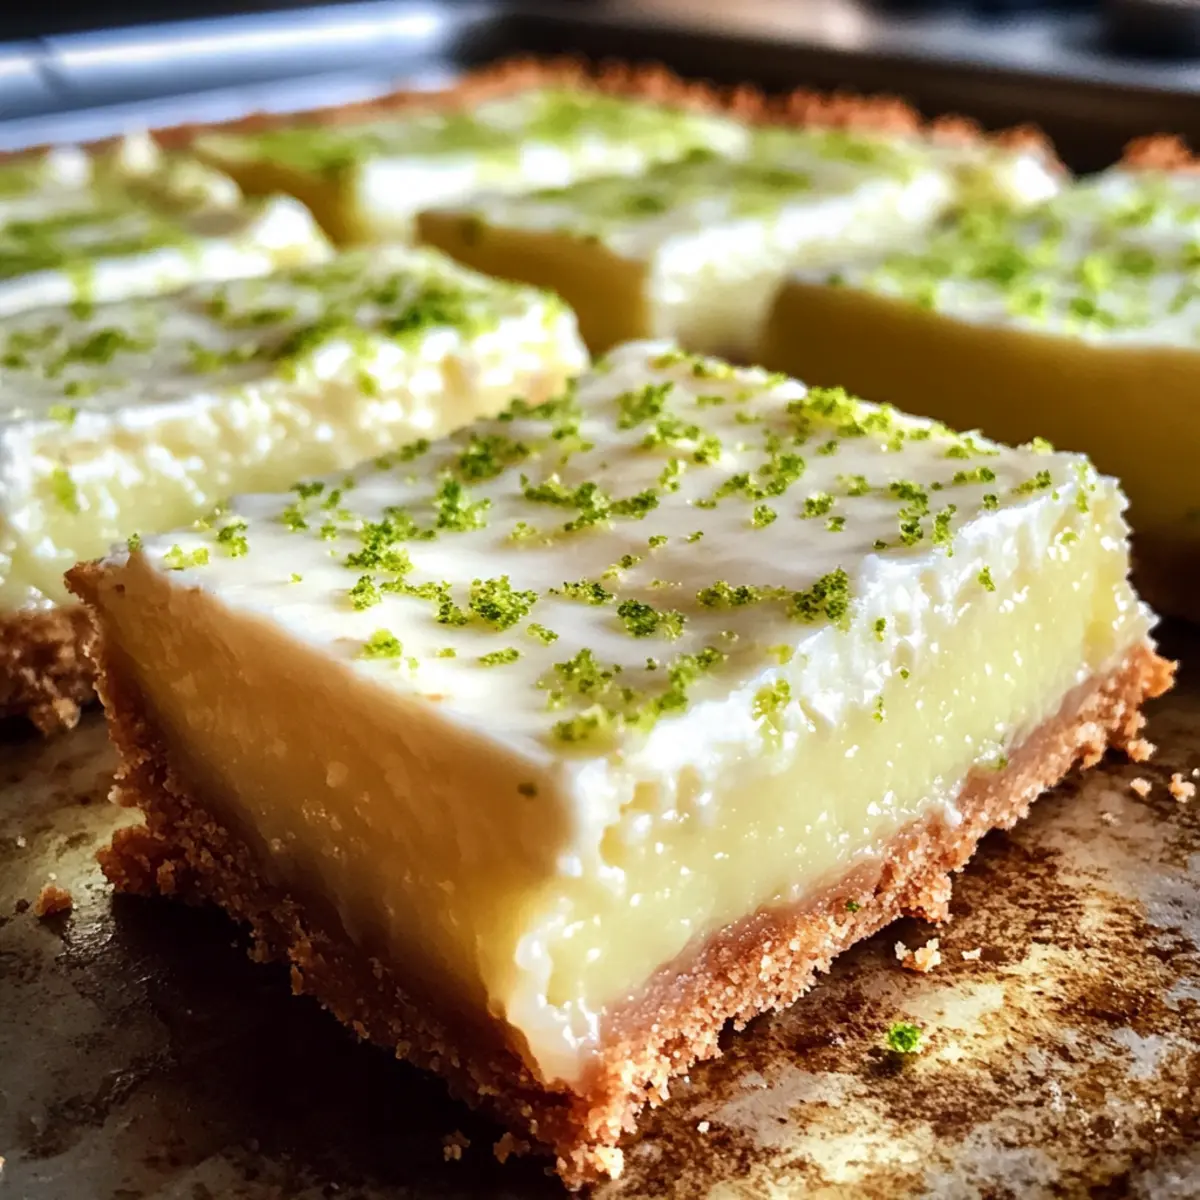
As I was sipping a refreshing drink on my porch one sunny afternoon, I couldn’t help but crave something tangy and sweet to complement the warm breeze. That’s when the idea of making Key Lime Pie Bars hit me—an easy dessert that brings a taste of summer right to your kitchen without the fuss of traditional pie-making. These perfectly tart treats are not just a crowd-pleaser; they’re a no-bake wonder that can be enjoyed straight from the fridge or frozen for a cool twist. With a delightful cookie crust and a creamy lime filling, how could anyone resist? Ready to impress your friends and family with this simple yet delicious summer delight? Let’s dive into the recipe!
Why Are Key Lime Pie Bars So Irresistible?
Tart, Creamy Delight: The perfect balance of tangy lime and sweet, creamy filling makes every bite a blissful experience.
Effortless Preparation: With a no-bake approach, this recipe is quick and easy, letting you spend less time in the kitchen and more time enjoying a sunny day.
Versatile Treat: Whether you serve them chilled or frozen, these bars are excellent for summer picnics, barbecues, or an after-dinner treat.
Crowd-Pleasing Flavor: Your friends and family will be raving about these bars; it’s a dessert that satisfies everyone’s sweet tooth.
Customizable Options: Swap out key limes for regular limes or try a different cookie crust to make them your own. For more summer-inspired desserts, check out Apple Cider Whoopie for a delightful change!
Key Lime Pie Bars Ingredients
For the Crust
- Vanilla Wafer Cookies – These create a sweet and crunchy foundation; you can also use graham crackers or shortbread for varied flavors.
- Brown Sugar – Adds a rich sweetness to the crust; white sugar can be used for a cleaner taste.
- Unsalted Butter – Helps bind the crust together; coconut oil offers a dairy-free alternative.
For the Filling
- Egg Yolks – The secret to a rich and creamy filling; use only yolks for the best texture.
- Lime Zest – Brightens the filling with citrus goodness; fresh zest is best, but dry can work in a pinch.
- Sweetened Condensed Milk – Provides a creamy, sweet base for the filling; try coconut condensed milk for a dairy-free twist.
- Lime Juice – The key flavor for this filling; fresh key lime juice is ideal, but regular limes are a great substitute.
For Topping
- Heavy Whipping Cream – Whip this to dollop on top of your bars for an indulgent finish; whipped coconut cream is a fantastic dairy-free option.
These Key Lime Pie Bars are an easy dessert that can turn any gathering into a memorable occasion!
Step‑by‑Step Instructions for Key Lime Pie Bars
Step 1: Prepare Crust
Begin by crushing approximately 2 cups of vanilla wafer cookies into fine crumbs using a food processor. In a large bowl, mix the crumbs with ¼ cup of brown sugar and ½ cup of melted unsalted butter until the mixture resembles wet sand. Press this mixture firmly into the bottom of an 8×8 inch baking pan lined with parchment paper, creating an even layer for your Key Lime Pie Bars.
Step 2: Bake Crust
Preheat your oven to 350°F (175°C). Place the crust in the oven and bake for 13-15 minutes, or until it turns golden brown and is slightly firm to the touch. Once baked, remove the crust from the oven and allow it to cool on a wire rack for about 30 minutes. This cooling step is crucial for the texture of your Key Lime Pie Bars.
Step 3: Make Filling
In a medium mixing bowl, beat together 4 large egg yolks and the zest of 2 limes until the mixture is pale and fluffy. Gradually whisk in one 14-ounce can of sweetened condensed milk, followed by ½ cup of fresh lime juice, ensuring that the mixture is smooth and well-combined. This filling will be the heart of your Key Lime Pie Bars, imparting that signature tangy flavor.
Step 4: Combine Layers
Once the crust has cooled, carefully pour the lime filling over the crust. Use a spatula to spread the filling evenly across the surface, leveling the top for a neat presentation. This step is important to ensure that every bite of your Key Lime Pie Bars has a perfect balance of crust and filling.
Step 5: Bake Filling
Return the pan to the oven and bake for 15-17 minutes, or until the edges of the filling are set but the center still jiggles slightly when shaken. This jiggle indicates a creamy texture that you want for your Key Lime Pie Bars. After baking, let the pan cool on a wire rack for another 30 minutes before refrigerating.
Step 6: Chill and Serve
Place your Key Lime Pie Bars in the refrigerator for at least 3 hours, or overnight if you can wait! Chilling them thoroughly allows the bars to firm up, making them easier to cut. When ready to serve, whip 1 cup of heavy whipping cream until soft peaks form and spread it generously over the top of the chilled bars. Slice into squares and enjoy!
How to Store and Freeze Key Lime Pie Bars
Fridge: Store your Key Lime Pie Bars in an airtight container in the refrigerator for up to 4 days to keep them fresh and zesty.
Freezer: For longer storage, freeze the bars without the whipped cream topping. They can last up to 2 months in the freezer; just wrap them tightly in plastic wrap and foil.
Reheating: There’s no need to reheat these bars, as they are best enjoyed cold. For a special treat, let them sit at room temperature for 10-15 minutes before serving.
Serving After Freezing: When you’re ready to enjoy frozen Key Lime Pie Bars, simply remove them from the freezer and let them thaw in the fridge overnight for the best texture.
Expert Tips for Key Lime Pie Bars
- Fresh Ingredients: Use fresh lime juice and zest for the brightest flavor; avoid bottled varieties, as they can dull the taste of your Key Lime Pie Bars.
- Perfect Crust Texture: Make sure to pack the crust mixture tightly to avoid crumbling. A loose crust won’t hold your delicious filling!
- Chill Properly: Allow the bars to cool completely before refrigerating; this ensures a cleaner slice and prevents the filling from becoming too runny.
- Whip Cream Just Right: When whipping your cream, stop at soft peaks for a light topping that won’t overpower the bars; avoid over-whipping, which can lead to butter!
- Make Ahead: These bars can be made a day in advance; they often taste even better after sitting, allowing flavors to meld beautifully.
What to Serve with Perfectly Tart Key Lime Pie Bars?
Treat your guests to a delightful summer feast with these refreshing bars—perfectly complementing them will elevate your gathering.
- Coconut Rice: A creamy, fragrant side that echoes the tropical notes of the lime, creating a harmonious meal.
- Grilled Shrimp Skewers: Lightly seasoned shrimp bring a delightful texture and sweetness that pairs beautifully with the tangy bars. A hint of smokiness from the grill enhances each bite, making it a wonderful appetizer.
- Fresh Fruit Salad: A bright mix of berries, melon, and citrus adds a refreshing element, balancing the dessert’s creamy richness with a sweet and juicy crunch.
- Crispy Spring Rolls: Light and crunchy, they provide a lovely contrast to the creamy filling. The fresh veggies can cleanse the palate and complement your dessert beautifully.
- Sparkling Lemonade: Bright and bubbly, this refreshing drink is a perfect match for the tangy bars, enhancing their citrus flavor and keeping everyone cool.
- Minty Iced Tea: A refreshing, herb-infused beverage that adds a layer of flavor and complements the pie’s zestiness without overpowering it.
- Key Lime Sorbet: For a double dose of lime deliciousness, a tangy sorbet is a light dessert option that mirrors the flavors of the bars while providing a refreshing finish.
- Chocolate Dipped Strawberries: The rich chocolate adds a luxurious feel, contrasting sweetly with the tartness of the key lime, providing a delightful surprise at every bite.
- Chocolate Cake: Rich and indulgent, a slice of chocolate cake will satisfy dessert lovers, creating a beautiful contrast with the citrusy bars and enhancing the overall experience.
- Vanilla Ice Cream: Served alongside, it adds a cool creaminess to each bite of the bars, balancing out their tartness and creating the ultimate dessert duo.
Key Lime Pie Bars Variations
Feel free to get creative with these delightful bars; your imagination is your only limit when it comes to customizing your Key Lime Pie Bars!
- Lemon Zest: Brighten things up by substituting lemon zest for lime zest—perfect for those who enjoy a zesty punch!
- Graham Cracker Crust: Swap out the vanilla wafer cookies for graham crackers to create a traditional pie crust flavor that pairs beautifully with the filling.
- Coconut Cream: For a tropical twist, use whipped coconut cream instead of heavy whipping cream as a topping, adding a hint of island vibes.
- Dairy-Free Option: Replace sweetened condensed milk with coconut condensed milk for a completely dairy-free dessert that still delivers on creaminess.
- Spicy Kick: Add a pinch of cayenne pepper to the filling for an unexpected kick; the heat complements the sweetness and tanginess beautifully!
- Fruit Swirl: Create a fruit swirl by mixing in your favorite berry puree into the lime filling before baking—think raspberry or blueberry for a colorful finish.
- Nutty Variation: Add crushed nuts like pecans or almonds to the crust mixture for a crunchy texture that enhances the overall flavor experience.
- Frozen Delight: Consider freezing the bars for a frosty treat on a hot day—just let them sit out for a few minutes before slicing for the perfect texture.
Each variation brings its own charm to this classic recipe! Whether you’re pulling together a delightful dessert for a gathering or simply treating yourself, these Key Lime Pie Bars are sure to satisfy. If you’re in the mood for more sweet inspirations, don’t forget to check out Chicken Pot Pie for a savory classic and Apple Cider Whoopie for a unique fall dessert!
Make Ahead Options
These Key Lime Pie Bars are perfect for busy home cooks looking to save time! You can prepare the crust and filling up to 24 hours in advance. Simply crush the cookies, mix with brown sugar and melted butter, and press the mixture into your pan. The filling can also be made ahead by combining the egg yolks, lime juice, and sweetened condensed milk, then refrigerating it separately. To maintain their delicious quality, keep the crust and filling in airtight containers. When you’re ready to enjoy, bake the filling and chill the bars for at least 3 hours before serving. This way, you’ll have fresh, creamy Key Lime Pie Bars with minimal last-minute effort!
Key Lime Pie Bars Recipe FAQs
What type of limes should I use for the filling?
Absolutely! For the most authentic flavor, fresh key limes are ideal due to their unique tartness. However, regular limes can easily be substituted if you can’t find key limes—they still provide that wonderful zesty kick and will work beautifully in your Key Lime Pie Bars.
How should I store Key Lime Pie Bars?
To keep your Key Lime Pie Bars fresh and delicious, store them in an airtight container in the refrigerator for up to 4 days. Make sure to cover them well to prevent them from absorbing any odors from the fridge. This will retain their zesty flavor and creamy texture.
Can I freeze leftovers?
Yes, you can freeze Key Lime Pie Bars! Just make sure to freeze them without the whipped cream topping to maintain the best texture. Wrap them tightly in plastic wrap, then in foil, and they can be stored in the freezer for up to 2 months. When you’re ready to enjoy them, let them thaw overnight in the fridge for the best results.
What if my filling is too runny?
If your filling turns out runny, don’t worry! Ensure you’ve baked the filling long enough; it should be set around the edges while still jiggling slightly in the center. If it’s still too liquid after chilling, you can thicken it up for future batches—try reducing your lime juice or adding a bit more sweetened condensed milk and baking it a touch longer.
Are Key Lime Pie Bars safe for kids and pets?
While Key Lime Pie Bars are generally safe for kids, be cautious with pets. The ingredients like lime juice can be harmful to dogs and cats if consumed in large quantities. For kids, just keep an eye on the sugar content, especially if they’re sensitive to sweets.
How do I make my crust less crumbly?
To achieve that perfect crust that holds together well, make sure to pack the crust mixture tightly into your pan—almost like you’re shaping it rather than just pressing it down. You might also try adding a bit more melted butter if it feels too dry after mixing. A well-combined crust is the key to tasty Key Lime Pie Bars that don’t fall apart!
Zesty Key Lime Pie Bars That Everyone Will Love
Ingredients
Equipment
Method
- Begin by crushing approximately 2 cups of vanilla wafer cookies into fine crumbs using a food processor. In a large bowl, mix the crumbs with ¼ cup of brown sugar and ½ cup of melted unsalted butter until the mixture resembles wet sand. Press this mixture into the bottom of an 8x8 inch baking pan lined with parchment paper.
- Preheat your oven to 350°F (175°C). Place the crust in the oven and bake for 13-15 minutes, or until it turns golden brown and is slightly firm to the touch. Once baked, remove the crust from the oven and allow it to cool on a wire rack for about 30 minutes.
- In a medium mixing bowl, beat together 4 large egg yolks and the zest of 2 limes until pale and fluffy. Gradually whisk in one can of sweetened condensed milk, followed by ½ cup of fresh lime juice, ensuring a smooth mixture.
- Pour the lime filling over the cooled crust. Spread the filling evenly across the surface.
- Return the pan to the oven and bake for 15-17 minutes, until the edges are set but the center jiggles slightly. Let cool on a wire rack for another 30 minutes before refrigerating.
- Refrigerate for at least 3 hours. When ready to serve, whip 1 cup of heavy whipping cream until soft peaks form and spread over the top of chilled bars.
Leave a Reply