
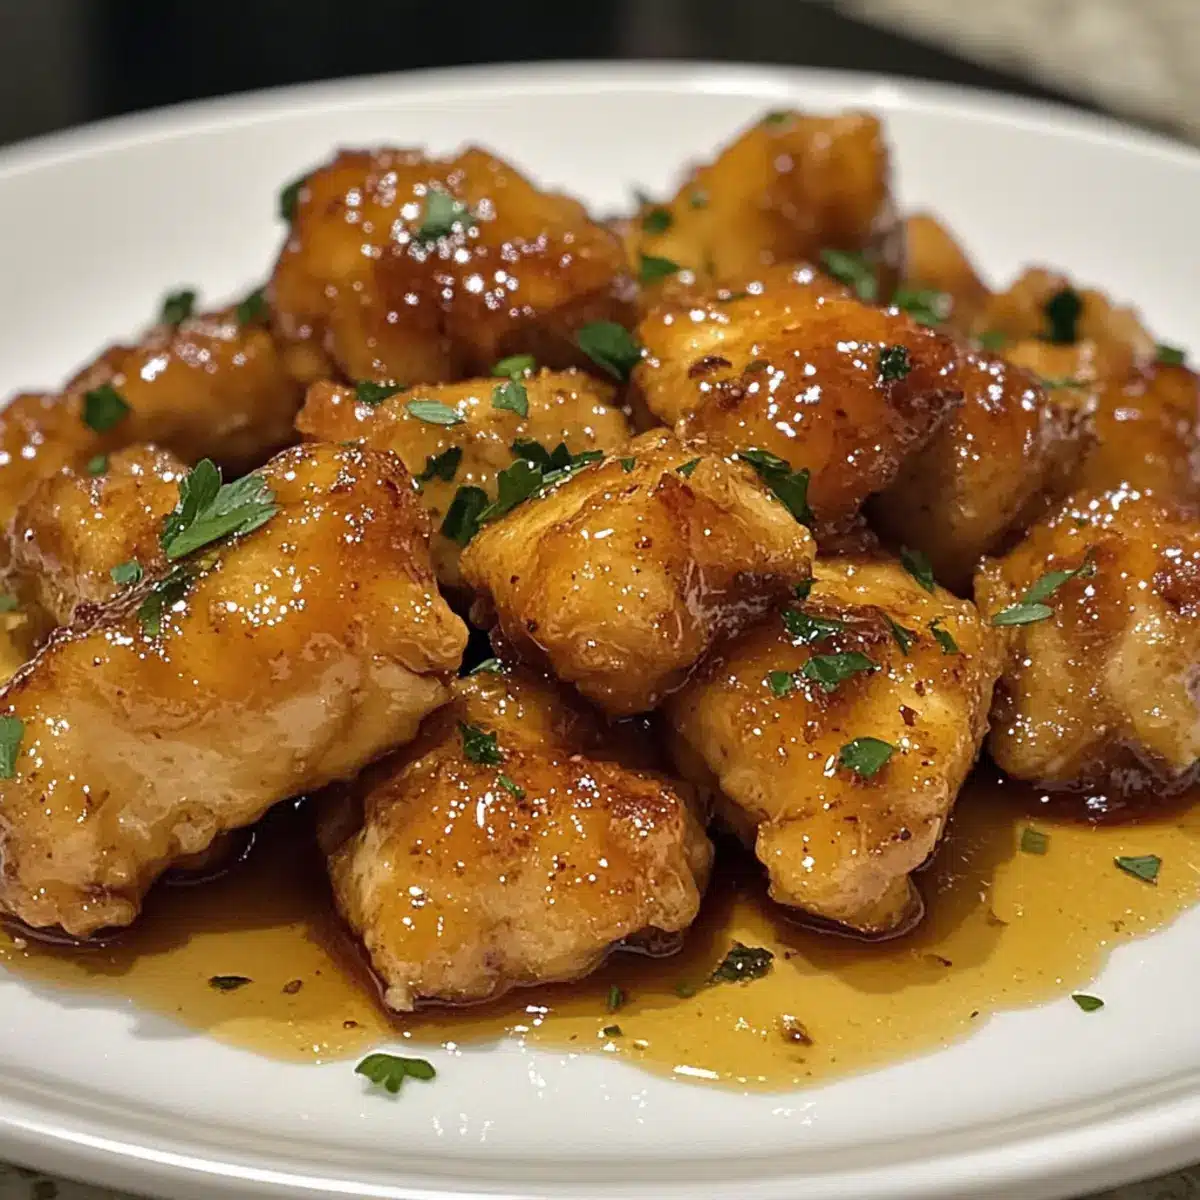
As the golden sun dips below the horizon, the enticing aroma of sizzling chicken dances through the air, beckoning everyone to the dinner table. My 30-Minute Honey Butter Chicken is a quick meal that combines crispy, tender chicken with a sweet-savory sauce, perfect for those bustling weeknights when time is of the essence. With a shallow frying technique that keeps the dish lighter than traditional frying, this recipe ensures that you don’t sacrifice flavor for speed. In just half an hour, you can create a meal that will impress your family and soothe your cravings, all while being adaptable for those who prefer a gluten-free or dairy-free option. Ready to unlock the secret to this mouthwatering dish? Let’s dive in!
Why is Honey Butter Chicken a winner?
Quick Prep Time: With just 30 minutes, you can whip up a delicious dinner that feels indulgent without the wait.
Crispy Yet Tender: The shallow frying technique creates a satisfying crunch while keeping the chicken juicy, elevating your weeknight meals.
Sweet and Savory Harmony: This dish features a delightful balance of flavors thanks to the honey and garlic sauce that will tantalize your taste buds.
Versatile Options: Easily customize the recipe to fit your dietary needs, with gluten-free and dairy-free alternatives available, so everyone can enjoy!
Great Crowd-Pleaser: Impress family and friends alike with restaurant-quality chicken right at home—perfect for gatherings or casual weeknight dinners.
If you’re interested in more quick meals, check out my Hot Honey Chicken or try the flavorful Garlic Parmesan Chicken.
Honey Butter Chicken Ingredients
Unlock the flavors of this delightful dish with these essential ingredients!
For the Chicken Coating
- Boneless Chicken Thighs or Tenders – The main protein source for juicy texture; easily swap for chicken breasts.
- All-Purpose Flour – Provides a crispy coating; use gluten-free flour for a gluten-free option.
- Kosher Salt – Enhances the overall flavor; substitute with sea salt if desired.
- Black Pepper – Adds warmth to the dish; feel free to adjust for your taste.
- Garlic Powder – Imparts savory depth; fresh garlic can boost flavor even more.
For Shallow Frying
- Olive Oil (or Canola/Vegetable Oil) – Preferred for flavor during frying; any neutral oil will work.
For the Sweet Sauce
- Unsalted Butter – Adds richness to the sauce; avoid substitutes like margarine for best results.
- Honey – Brings sweetness and a sticky finish to the chicken; essential for that honey butter chicken flavor!
- Light Soy Sauce – Adds umami and saltiness; opt for regular soy sauce if needed but dilute slightly.
- Garlic (minced) – Fresh is best; stay away from frozen varieties for optimal taste.
Step‑by‑Step Instructions for Honey Butter Chicken
Step 1: Prepare the Coating
In a large mixing bowl, whisk together the all-purpose flour, kosher salt, black pepper, and garlic powder until well combined. This mixture will provide a delightful crunchy coating for your Honey Butter Chicken. Set aside the prepared flour mixture to use when you’re ready to coat the chicken.
Step 2: Coat the Chicken
Take your boneless chicken thighs or tenders and dip each piece into the flour mixture, ensuring they are evenly coated. This step is crucial for achieving that crispy texture when the chicken is shallow fried. Place the coated chicken on a plate and let it rest for a few minutes while you heat up the oil.
Step 3: Heat the Oil
In a large skillet, pour enough olive oil to cover the bottom by about half an inch. Heat the oil over medium-high heat until it shimmers, approximately 5 minutes. This indicates that the oil is hot enough for frying. You want a steady sizzle when the chicken is added, so be patient to ensure even cooking.
Step 4: Fry the Chicken
Carefully place the coated chicken pieces in the hot oil, ensuring you don’t overcrowd the pan. Cook the chicken for about 5-7 minutes per side, or until golden brown and crispy. Use tongs to flip the chicken only once, allowing a nice crust to form without disturbance. Once done, transfer the chicken to a paper towel-lined plate to drain excess oil.
Step 5: Make the Honey Butter Sauce
In the same skillet, reduce the heat to medium and add the unsalted butter. Allow it to melt completely, stirring gently, then add the honey, light soy sauce, and minced garlic. Cook for about 2 minutes, stirring frequently until the mixture becomes bubbly and fragrant, creating a delicious sauce that will elevate your Honey Butter Chicken.
Step 6: Combine and Serve
Return the fried chicken to the skillet, tossing it gently in the honey butter sauce until well coated. This step should only take about 1-2 minutes to ensure the chicken absorbs the sweet and savory flavors. Once evenly coated, transfer the Honey Butter Chicken to a serving dish and admire your delicious work before diving in!
Honey Butter Chicken Variations
Feel free to get creative with this recipe and make it your own with these delightful variations!
-
Chicken Swap: Use boneless chicken breasts or tenders for a leaner option. This will result in a subtly different texture, but the same great flavor will remain.
-
Gluten-Free Flour: Substitute all-purpose flour with a gluten-free blend to tailor the recipe for those with dietary needs. This ensures everyone can join in on the fun without missing out on the deliciousness!
-
Spicy Kick: Add cayenne pepper or crushed red pepper flakes to the flour mixture. This adds a fiery twist and makes the dish pop with flavor for the heat lovers in your family.
-
Garlic Lovers: Replace garlic powder with fresh minced garlic in the coating. This will create a fragrance and flavor explosion that is just irresistible!
-
Oven-Baked Version: For a healthier twist, coat the chicken and place it on a baking sheet; bake at 400°F (200°C) for 20-25 minutes until golden and crispy.
-
Vegan Delight: Use tofu or seitan as a protein alternative, along with vegan butter and ahoney substitute to create a delightful dish that fits a plant-based lifestyle. The taste and texture won’t disappoint!
-
Honey Alternatives: Experiment with maple syrup or agave for a different sweet flavor profile. Each option adds its own unique twist to the beloved honey butter chicken.
If you’re intrigued by more delicious chicken recipes, why not try the Garlic Parmesan Chicken for a fun twist or enjoy the flavors in a Sticky Garlic Chicken that tantalizes your taste buds?
Expert Tips for Honey Butter Chicken
• Give It Space: Ensure chicken pieces aren’t crowded in the pan. This allows them to fry properly and achieve that perfect crispy texture.
• Let It Rest: Allow the coated chicken to sit for a few minutes before frying; this helps the coating to adhere better.
• Monitor Oil Temperature: Keep the oil at the right temperature for shallow frying—too hot and the coating burns; too cool and it gets soggy.
• Right Flour Choice: For a gluten-free option, use a gluten-free flour blend to maintain crunch without sacrificing taste.
• Sauce Timing: Coat the chicken with sauce right before serving to keep it crispy; leaving it too long can make it soggy.
How to Store and Freeze Honey Butter Chicken
Fridge: Store leftovers in an airtight container for up to 3 days. Make sure the chicken has cooled down before sealing to maintain freshness.
Freezer: If you want to keep it longer, honey butter chicken can be frozen for up to 2 months. Place it in a freezer-safe container or wrap tightly in foil and plastic wrap.
Reheating: To reheat, place the chicken in the oven at 350°F (175°C) for about 15-20 minutes until heated through. This helps retain the crispy texture without making it soggy.
Avoid Overheating: When reheating in the microwave, use shorter intervals to avoid drying out the chicken. Enjoy your delicious honey butter chicken again!
What to Serve with Honey Butter Chicken
Ready to create a harmonious dining experience that pairs perfectly with your honey butter chicken?
-
Steamed Jasmine Rice: Fluffy and fragrant, it complements the sweet sauce and balances the flavors beautifully. It’s a classic pairing that never disappoints.
-
Garlic Mashed Potatoes: Rich and creamy, these mashed potatoes offer a comforting touch that perfectly contrasts the crispy chicken texture. Your family will appreciate the added heartiness!
-
Roasted Seasonal Vegetables: Crisp and colorful veggies provide a fresh element to the meal, enhancing each bite of honey butter chicken with a burst of brightness and nutrition.
-
Coleslaw: Crunchy and tangy, this side adds a delightful crunch while cutting through the sweetness of the chicken, creating a well-rounded plate.
-
Coconut Milk Rice: Infused with creamy coconut flavor, this unique twist on traditional rice pairs well with the honey buttery nature of the chicken, delivering a tropical flair.
-
Honey Garlic Glazed Carrots: These sweet and tender carrots echo the chicken’s flavors while adding a splash of color to your meal. Their natural sweetness enhances the overall dining experience.
-
Crispy Brussels Sprouts: Roasted to perfection, they bring a savory crunch that complements the dish while offering a satisfying nutritional boost. A great way to elevate your plate!
-
Lemonade or Iced Tea: Refreshing beverages like these perfectly balance the sweetness of the honey butter sauce, ensuring you stay hydrated and satisfied throughout the meal.
-
Chocolate Chip Cookies: End your dinner on a sweet note with these warm, gooey treats that will make everyone smile. It’s a delightful contrast to the savory chicken, rounding off your meal perfectly!
Make Ahead Options
Preparing Honey Butter Chicken ahead of time is a fantastic way to streamline your mealtime routine! You can coat the chicken pieces in flour and seasonings up to 24 hours in advance, keeping them covered in the fridge to maintain their crunchiness. Additionally, you can make the honey butter sauce and refrigerate it for up to 3 days—just store it in an airtight container. When you’re ready to serve, simply reheat the sauce in a pan, shallow fry the chicken until crispy, and then toss them together. This way, you’ll still enjoy a delicious, restaurant-quality meal with minimal fuss during dinner time!
Honey Butter Chicken Recipe FAQs
What type of chicken works best for this recipe?
I recommend using boneless chicken thighs or tenders for a juicy texture. If you choose chicken breasts, just be aware that they may require additional cooking time to ensure they remain tender and moist.
How should I store leftover honey butter chicken?
Store your leftovers in an airtight container in the fridge for up to 3 days. It’s important to let the chicken cool before sealing it to help maintain its delicious flavor and prevent sogginess.
Can I freeze honey butter chicken, and how?
Absolutely! You can freeze honey butter chicken for up to 2 months. Make sure to place it in a freezer-safe container or wrap it tightly in plastic wrap and foil. When you’re ready to enjoy it again, simply thaw it in the fridge overnight before reheating!
What should I do if the chicken isn’t getting crispy?
If your chicken isn’t turning out crispy, a common issue could be that the oil temperature is too low. Ensure the oil is hot enough—about 350°F (175°C)—before adding the chicken. Also, don’t overcrowd the pan, as this can drop the temperature and lead to sogginess.
Are there any dietary considerations for allergies?
Yes, this honey butter chicken can be adapted! For gluten-free options, simply replace all-purpose flour with a gluten-free flour blend. For dairy-free preferences, use vegan butter instead of regular unsalted butter. Just be sure to check condiment labels for any hidden allergens.
How can I enhance the spiciness of this dish?
If you like a bit of heat, consider adding cayenne pepper or red pepper flakes to the flour mixture before coating the chicken. Start with a small amount—maybe 1/4 teaspoon—and adjust according to your desired spice level. Happy cooking!
Crispy Honey Butter Chicken in Just 30 Minutes
Ingredients
Equipment
Method
- In a large mixing bowl, whisk together the all-purpose flour, kosher salt, black pepper, and garlic powder until well combined.
- Take your boneless chicken thighs or tenders and dip each piece into the flour mixture, ensuring they are evenly coated.
- In a large skillet, pour enough olive oil to cover the bottom by about half an inch. Heat the oil over medium-high heat until it shimmers, about 5 minutes.
- Carefully place the coated chicken pieces in the hot oil, cooking for about 5-7 minutes per side, or until golden brown and crispy.
- In the same skillet, reduce the heat to medium. Add the unsalted butter and allow it to melt completely, then add the honey, light soy sauce, and minced garlic. Cook for about 2 minutes.
- Return the fried chicken to the skillet, tossing it gently in the honey butter sauce until well coated.
Leave a Reply