
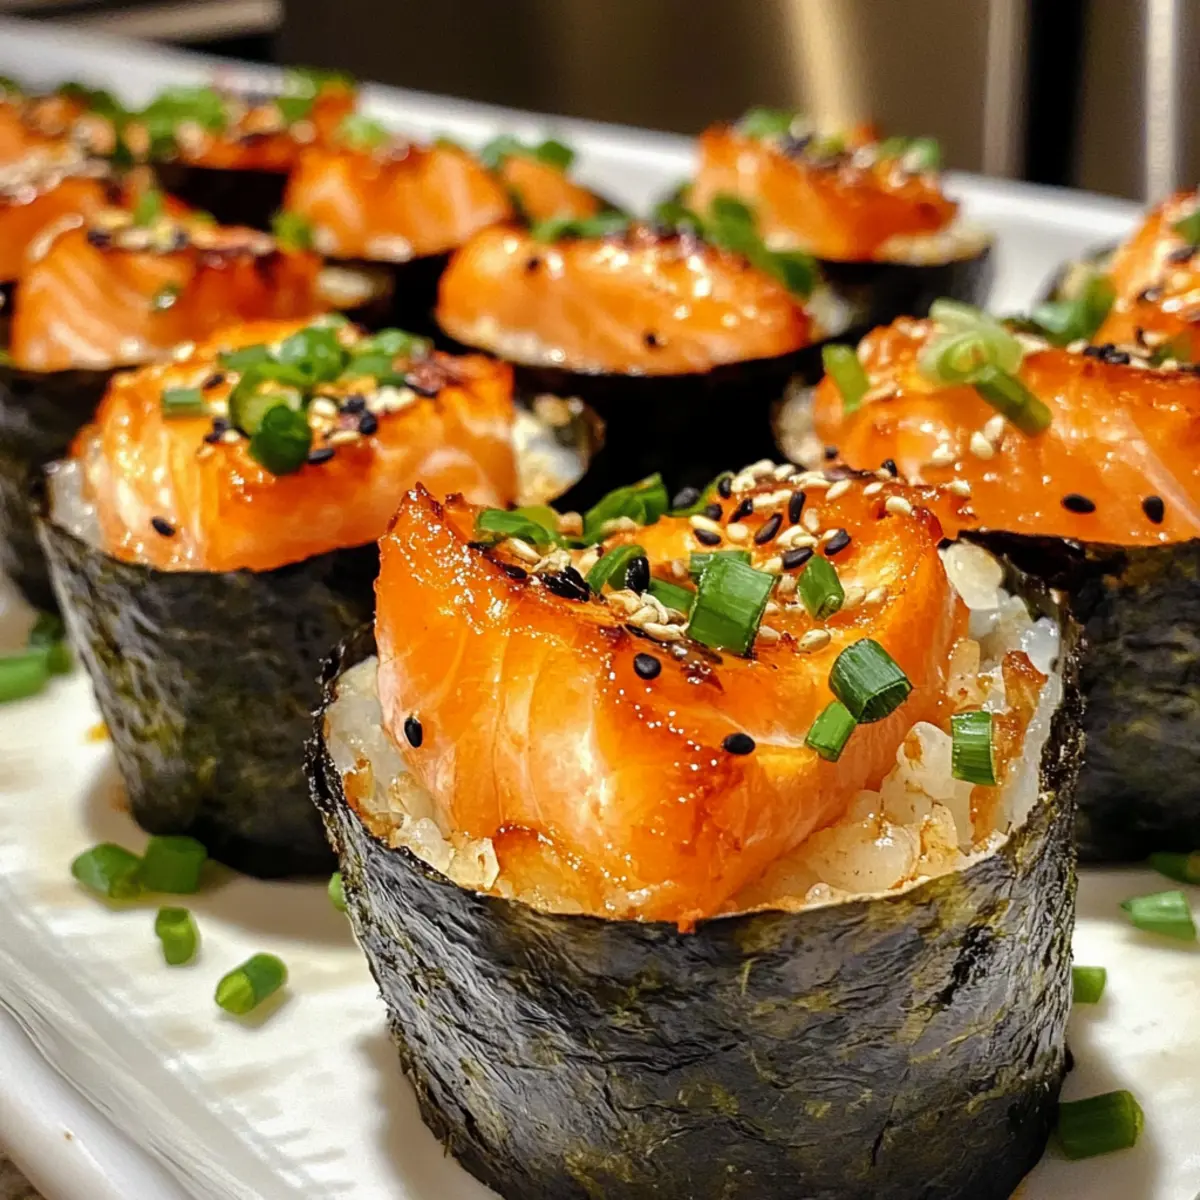
Have you ever craved the delightful flavors of sushi but found yourself short on time? Enter these Easy Baked Salmon Sushi Cups! These little gems are a perfect fusion of tender salmon, savory sushi rice, and crispy nori, all wrapped up in a warm, bite-sized delight. They’re not only quick to whip up but also serve as a fantastic appetizer that will impress your family and friends. The best part? With zesty sriracha and creamy Kewpie mayo on top, each bite offers a rich burst of flavor that’s hard to resist! Ready to learn how to create this viral sensation in your kitchen? Let’s dive in!
Why Are These Sushi Bake Cups So Irresistible?
Flavor Fusion: These easy baked salmon sushi cups bring together the deliciousness of sushi with the comforting appeal of baked goodies, creating a unique taste sensation that everyone will love.
Crowd-Pleasing Appeal: Perfect for parties or intimate gatherings, these sushi cups are certain to impress. Their bite-sized nature makes them the ideal appetizer!
Quick & Simple: With uncomplicated steps and minimal prep time, even novice cooks can whip these up in no time.
Customizable: Feel free to swap out ingredients or add fresh veggies like avocado to make it uniquely yours – the possibilities are endless!
Don’t forget to check out our Spicy Shrimp Sushi for another delicious sushi-inspired dish!
Sushi Bake Cups Ingredients
• Create your own delightful bites!
For the Salmon Mixture
- Salmon – Fresh fish that provides rich protein and flavor. Substitution: Can use canned salmon for convenience.
- Light Soy Sauce – Adds saltiness and umami depth.
- Kewpie Mayo – A creamy, flavored mayo enriching the salmon mixture. Substitution: Can use regular mayonnaise if Kewpie is unavailable.
- Sriracha – Offers a spicy kick enhancing the flavor profile.
- Sesame Oil – Adds a nutty aroma and richness to the mixture.
For the Sushi Base
- Uncooked Sushi Rice – Base of the cups providing structure and texture. Note: Make sure to rinse before cooking to achieve the right texture.
- Rice Vinegar – Offers a tangy flavor to balance the richness of the other ingredients.
- White Sugar – Sweetness to balance the acidity of rice vinegar.
For Assembly
- Nori Sheets – Provides a crisp, sea-flavored wrapper for the sushi cups.
- Furikake – Japanese seasoning for garnish, contributing a savory crunch.
- Green Onion – Freshness and color garnish.
Don’t miss out on these tasty sushi bake cups—they’re a guaranteed hit for your next gathering!
Step‑by‑Step Instructions for Sushi Bake Cups
Step 1: Prepare Sushi Rice
Begin by cooking the uncooked sushi rice according to the package instructions, which typically takes about 20 minutes. Once the rice is cooked and fluffy, mix rice vinegar and sugar in a microwave-safe bowl until dissolved. Gently fold this mixture into the warm rice until evenly coated. Set the seasoned rice aside to cool slightly while you prepare the other ingredients.
Step 2: Prepare Salmon Mixture
Preheat your oven to 400℉ (200℃) while you prepare the salmon mixture. In a medium bowl, combine cubed fresh salmon with light soy sauce, Kewpie mayo, a generous drizzle of sriracha, and a hint of sesame oil. Mix everything well until the salmon is fully coated in the rich flavors, creating a delightful, creamy mixture that will be layered atop the rice and nori.
Step 3: Cut Nori
Take your nori sheets and cut them into squares that will fit neatly into the muffin tin cups. Each square should be large enough to gently press into the bottom and sides of each muffin cavity while leaving a little overhang. This overhang will help create a delightful crispy edge as the sushi bake cups cook. Set these prepared nori squares aside for assembly.
Step 4: Assemble Cups
Grease your muffin tin lightly to prevent sticking, then take a small amount of sushi rice and press it firmly into the bottom of each nori square in the tin. Layer the salmon mixture generously on top of the pressed rice, ensuring that each cup is filled nicely. Don’t overfill, as the mixture will expand during baking, and you want even cooking for your sushi bake cups.
Step 5: Bake
Place the muffin tin in your preheated oven and bake for about 15 minutes or until the salmon is cooked through and the tops are golden and slightly crispy. Keep an eye on them—it’s the golden color that indicates perfect doneness! The aroma wafting through your kitchen will be simply irresistible as the sushi bake cups come together beautifully.
Step 6: Garnish and Serve
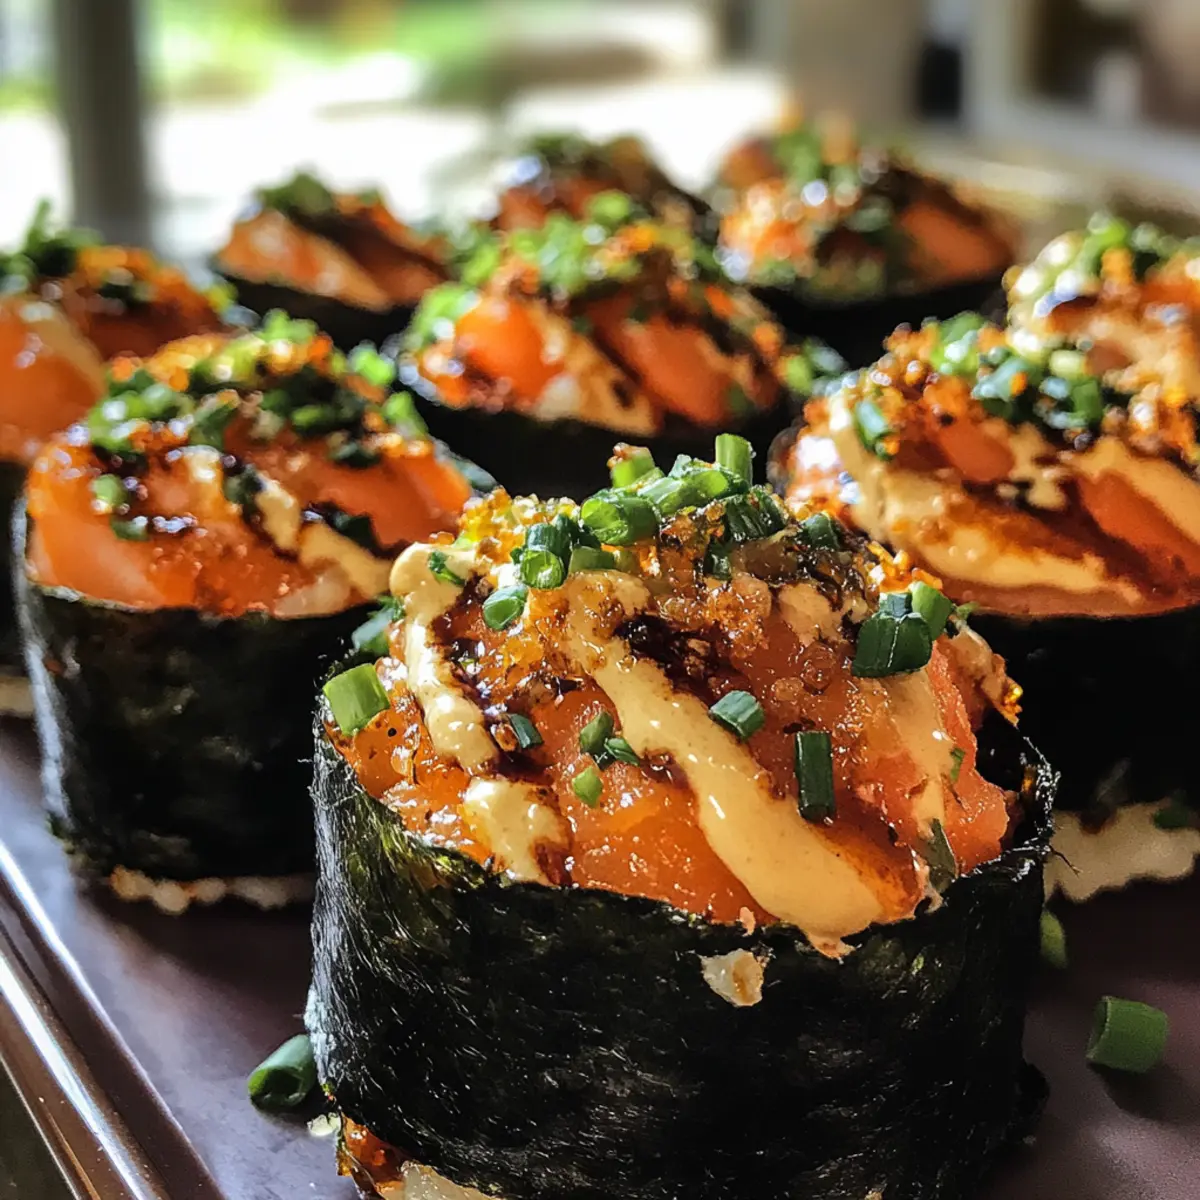
Once baked, remove the sushi bake cups from the oven and allow them to cool for a few minutes. Drizzle the tops with spicy mayo for an extra kick, then sprinkle furikake generously over each cup, adding savory crunch and flavor. Finish by garnishing with chopped green onions for a fresh pop of color before serving them warm as a delicious appetizer.

Storage Tips for Sushi Bake Cups
-
Room Temperature: Sushi bake cups are best enjoyed fresh but can sit out for up to 2 hours at room temperature during gatherings before needing refrigeration.
-
Fridge: Store any leftovers in an airtight container in the fridge for up to 2–3 days. Make sure they are completely cooled before sealing to maintain their texture.
-
Freezer: For longer storage, freeze the baked sushi cups for up to 1 month. Wrap them individually in plastic wrap, then place them in a freezer-safe bag.
-
Reheating: Reheat in the oven at 350℉ (175℃) for about 10-12 minutes, or until warmed through. This way, your sushi bake cups will stay crispy and delicious!
What to Serve with Easy Baked Salmon Sushi Cups
Delight in the perfect pairing of flavors that will elevate your sushi experience from appealing appetizer to a full-fledged meal.
-
Soy-Glazed Edamame: Serves as a flavorful and protein-rich side that complements the sushi cups’ umami taste.
-
Pickled Ginger: A refreshing palate cleanser that contrasts beautifully with the rich flavors of the salmon and mayo.
-
Seaweed Salad: An appealing mix of textures and flavors, this salad adds a crunchy element that balances the creaminess of the sushi cups while enhancing the sea-inspired theme.
-
Light Miso Soup: A warm, comforting bowl of miso soup rich in umami flavors, making it an ideal starter before enjoying your sushi bites.
-
Sushi Rolls: Mix things up by serving assorted sushi rolls alongside your sushi cups, inviting variety without straying too far from the theme.
-
Sriracha Lime Mocktail: This vibrant drink, with a spark of heat and citrusy freshness, pairs well with the flavors of your dish while keeping the festivities light.
-
Creamy Avocado Dip: Smooth and rich, this dip adds an extra layer of satisfaction. Enjoy it with tortilla chips as a contrasting texture to the warm sushi cups.
-
Coconut Sticky Rice: Sweet and slightly chewy, this dessert brightens the palate after the savory bites, providing a delightful finish to your sushi-themed meal.
Sushi Bake Cups: Delicious Recipe Variations
Feel free to make these sushi bake cups your own with these fun and easy variations!
- Tuna Twist: Replace salmon with fresh tuna or canned tuna for a different flavor profile.
- Crab Delight: Use imitation crab meat for a delicious seafood twist that’s quick and convenient.
- Veggie-Loaded: Add chopped cucumber and avocado in the layers to introduce a refreshing crunch.
- Spicy Heat: Increase the sriracha for more spice, or add a sprinkle of red pepper flakes for an extra kick!
- Creamy Dream: Swap Kewpie mayo for a mix of cream cheese and mayo for a richer filling.
- Sesame Crunch: Toss in toasted sesame seeds into the salmon mixture for added texture and nutty flavor.
- Herb Infusion: Mix in chopped cilantro or basil to give the cups a fresh, herbal note.
- Flavor Boost: Enhance the umami with a splash of miso paste in the salmon mixture, offering a deeper flavor.
Feel inspired? If you’re looking for more unique recipes, don’t forget to try our Cauldron Cookie Cups or dive into some Loaded Baked Potato Soup for a cozy night in!
Expert Tips for Sushi Bake Cups
-
Fresh Salmon: Use fresh salmon for the best flavor and texture. If short on time, canned salmon works but may alter texture.
-
Avoid Overcrowding: Ensure you don’t overcrowd the muffin tin; this guarantees even cooking of each sushi bake cup.
-
Baking Time: Check at the 15-minute mark; if you want a crunchier topping, bake a few minutes longer while monitoring closely to prevent burning.
-
Rinse Rice: Always rinse your uncooked sushi rice before cooking to achieve that perfect sticky texture essential for the sushi bake cups.
-
Making Ahead: Pre-assemble the cups and store them in the fridge; bake just before serving for warm, crispy delights!
Make Ahead Options
These Easy Baked Salmon Sushi Cups are perfect for meal prep enthusiasts! You can prepare the sushi rice and salmon mixture up to 24 hours in advance, storing them separately in the refrigerator to maintain freshness. Simply cook the sushi rice according to package instructions and mix it with rice vinegar and sugar, then keep it covered. For the salmon mixture, combine cubed salmon with soy sauce, Kewpie mayo, sriracha, and sesame oil, and refrigerate in a sealed container. When you’re ready to bake, just assemble the cups by pressing the rice into the nori squares, topping with the salmon mixture, and baking as directed. This way, you can enjoy a hassle-free, restaurant-quality appetizer on busy weeknights!
Easy Baked Salmon Sushi Cups Recipe FAQs
What type of salmon should I use for the sushi bake cups?
Absolutely! For the best flavor and texture, I recommend using fresh salmon. Look for fillets that are vibrant in color and smell clean, with a firm texture. If you’re short on time, you can use canned salmon, but keep in mind it might change the overall texture a bit.
How long can I store leftovers in the fridge?
I often store leftovers in an airtight container for up to 2-3 days. Make sure to let them cool completely before sealing to maintain their delicious texture. When you’re ready to enjoy them again, simply reheat in the oven for that freshly baked taste!
Can I freeze my sushi bake cups?
Absolutely! To freeze your sushi bake cups, first let them cool completely. Wrap each cup individually in plastic wrap and then place them in a freezer-safe bag. They can last up to 3 months in the freezer. When you want to enjoy them again, thaw in the fridge overnight and reheat in the oven until warmed through.
What should I do if my sushi rice is too sticky?
If you find your sushi rice too sticky, it’s likely because it wasn’t rinsed well enough before cooking. Be sure to wash the rice thoroughly under cold water until the water runs clear prior to cooking. If it’s already cooked and too sticky, mix in a little water to loosen it and fluff.
Can I make these sushi bake cups vegetarian?
Very! You can easily swap the salmon for other delicious ingredients. Try using marinated tofu, roasted veggies, or even a mix of avocado and cucumber for a fresh twist. Just keep the sushi rice and nori layers as is for the authentic texture and flavor.
Is there anything I should avoid or be cautious about when making this recipe?
Yes, ensure that you don’t overcrowd the muffin tin, as this will prevent even cooking. Also, keep an eye on the baking time—the salmon should be cooked through and the tops golden, but don’t let them burn. Making sure to grease the tin well helps in getting those lovely sushi cups out without sticking!
Sushi Bake Cups: Savory, Easy Appetizer to Impress Friends
Ingredients
Equipment
Method
- Begin by cooking the uncooked sushi rice according to the package instructions, which typically takes about 20 minutes. Mix rice vinegar and sugar in a microwave-safe bowl until dissolved, then gently fold into warm rice and set aside.
- Preheat your oven to 400℉ (200℃). In a bowl, combine cubed fresh salmon with light soy sauce, Kewpie mayo, sriracha, and sesame oil. Mix well until the salmon is coated.
- Cut nori sheets into squares that fit into muffin tin cups, leaving a little overhang to create crispy edges.
- Grease muffin tin lightly. Press a small amount of sushi rice into the bottom of each nori square and layer salmon mixture generously on top.
- Bake for about 15 minutes or until the salmon is cooked through and the tops are golden. Keep an eye on them as they bake.
- Remove from oven, let cool for a few minutes, drizzle with spicy mayo, sprinkle furikake, and garnish with chopped green onions before serving warm.
Leave a Reply