
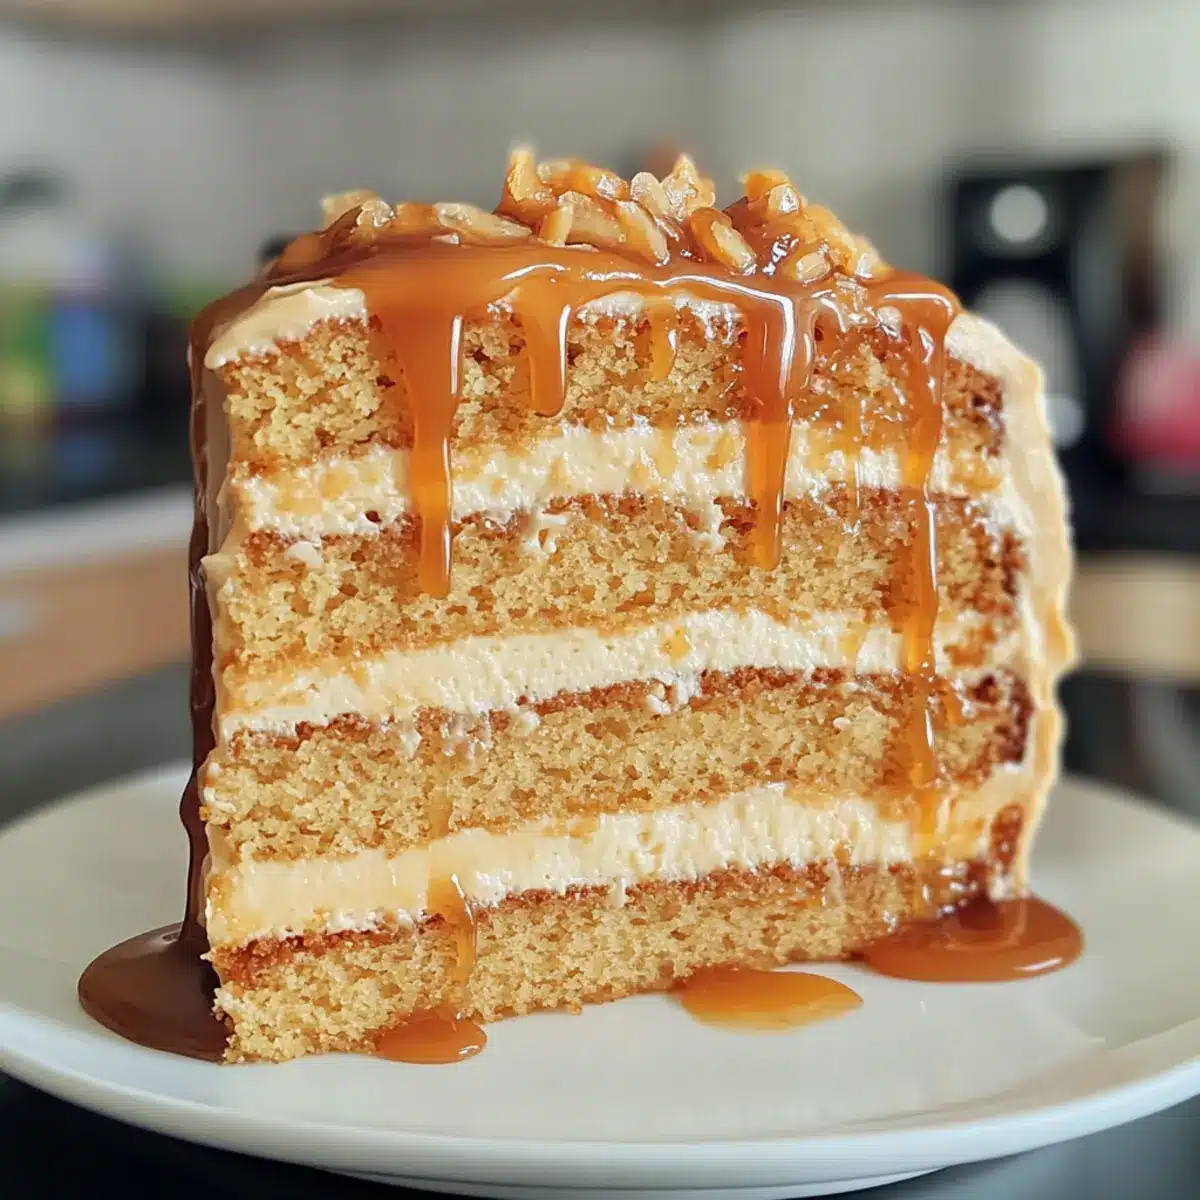
Caught in a sweet dilemma, I found myself torn between two irresistible cravings: velvety vanilla cake and luscious salted caramel. So, I took a leap of faith and created a Salted Caramel Cake that elegantly marries these flavors into dessert perfection. The result? A stunning centerpiece that doesn’t just taste divine—it’s surprisingly easy to make! This cake is not only a showstopper for any celebration, but it also brings a delightful balance of sweet and salty sensations, guaranteeing smiles around the table. Plus, with the ultra-creamy salted caramel buttercream enveloping each layer, it’s a guaranteed crowd-pleaser that will make everyone feel special. Are you ready to elevate your dessert game and create a masterpiece that will impress your friends and family? Let’s dive into making this deliciously decadent treat!
Why is Salted Caramel Cake a Must-Try?
Indulgent Flavors: This cake uniquely balances the sweet and salty, creating a taste sensation that dances on your palate.
Effortless Elegance: Surprisingly easy to make, it impressively transforms basic ingredients into a stunning dessert to showcase at any gathering.
Versatile Delight: Swap vanilla layers for chocolate or add nuts for an extra crunch—customization possibilities are endless!
Crowd-Pleasing Appeal: Perfect for birthdays or special occasions, it’s a guaranteed hit that will leave everyone raving about your baking skills.
Creamy Buttercream: The luscious salted caramel buttercream adds a decadence that makes each slice utterly irresistible. Pair it with whipped cream or a scoop of ice cream for an extra treat!
This Salted Caramel Cake is sure to become a cherished recipe, just like my Caramel Corn Sweetened or Strawberry Shortcake Cake. Don’t wait—let’s get baking!
Salted Caramel Cake Ingredients
For the Cake Batter
- Granulated Sugar – Adds sweetness and structure; you can substitute with coconut sugar for a richer flavor.
- Water – Helps dissolve sugar in caramel; no substitutions necessary.
- Butter – Provides richness and moisture; opt for unsalted to control the saltiness.
- Heavy Cream – Adds creaminess to both caramel and buttercream; can use half-and-half for a lighter touch.
- All-Purpose Flour – Essential for structure; a gluten-free flour blend works as a substitute.
- Cornstarch – Softens the cake texture; optional but recommended for fluffiness.
- Baking Powder/Soda – These leavening agents guarantee a light, airy cake; ensure they’re fresh for best results.
- Eggs – Act as a binding agent for moisture; using them at room temperature helps emulsification.
- Sour Cream – Contributes to moisture and richness; full-fat Greek yogurt can be a suitable swap.
- Vegetable Oil – Keeps the cake moist; melted coconut oil is a lovely alternative.
- Vanilla Extract – Enhances the flavor; pure vanilla extract is preferred for its depth.
For the Buttercream
- Powdered Sugar – Sweetens the frosting; sift it for a smooth consistency.
- Additional Caramel – Infuses flavor in the buttercream; feel free to use homemade or store-bought.
For Decoration
- Big Pinch of Salt – Enhances the flavors; adjust to your liking for the perfect salty touch.
With these ingredients, you’re set to whip up a stunning Salted Caramel Cake that will leave both your taste buds and your guests in awe!
Step‑by‑Step Instructions for Salted Caramel Cake
Step 1: Make the Caramel
In a medium saucepan over medium heat, combine granulated sugar and water, stirring until dissolved. Allow the mixture to simmer without stirring until it turns a rich amber color, about 8-10 minutes. Carefully stir in the unsalted butter and heavy cream until smooth. Remove from heat and let cool slightly before refrigerating to thicken.
Step 2: Prepare Cake Batter
Preheat your oven to 340ºF (170ºC). In a large mixing bowl, sift together the all-purpose flour, cornstarch, baking powder, and baking soda. In another bowl, cream together the unsalted butter and granulated sugar until light and fluffy, about 3-4 minutes. Gradually add in the eggs, followed by the dry mixture, alternating with sour cream, vegetable oil, and vanilla extract until fully combined.
Step 3: Bake Cakes
Divide the cake batter evenly into two greased and floured round cake pans. Smooth the tops with a spatula and bake in the preheated oven for 20-23 minutes or until a toothpick inserted in the center comes out clean. Once baked, let the cakes cool in the pans for 10 minutes before transferring them to wire racks to cool completely.
Step 4: Make Buttercream
In a large mixing bowl, beat the softened butter until it’s fluffy and pale, about 5 minutes. Gradually add in the sifted powdered sugar and mix until combined. Stir in the cooled salted caramel and a pinch of salt, beating until the buttercream is light and creamy. Adjust the texture with additional cream if needed.
Step 5: Assemble the Cake
Place one cooled cake layer on a serving plate. Spread a generous layer of buttercream on top, drizzle with additional salted caramel, and repeat with the second layer. Apply a thin crumb coat of buttercream around the cake to seal in crumbs, then chill for 20-30 minutes. Once chilled, finish decorating the cake with more buttercream and an alluring drizzle of caramel.
Step 6: Serve Your Salted Caramel Cake
Slice the assembled cake into generous portions and serve. This Salted Caramel Cake is perfect for special occasions and pairs beautifully with a dollop of whipped cream or a scoop of vanilla ice cream for an extra indulgent treat. Enjoy the delightful balance of flavors!
Storage Tips for Salted Caramel Cake
-
Room Temperature: Keep the salted caramel cake at room temperature for up to 1 day, covered with a cake dome or plastic wrap to avoid dryness.
-
Fridge: Store leftovers in an airtight container in the fridge for up to 3 days. Let it sit at room temperature for 20-30 minutes before serving for optimal flavor.
-
Freezer: The cake can be frozen for up to 3 months. Wrap each layer individually in plastic wrap and then in aluminum foil to prevent freezer burn.
-
Reheating: If frozen, thaw the salted caramel cake overnight in the fridge. Rewarm slices in the microwave for about 10 seconds for added softness before enjoying.
Make Ahead Options
These Salted Caramel Cakes are ideal for busy home cooks looking to save time on special occasions! You can prepare the salted caramel up to 3 days in advance; simply cool it and store it in an airtight container in the refrigerator. Additionally, the cake layers can be baked and wrapped tightly for up to 2 days in advance, ensuring they remain moist. When it’s time to serve, just thaw the layers at room temperature for about an hour, then assemble with the buttercream made fresh the day of serving for maximum fluffiness. By prepping the caramel and cake layers ahead, you’ll easily create a stunning dessert with minimal effort on the big day!
Salted Caramel Cake Customization Ideas
Feel free to make this Salted Caramel Cake uniquely yours with these fun and delightful variations!
-
Chocolate Layers: Substitute the vanilla cake with rich chocolate cake layers for a decadent twist that chocolate lovers will adore.
Deep, dark chocolate pairs beautifully with the salted caramel, making every bite an indulgent experience. -
Nutty Additions: Fold in chopped pecans or walnuts into the cake batter for a delightful crunch and added flavor.
The nuts not only add texture but also enhance the overall flavor profile, making it even more irresistible. -
Fruity Surprise: Incorporate fresh fruit like raspberries or strawberries between the layers for a vibrant burst of flavor.
The tartness of the berries balances the sweetness, creating a beautiful contrast that brightens each mouthful. -
Alternative Extracts: Swap vanilla extract for almond or hazelnut for a unique flavor twist in the buttercream.
These extracts impart a delightful nuttiness that complements the salted caramel wonderfully. -
Dairy-Free Option: Use coconut cream in place of heavy cream for the caramel and buttercream to make it dairy-free.
This swap adds a tropical hint while keeping the cake rich and creamy. -
Spice It Up: Add a teaspoon of cinnamon or a pinch of nutmeg to the cake batter for a warm, spiced flavor profile.
It transforms your cake into a seasonal delight, perfect for cozy gatherings! -
Caramel Drizzle: Drizzle extra salted caramel sauce over the frosting for an extra layer of gooey goodness.
This rich topping takes the indulgence up a notch, creating a sublime presentation. -
Cocoa Dusting: Dust the top with cocoa powder or chocolate shavings for a beautiful finish and an added flavor boost.
This simple yet elegant touch enhances the cake’s visual appeal, making it a true showstopper.
With these ideas, your Salted Caramel Cake will not only satisfy but also surprise, making it a favorite for years to come. You might also enjoy adding a scoop of vanilla ice cream or a dollop of whipped cream, just like with my beloved Caramel Apple Nachos. Happy baking!
Expert Tips for Salted Caramel Cake
-
Caramel Consistency: Make sure to cook the caramel until it reaches a rich amber color for that perfect balance of sweet and salty flavors.
-
Room Temperature Ingredients: Using room temperature eggs and butter helps create a smooth batter and fluffier cake. Don’t skip this step!
-
Sifting Flour: Always sift your all-purpose flour before measuring to avoid a dense cake texture; it aerates the flour and ensures even mixing.
-
Cooling Cakes: Allow the cakes to cool completely before frosting to prevent the buttercream from melting. Patience here is key!
-
Crumb Coat Importance: Applying a crumb coat seals in crumbs and makes for a cleaner final layer of frosting, enhancing the presentation of your Salted Caramel Cake.
What to Serve with Salted Caramel Cake?
Indulge your senses and create a feast that perfectly complements this delightful treat.
- Vanilla Ice Cream: The creamy, chilly texture beautifully contrasts with the cake’s warmth, enhancing the sweet and salty flavors.
- Fresh Berries: Tart raspberries or strawberries provide a refreshing acidity that cuts through the richness, balancing every sweet bite.
- Whipped Cream: A dollop of lightly sweetened whipped cream adds airy lightness, making each slice even more decadent without overwhelming the palate.
- Coffee or Espresso: A warm cup of coffee or espresso pairs nicely with the flavors, allowing the cake’s sweetness to shine while providing a cozy, comforting atmosphere.
- Chocolate Ganache: Drizzle a rich chocolate ganache on top for an elegant touch; the chocolate adds depth and sophistication to the caramel’s sweetness.
- Salted Caramel Sauce: Extra sauce on the side ensures an indulgent experience, letting guests drizzle it over their slice as they please—a true treat!
- Nuts: Chopped pecans or walnuts sprinkled on top introduce a delightful crunch and enhance the nutty undertones of the cake.
- Coconut Whipped Cream: For a tropical twist, brighten the plate with coconut-infused cream, which pairs perfectly with the cake’s buttery layer.
- A Glass of Milk: A classic pairing, a cold glass of milk refreshes between decadent bites, amplifying the cake’s sweet flavor balance.
Bask in the joy of savoring your Salted Caramel Cake alongside these delightful accompaniments—that’s the way to elevate your dessert experience!
Salted Caramel Cake Recipe FAQs
What should I look for when selecting ingredients for the salted caramel?
Absolutely! When selecting your sugar for the caramel, look for granulated sugar that is free from clumps, as this helps ensure even melting. For the butter, unsalted is preferred, letting you control the salty flavor in the final product. The heavy cream should be fresh, ideally whole, for the richest result—if you’re looking for a lighter option, half-and-half will still work nicely. Lastly, the salt should be a fine sea salt for the best flavor distribution.
How should I store leftover salted caramel cake?
Very good question! Leftover salted caramel cake should be stored in an airtight container at room temperature for up to 1 day. If you have more left over, move it to the fridge, where it will last for about 3 days. Make sure to let it sit at room temperature for 20-30 minutes before serving to revitalize that glorious flavor.
Can I freeze my salted caramel cake?
Absolutely! You can freeze your salted caramel cake for up to 3 months. Here’s how: Wrap each cake layer tightly in plastic wrap to prevent freezer burn. Then, wrap them again in aluminum foil. When you’re ready to enjoy your cake, thaw it overnight in the fridge. For a bit of warm, soft goodness, microwave individual slices for about 10 seconds before serving.
What if my caramel turns out grainy or hard?
No worries, I’ve been there too! If your caramel becomes grainy, reheat it gently over low heat with a small amount of water (1-2 tablespoons should do). Stir continuously until smooth. If it hardens too much during cooling, you can still fix it—just warm it slightly and mix, adding a splash of cream if needed for a smoother consistency.
Can I make this cake gluten-free?
Very much so! To make a gluten-free salted caramel cake, simply substitute all-purpose flour with a gluten-free flour blend. Make sure your baking powder and any other ingredients are also gluten-free. You might want to add a touch of cornstarch as well, as it provides added fluffiness to your cake layers.
Is this recipe safe for pets?
I recommend caution here! The salted caramel cake contains ingredients like sugar and butter that aren’t suitable for pets, especially dogs and cats, who can easily become ill from these sweet treats. Always keep any baked goods out of reach of your furry friends to ensure their safety.
Irresistible Salted Caramel Cake Perfect for Celebrations
Ingredients
Equipment
Method
- In a medium saucepan over medium heat, combine granulated sugar and water, stirring until dissolved. Allow the mixture to simmer until it turns a rich amber color, about 8-10 minutes.
- Carefully stir in the unsalted butter and heavy cream until smooth. Remove from heat and let cool slightly before refrigerating to thicken.
- Preheat your oven to 340ºF (170ºC). In a large mixing bowl, sift together flour, cornstarch, baking powder, and baking soda.
- In another bowl, cream unsalted butter and granulated sugar until light and fluffy, about 3-4 minutes. Gradually add in eggs, alternating with dry mixture, sour cream, vegetable oil, and vanilla extract.
- Divide the batter into two greased and floured round pans. Bake for 20-23 minutes or until a toothpick inserted comes out clean. Let cakes cool in pans for 10 minutes before transferring to wire racks.
- In a large bowl, beat the softened butter until fluffy and pale, about 5 minutes. Gradually add sifted powdered sugar until combined.
- Stir in cooled salted caramel and a pinch of salt, beating until light and creamy. Adjust texture with additional cream if needed.
- Place one cooled cake layer on a serving plate. Spread with buttercream, drizzle with caramel, and repeat with the second layer. Apply a crumb coat of buttercream and chill for 20-30 minutes.
- Finish decorating the cake with remaining buttercream and a drizzle of caramel.
- Slice the assembled cake into generous portions. Serve with whipped cream or a scoop of vanilla ice cream. Enjoy!
Leave a Reply