
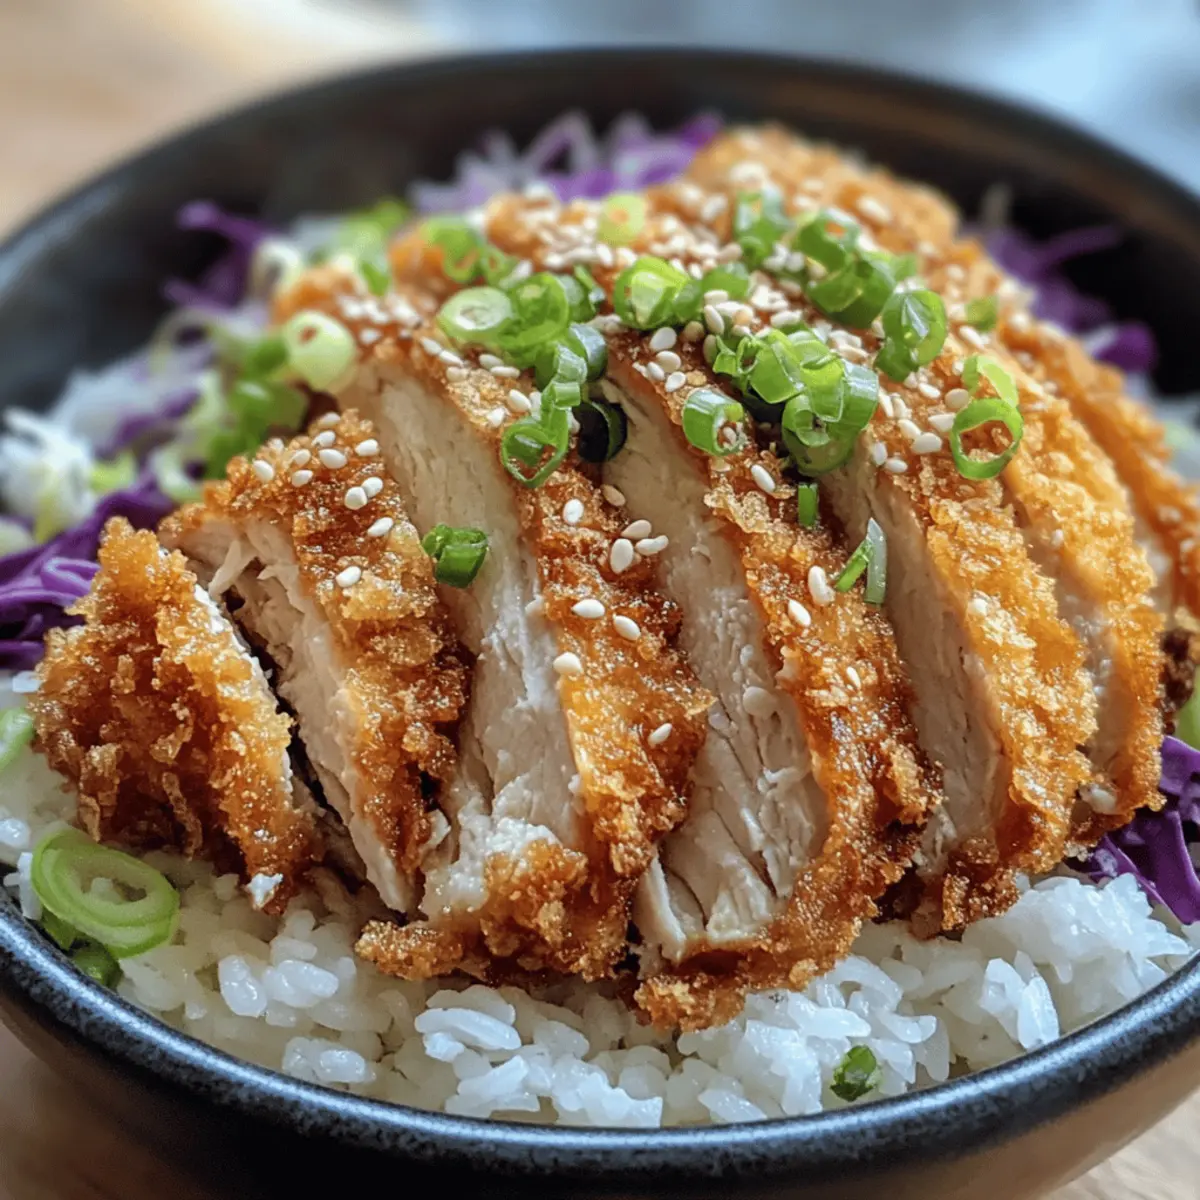
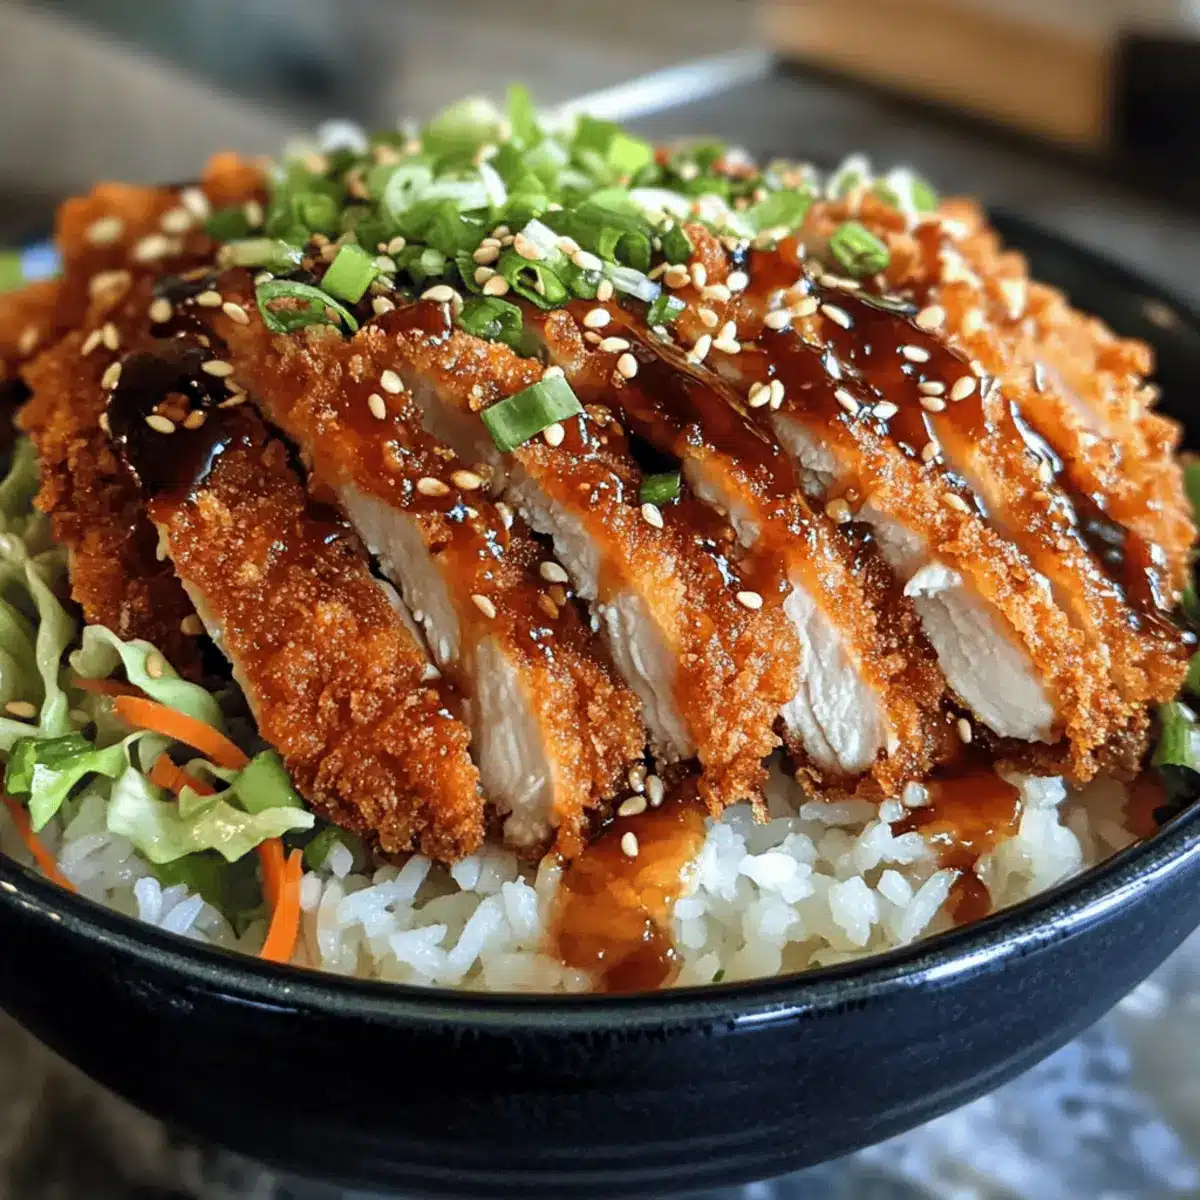
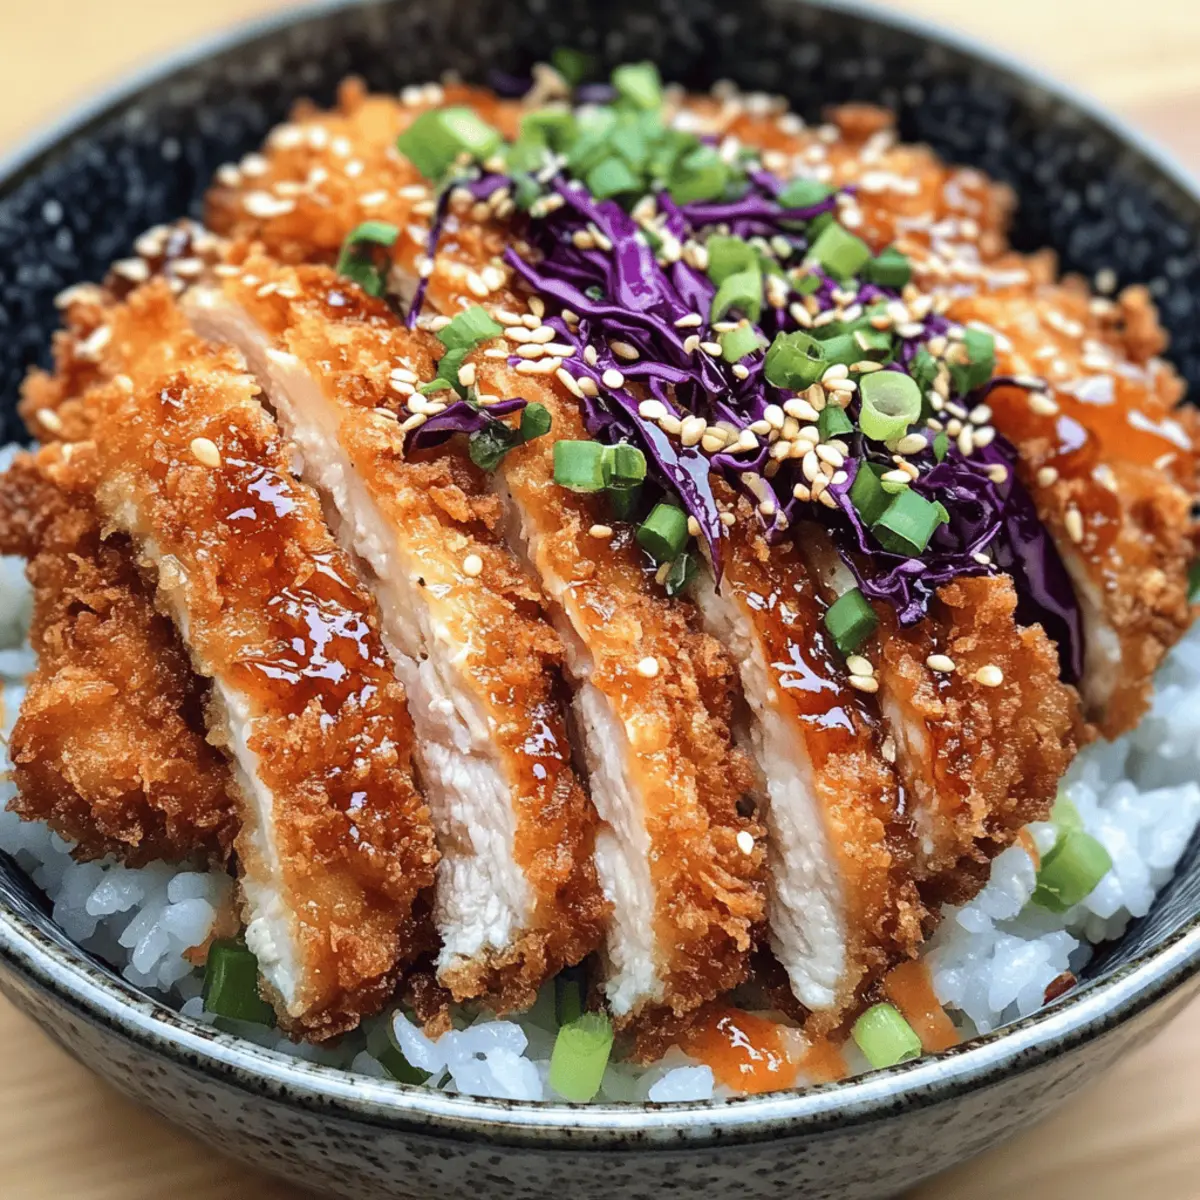
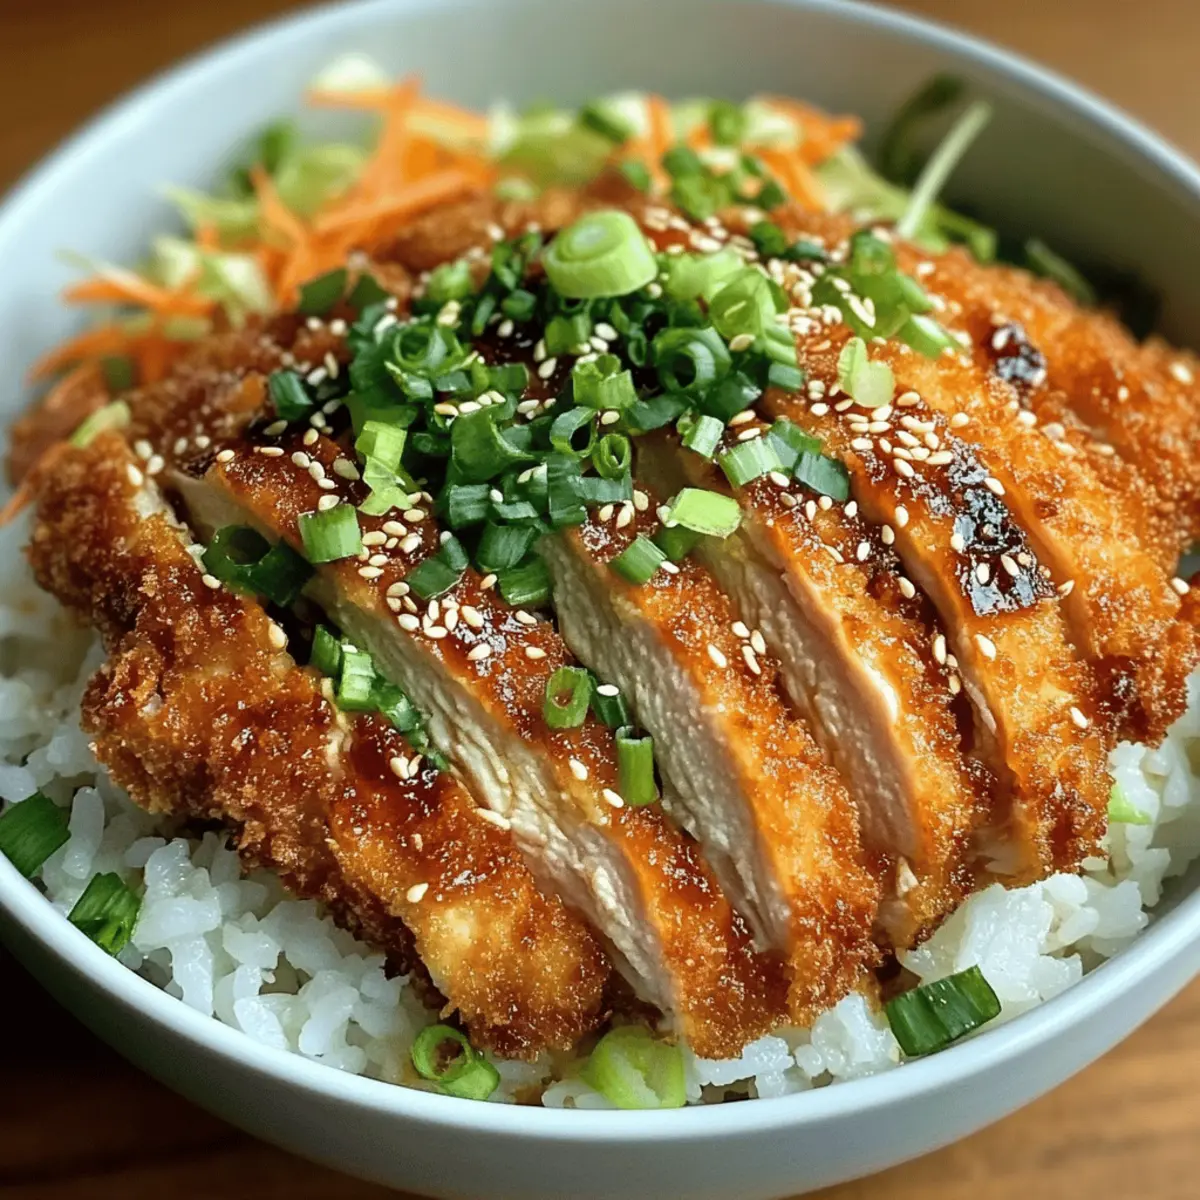
The moment I first sank my teeth into a crispy katsu bowl at a quaint izakaya in Tokyo, I felt as if I was indulging in comfort food magic. This Authentic Japanese Katsu Bowl with Crispy Chicken captures that enchanting experience right at home. Imagine molding juicy, tender chicken breasts into golden bites of crunch, resting atop fluffy, seasoned rice—all draped in a rich, savory tonkatsu sauce. What’s more, this recipe proves not only to be a quick culinary triumph but also fully customizable, allowing you to switch out chicken for pork or even experiment with vegan options. Whether you’re serving it up for a cozy weeknight dinner or a special occasion, this dish resonates with the joy of homemade cooking. Are you ready to bring a taste of Japan into your kitchen?
What makes these Katsu Bowls special?
Crispy texture: The panko breadcrumbs ensure every bite of chicken katsu is golden, crunchy, and utterly satisfying.
Flavor explosion: Rich tonkatsu sauce drizzled on top elevates the dish with umami goodness, perfectly complementing both chicken and rice.
Versatile protein: Swap chicken for pork or even tofu for a vegetarian delight—no matter your choice, it delivers comfort.
Customizable toppings: Add shredded cabbage, green onions, or sesame seeds for a fresh crunch that brightens the bowl.
Quick and easy: With straightforward steps and ingredients, this recipe is perfect for spontaneous dinners or meal prep days. Embrace the heartwarming essence of Japanese cuisine in your home with these delightful katsu bowls!
Japanese Katsu Bowls Ingredients
-
For the Katsu
• Boneless Chicken Breasts – Main protein that remains juicy and tender when cooked.
• Salt and Pepper – Essential seasoning to enhance the natural flavor of the chicken.
• All-Purpose Flour – Helps the coating adhere well to the chicken; ensure it’s evenly spread.
• Eggs – Large eggs provide moisture and ensure breadcrumbs stick effectively.
• Panko Breadcrumbs – Key for achieving that super crispy texture; opt for gluten-free if needed.
• Vegetable Oil – Choose oil with a high smoke point for optimal frying; canola or sunflower works great. -
For the Rice
• Japanese Short-Grain Rice – Provides a sticky, delicious base that absorbs flavors beautifully.
• Water – Essential for hydrating and cooking the rice to perfection.
• Rice Vinegar – Adds a subtle acidity to enhance the flavor of the rice; apple cider vinegar can be a substitute.
• Sugar – Balances the tartness of the vinegar; honey could be used for a different sweetness.
• Salt – Enhances the overall flavor profile of the rice. -
For the Sauce
• Tonkatsu Sauce – A necessity for that rich, savory depth and umami in the dish; homemade versions are delightful.
• Soy Sauce – Adds saltiness and enhances the savory notes of the sauce.
• Worcestershire Sauce – Boosts the complexity of flavors in the sauce.
• Ketchup – Provides a sweet and tangy balance within the sauce mix. -
For Serving
• Shredded Cabbage – Fresh and crunchy topping that brightens your katsu bowl.
• Green Onions – Offers a peppery punch and a pop of color.
• Sesame Seeds – Perfect for garnishing, adding a nutty flavor.
• Pickled Ginger (optional) – A traditional side that introduces a tangy contrast to enjoy with the katsu.
Dive into the world of Japanese Katsu Bowls and create a comforting meal that’s perfect for any occasion!
Step‑by‑Step Instructions for Japanese Katsu Bowls
Step 1: Rinse and Soak Rice
Begin by rinsing 1 cup of Japanese short-grain rice under cold water until the water runs clear, which should take about 2-3 minutes. Once rinsed, soak the rice in fresh water for 30 minutes to achieve the perfect texture. This soaking step allows the grains to hydrate and cook evenly, enhancing the overall quality of your Japanese Katsu Bowls.
Step 2: Cook Rice
After soaking, drain the rice and add it to a pot with 1.5 cups of water. Bring the mixture to a boil over medium-high heat, then reduce to low, cover, and simmer for 15 minutes without lifting the lid. Once the time is up, turn off the heat and let it sit covered for an additional 10 minutes. This two-step cooking process will yield perfectly fluffy rice for your katsu bowls.
Step 3: Season Rice
In a separate bowl, mix 2 tablespoons of rice vinegar, 1 tablespoon of sugar, and ½ teaspoon of salt until dissolved. Once the rice has rested, gently fold this mixture into the rice using a spatula. Be careful not to mash the grains; you want to maintain that fluffy texture. Seasoned rice is an essential component of Japanese Katsu Bowls, enhancing every bite.
Step 4: Prepare Chicken
While the rice is resting, get 2 boneless chicken breasts and pound them to an even thickness using a meat mallet. This ensures they’ll cook uniformly. Season both sides generously with salt and pepper, then set up a breading station with plates of all-purpose flour, beaten eggs, and panko breadcrumbs. This prep will make the breading process smooth and efficient.
Step 5: Bread Chicken
Take each seasoned chicken breast and dredge it lightly in the all-purpose flour, shaking off any excess. Next, dip it into the beaten eggs, allowing any excess to drip off before coating it thoroughly with panko breadcrumbs. Press down gently on the breadcrumbs to ensure they adhere well. This crispy coating is what makes your chicken katsu the star of these Japanese Katsu Bowls!
Step 6: Fry Katsu
In a large skillet, heat about ½ inch of vegetable oil over medium heat until shimmering but not smoking (around 350°F). Carefully add the breaded chicken to the hot oil, frying for 4-5 minutes per side until the katsu is golden brown and an internal temperature of 165°F is reached. This method promises a beautifully crispy exterior while keeping the chicken juicy and tender.
Step 7: Drain and Slice
Once cooked, transfer the katsu to a paper towel-lined plate to drain excess oil. Allow it to cool for a minute, then slice the katsu into strips. Your crispy chicken is now ready to elevate your Japanese Katsu Bowls with its irresistible crunch and flavor!
Step 8: Make Sauce
In a small bowl, mix together 2 tablespoons of tonkatsu sauce, 1 tablespoon of soy sauce, 1 teaspoon of Worcestershire sauce, and 1 tablespoon of ketchup. Stir until well combined. This sauce will add the signature umami flavor that completes your Japanese Katsu Bowls, enhancing every layer of this comforting dish.
Make Ahead Options
These Japanese Katsu Bowls are perfect for meal prep enthusiasts! You can bread and fry the chicken katsu up to 3 days in advance, refrigerating them in an airtight container to maintain their crispiness. The rice can also be cooked ahead and stored in the fridge for up to 4 days, just reheat before serving to retain its fluffy texture. For added flavor, consider mixing the vinegar, sugar, and salt for the rice up to 24 hours ahead; simply fold into the rice once it’s warm. When you’re ready to serve, just reheat the katsu in the oven for a few minutes, drizzled with tonkatsu sauce, for restaurant-quality results with minimal effort!
Japanese Katsu Bowls: Customization Options
Feel free to mix and match ingredients to create your perfect Katsu Bowl experience!
-
Pork Katsu: Swap chicken for thinly sliced pork loin for a classic tonkatsu twist. This option introduces a rich, savory flavor that’s truly mouthwatering.
-
Vegetarian Delight: Use eggplant slices or tofu for a plant-based version. Just coat and fry until crisp for a satisfying vegetarian take that everyone will love!
-
Spicy Kick: Add a drizzle of sriracha or mix some chili paste into your tonkatsu sauce for those who crave heat. This little kick elevates the bowl into a fragrant fiesta for your taste buds.
-
Flavor Boost: Consider marinating chicken in teriyaki sauce before frying for an extra layer of flavor. It infuses the meat with sweetness that pairs beautifully with the savory sauce.
-
Crispy Additions: Top with crispy shallots or fried garlic for an added crunch and flavor burst. These will contrast delightfully with the soft rice and tender katsu.
-
Nutty Topping: Sprinkle crushed peanuts or walnuts on top for a nutty twist that transforms your Katsu Bowl into a rich and hearty experience.
-
Fresh Greens: Add fresh spinach or a handful of arugula for a peppery brightness. It not only enhances the dish visually but also adds a healthy touch!
-
Seasonal Veggies: Incorporate stir-fried seasonal vegetables like bell peppers, snap peas, or carrots for a vibrant and nutritious boost. These colorful veggies provide a satisfying crunch and connect your meal to nature.
Explore these variations to create your perfect harmony of flavors, and don’t forget to check out how to store leftovers to keep your Katsu Bowls fresh for your next culinary adventure!
Expert Tips for Japanese Katsu Bowls
- Oil Temperature: Ensure the oil is hot enough before frying. Test with a breadcrumb; it should sizzle to guarantee crispiness.
- Crowd Control: Avoid overcrowding the pan while frying. Frying in batches helps maintain the proper temperature for a golden crust.
- Even Breading: When breading the chicken, press the panko breadcrumbs firmly to adhere well. This ensures maximum crunch in your katsu bowls.
- Fluffy Rice: Gently fold in the vinegar mixture into the rice to avoid mashing it. This keeps your rice fluffy, an essential element in Japanese katsu bowls.
- Storage Tip: To maintain crispness, reheat the katsu in an oven rather than a microwave. This method keeps the texture delightful.
What to Serve with Authentic Japanese Katsu Bowls
Imagine a comforting meal that’s as satisfying as it is delightful, filled with crunch and vibrant flavors.
-
Pickled Vegetables: The tangy crunch of pickled veggies offers a perfect contrast to the rich flavors of katsu. They can brighten up the dish while also balancing the savory notes.
-
Crispy Salad: A fresh mixed greens salad topped with a light sesame dressing complements the katsu’s heaviness. The crisp greens will provide a refreshing burst with every bite.
-
Steamed Broccoli: This healthy addition creates a beautiful green pop on the plate, adding essential nutrients and a mild flavor that harmonizes with the savory bowl.
-
Miso Soup: A warm bowl of miso soup accompanies the katsu beautifully, enhancing your meal with comforting brothy flavors and umami depth that matches the richness of the katsu.
-
Chilled Sake: A glass of chilled sake can elevate your dining experience, pairing wonderfully with the crispy textures and savory notes of the dish. Its subtle fruity flavor enhances the overall meal.
-
Green Tea Ice Cream: For dessert, consider a scoop of green tea ice cream. Its creamy texture and unique flavor provide a delightful finish, cleansing the palate and leaving you with a sweet memory of the meal.
How to Store and Freeze Japanese Katsu Bowls
- Room Temperature: For best quality, do not leave prepared katsu bowls at room temperature for more than 2 hours to prevent foodborne illnesses.
- Fridge: Store leftover katsu and rice in an airtight container in the refrigerator for up to 3 days to maintain freshness and flavor.
- Freezer: If you want to freeze your katsu, allow it to cool completely, then wrap each piece in plastic wrap and place them in a freezer bag. It can be frozen for up to 2 months.
- Reheating: To ensure your katsu stays crispy, reheat it in the oven at 375°F for about 10-15 minutes. Rice can be microwaved with a splash of water for moisture.
Japanese Katsu Bowls Recipe FAQs
How do I select the best chicken for my katsu bowls?
Absolutely! For the juiciest results, choose boneless, skinless chicken breasts that are plump and slightly moist. Look for chicken that has a bright pink color without dark spots or dryness—freshness is key. Alternatively, for a classic option, you may substitute with pork loin for a traditional pork katsu!
What’s the best way to store leftover katsu bowls?
Very! Store any leftover katsu and rice separately in airtight containers in the refrigerator for up to 3 days. This ensures the chicken maintains its crispness and the rice stays fluffy. If you’ve layered them, the moisture can make the katsu soggy!
Can I freeze my katsu bowls for later?
Absolutely! To freeze your katsu, allow it to cool completely. Wrap each chicken piece in plastic wrap and place them in a freezer bag, ensuring to remove as much air as possible. This keeps them fresh for up to 2 months. When you’re ready to enjoy, reheat in the oven at 375°F for about 10-15 minutes for that crispy texture.
Why is my katsu soaking up too much oil during frying?
This could happen for a couple of reasons. Ensure that your oil is hot enough before adding the katsu—if it’s too cool, the chicken will absorb more oil, leading to a greasy result. Additionally, avoid overcrowding the pan as this lowers the temperature and affects crispiness. Fry in smaller batches to retain that glorious crunch!
Can I make this dish vegetarian-friendly?
Very! For a delightful vegetarian version, simply replace the chicken with eggplant or tofu. Slice the eggplant into thick rounds or press tofu to remove excess moisture before breading. Follow the same breading and frying instructions, and you’ll create a savory katsu bowl that everyone can enjoy!
Is there a gluten-free option for katsu?
Absolutely! To make your Japanese Katsu Bowls gluten-free, substitute all-purpose flour with a gluten-free flour blend and use gluten-free panko breadcrumbs. Just be sure to follow the same breading and frying techniques, and you’ll enjoy the same delicious flavors with no gluten!
Crispy Japanese Katsu Bowls: Comfort Food Made Easy
Ingredients
Equipment
Method
- Rinse 1 cup of Japanese short-grain rice under cold water until clear, then soak in fresh water for 30 minutes.
- Drain rice and add to a pot with 1.5 cups of water; boil, then simmer covered for 15 minutes. Let sit for 10 minutes.
- Mix 2 tbsp rice vinegar, 1 tbsp sugar, and 1/2 tsp salt until dissolved. Fold into rice gently after resting.
- Pound chicken breasts to even thickness. Season generously with salt and pepper. Prepare breading station with flour, beaten eggs, and panko.
- Dredge each chicken breast in flour, dip in eggs, and coat with panko breadcrumbs, pressing to adhere.
- Heat 1/2 inch of vegetable oil in a skillet. Fry chicken for 4-5 minutes per side until golden and cooked through.
- Drain katsu on paper towels, let cool for a minute, then slice into strips.
- Mix 2 tbsp tonkatsu sauce, 1 tbsp soy sauce, 1 tsp Worcestershire sauce, and 1 tbsp ketchup in a bowl until combined.
Leave a Reply