
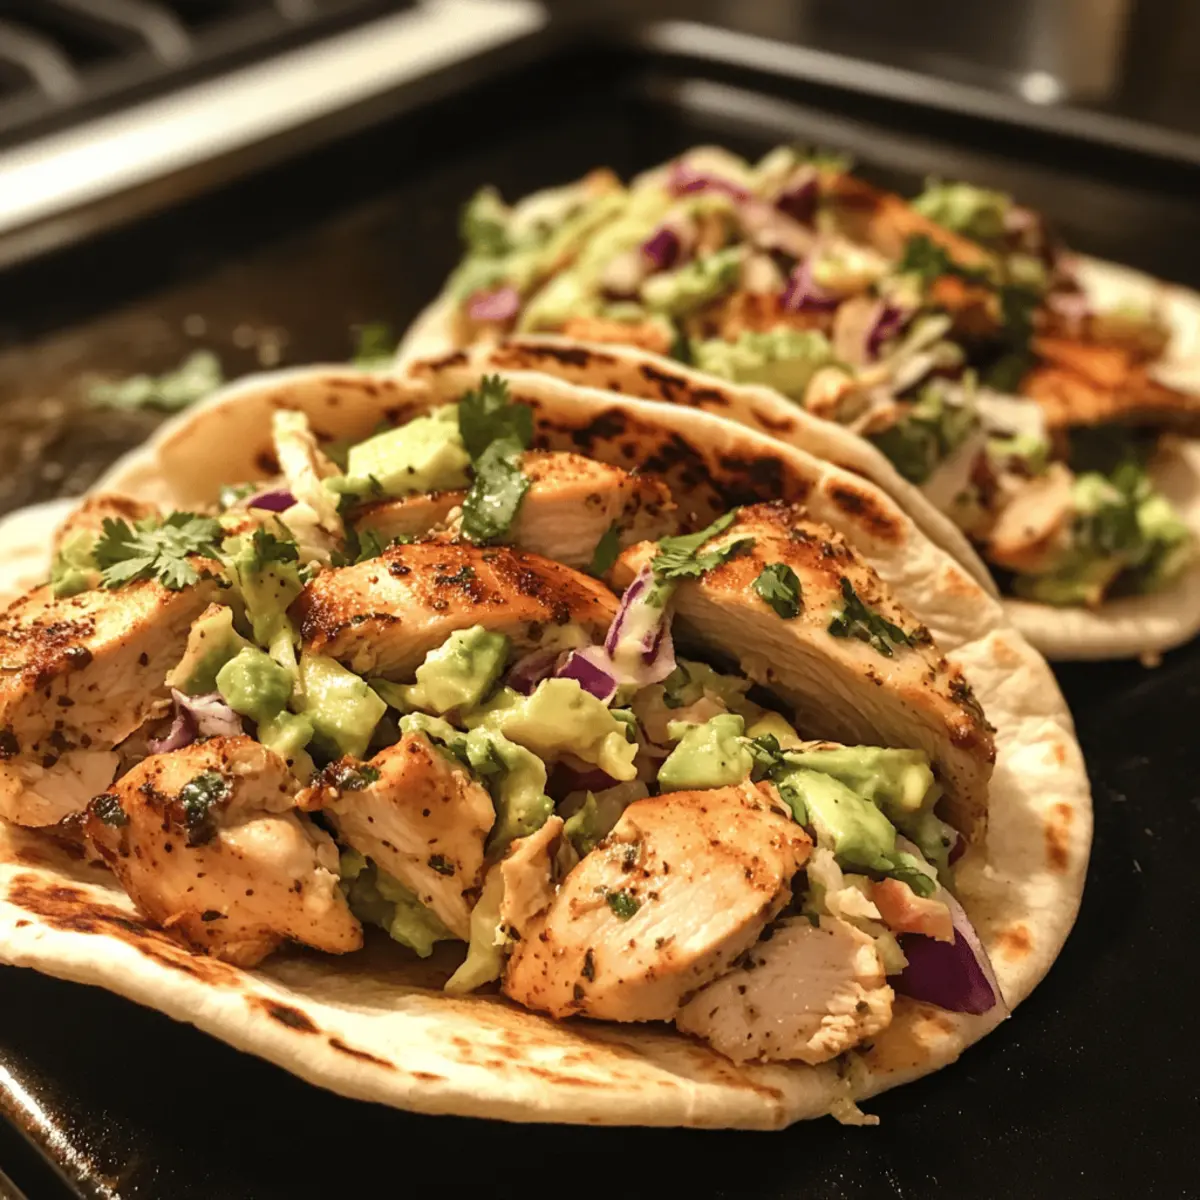
The aroma of roasted chicken wafting through the kitchen always seems to ignite a little magic, doesn’t it? That’s why I’m thrilled to share my latest weeknight wonder: Sheet Pan Chicken Pitas with Herby Ranch. In just a pinch of time, you’ll have juicy, spiced chicken nestled in warm pitas, accompanied by a refreshing, creamy herb slaw that adds an irresistible twist. What I love most is how easy this healthy chicken dinner is to whip up, with minimal cleanup—a true lifesaver for those busy evenings! Plus, it’s a meal that everyone can enjoy, making it perfect for family dinners or casual get-togethers. So, are you ready to create a dish that will turn your weeknights into something special? Let’s dive in!
Why Are Chicken Pitas So Irresistible?
Easily Customizable: These chicken pitas are perfect for personalizing based on your flavor preferences—swap in shrimp or tofu for a delightful twist!
Quick Prep Time: With just a few simple steps, you can have a flavorful dinner on the table in under 30 minutes!
Healthy Deliciousness: Loaded with juicy protein and fresh herbs, this recipe ensures you’re savoring a nourishing meal that feels indulgent without the guilt.
Crowd-Pleasing Appeal: Whether you’re serving the family or hosting friends, everyone will be clamoring for more of these vibrant pitas!
Minimal Cleanup: Say goodbye to endless dishes; this sheet pan has you covered for easy cooking and quick cleanup.
For an extra flavor boost, consider pairing these pitas with a refreshing side like a Greek Quinoa Salad to round out your meal!
Chicken Pita Ingredients
For the Chicken
- Chicken Breasts – Juicy protein that cooks quickly; you can use chicken thighs for more moisture.
- Brown Sugar – Adds sweetness and helps caramelize the chicken during roasting.
- Smoked Paprika – Provides deep flavor and a smoky undertone; swap for regular paprika if needed.
- Garlic Powder – Amplifies savory notes; fresh garlic can be used for an extra punch.
- Onion Powder – Adds a mild onion flavor; feel free to skip if you’re out.
- Cayenne Pepper – Delivers a kick; adjust to taste or omit for a milder dish.
- Kosher Salt – Vital for seasoning; be sure to taste and adjust as necessary.
- Olive Oil – For cooking and flavor infusion; other oils like avocado oil are fine substitutes.
- Lemon – Brightens the dish; lime offers a fun twist with a different flavor.
For the Slaw
- Plain Yogurt – Acts as the creamy base for the slaw; dairy-free yogurt works as a replacement if needed.
- Fresh Dill, Parsley, Chives – These herbs provide freshness and flavorful contrast; mix herbs based on your tastes.
- Cabbage – Adds a crunchy texture; you can replace it with coleslaw mix or kale for variety.
For Assembly
- Pitas – The delicious wrap for your chicken and slaw; gluten-free options are available.
- Avocado – Adds a creamy element; substitute with hummus or skip it if desired.
Enjoy creating delightful Chicken Pitas with Herby Ranch that will captivate your taste buds while keeping mealtime simple and satisfying!
Step‑by‑Step Instructions for Chicken Pitas with Herby Ranch
Step 1: Prep the Oven & Chicken
Begin by preheating your oven to 425°F (220°C). In a large mixing bowl, combine your chicken breasts with brown sugar, smoked paprika, garlic powder, onion powder, cayenne pepper, kosher salt, and a drizzle of olive oil. Toss well to ensure each piece is evenly coated. Add a couple of lemon slices for extra flavor, then spread the chicken mixture onto a greased sheet pan.
Step 2: Roast the Chicken
Place the sheet pan in the preheated oven and roast the chicken for about 15 minutes. Once the time is up, give the chicken a gentle stir and return it to the oven for an additional 4 to 7 minutes. You’re looking for a golden-brown exterior and an internal temperature of 165°F (75°C) – this ensures your Chicken Pitas with Herby Ranch will be tender and juicy.
Step 3: Make the Slaw
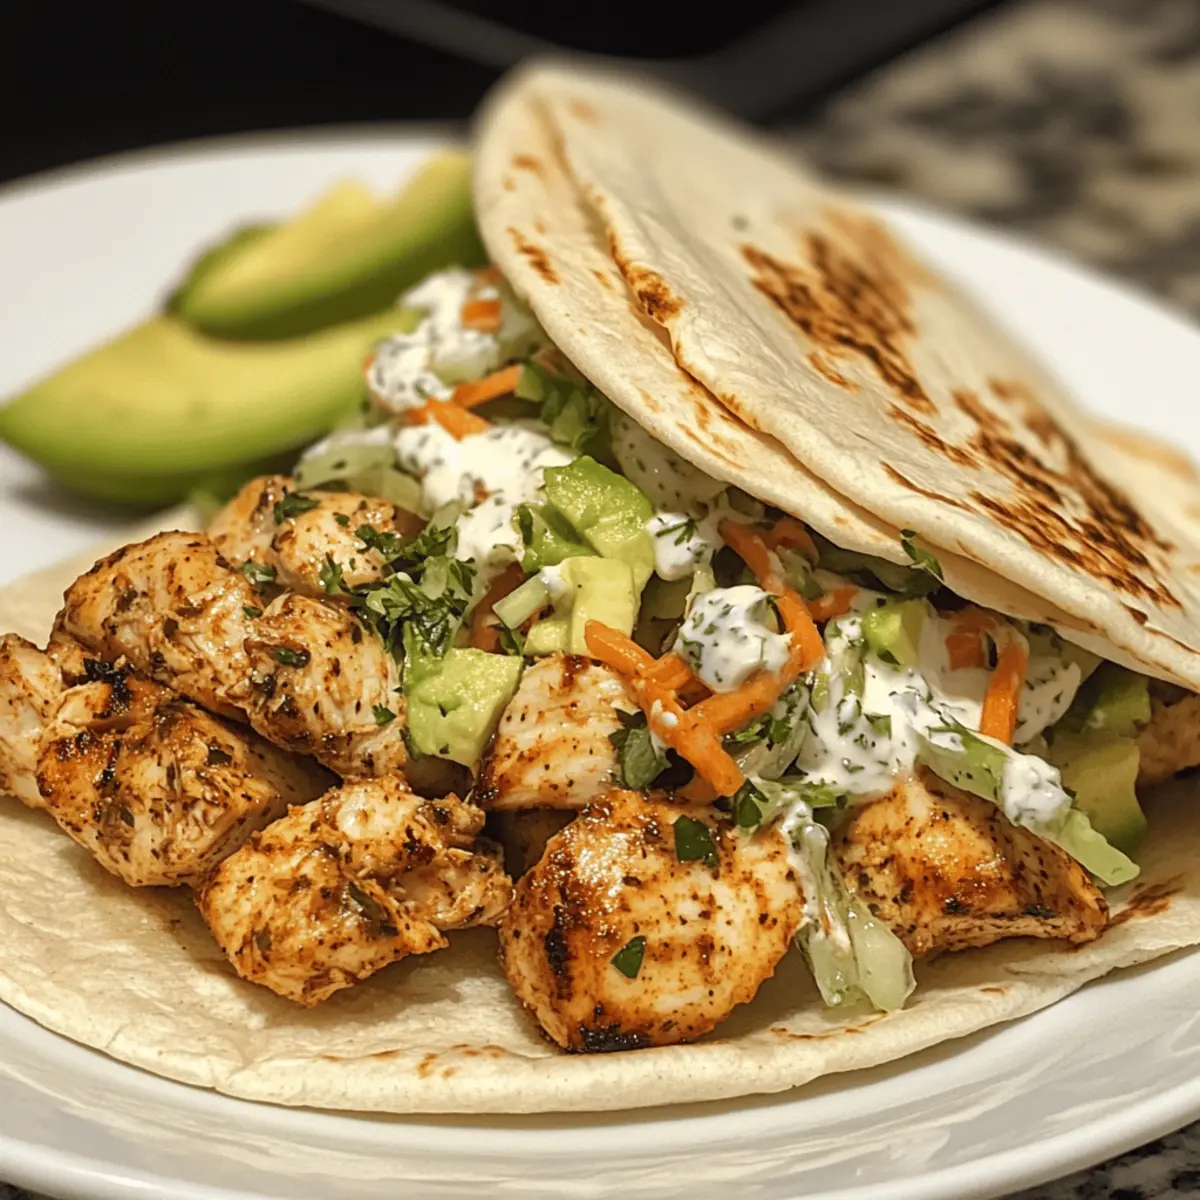
While the chicken roasts, prepare the slaw by whisking together plain yogurt, freshly chopped herbs, lemon juice, a splash of olive oil, and a pinch of salt in a separate bowl. Add in the shredded cabbage, gently folding it into the mixture. Let this mixture sit for about 10 to 15 minutes to allow the flavors to meld and the cabbage to soften slightly.
Step 4: Warm and Fill Pitas
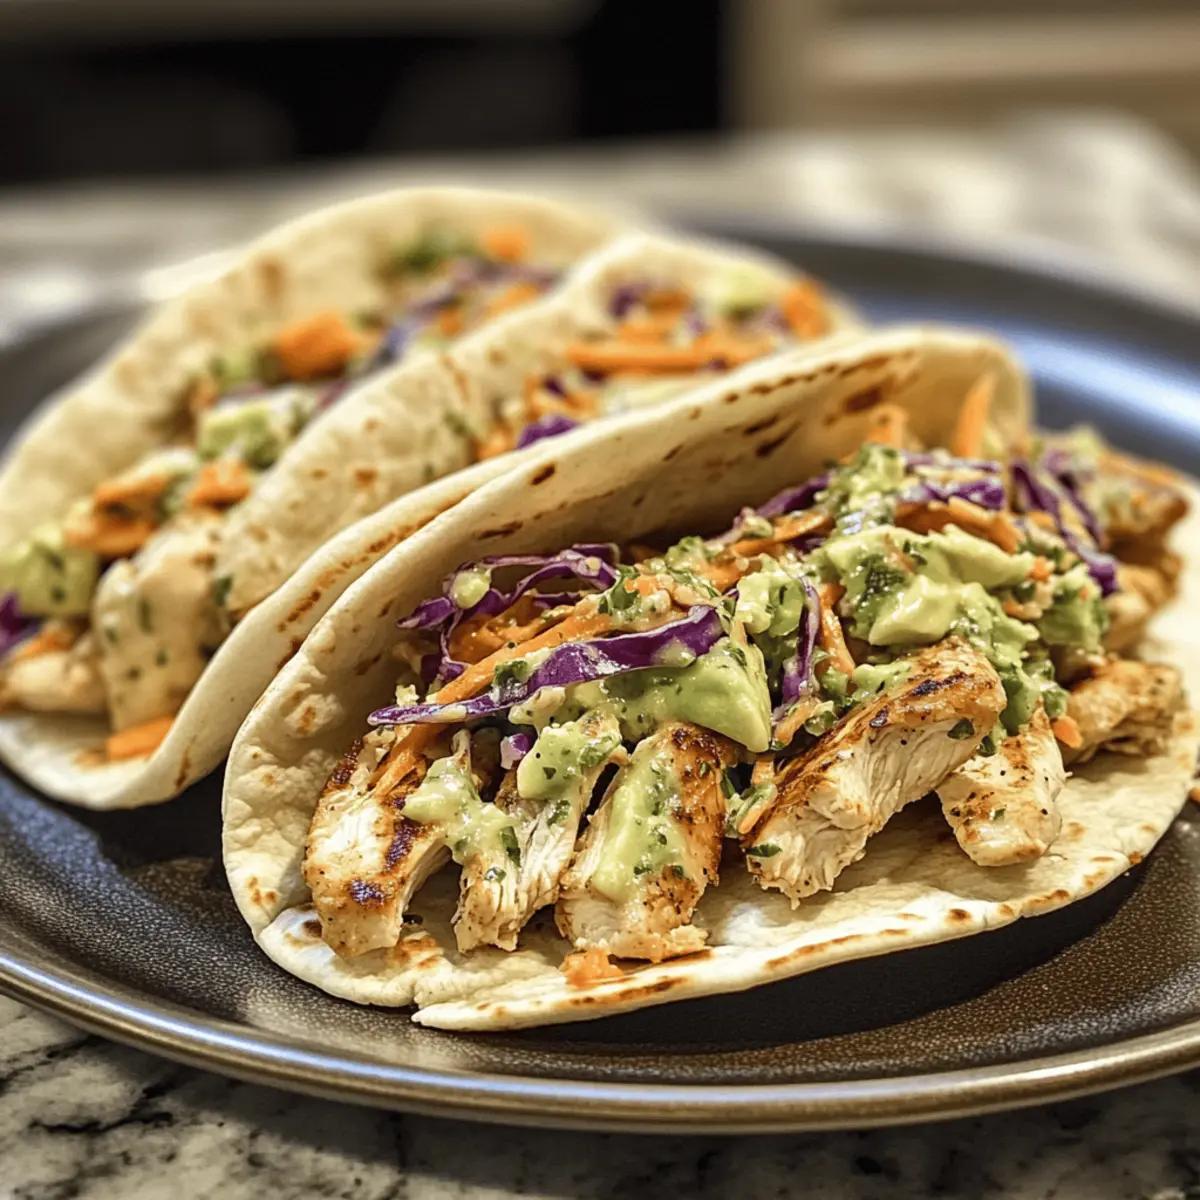
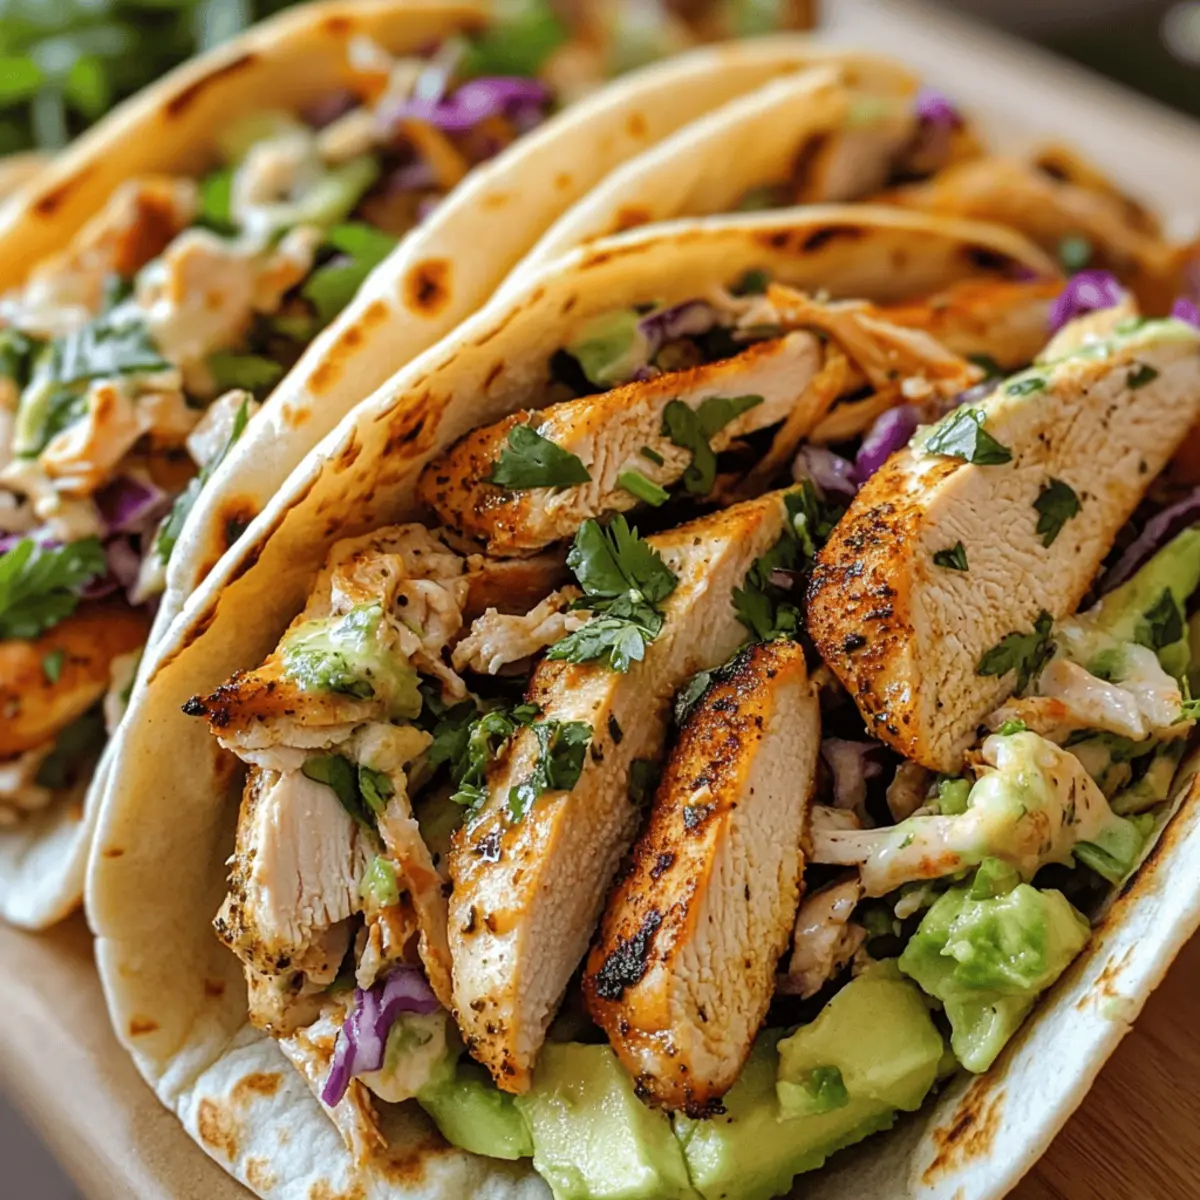
Once the chicken is perfectly roasted, take the sheet pan out of the oven. Warm your pita breads briefly in the oven or on a skillet until they are soft and pliable. Then, fill each pita with a generous scoop of the herby slaw, followed by the succulent chicken pieces, and a slice or two of creamy avocado.
Step 5: Serve and Enjoy
Plate your Chicken Pitas with Herby Ranch, serving them warm for the best experience. These delightful pitas are perfect for a quick dinner that enchants the taste buds of your family and friends. Embrace the vibrant flavors and enjoy your bustling evening with this easy weeknight meal!
What to Serve with Sheet Pan Chicken Pitas with Herby Ranch
Transform your meal into a delightful feast with these perfectly paired sides and drinks.
-
Mediterranean Chickpea Salad: A zesty and colorful salad that complements the spiced chicken beautifully, adding refreshing crunch and protein.
-
Roasted Vegetable Medley: A mix of seasonal veggies roasted to perfection, providing a warm and savory texture that pairs wonderfully with the soft pitas.
-
Tzatziki Sauce: This cool, creamy sauce with cucumber and garlic adds an extra layer of flavor, enhancing each bite of chicken and herby slaw.
-
Pita Chips with Hummus: Serve crunchy pita chips with a side of smooth hummus for a satisfying appetizer that echoes the Mediterranean theme.
-
Grilled Corn on the Cob: Sweet and smoky grilled corn elevates your table, offering a delicious side that brings a BBQ flair.
-
Cucumber Mint Lemonade: Cool down with this refreshing drink that balances the flavors of your meal, making every bite even more enjoyable.
-
Baklava for Dessert: End on a sweet note with this flaky pastry, drizzled in honey and nuts, tying the Mediterranean meal together.
Expert Tips for Chicken Pitas
-
Perfectly Roast Chicken: Ensure the chicken pieces are uniform in size for even cooking, achieving beautifully roasted chicken in your chicken pitas.
-
Fresh Slaw Matters: Prepare the herby slaw shortly before serving. This keeps it crunchy and retains vibrant flavors that complement the chicken perfectly.
-
Warming Pitas: Warm the pitas just before assembling to enhance their softness and make for easier wrapping. They should be pliable to hold all the tasty fillings!
-
Flavor Boost: Feel free to play with the spices. Adding a splash of lemon juice or a dash of hot sauce to the slaw can elevate your chicken pitas with herby ranch to another level.
-
Storage Tips: Leftovers can be kept in airtight containers. Store chicken and slaw separately to maintain freshness for up to 3 days.
Storage Tips for Chicken Pitas with Herby Ranch
Fridge: Store leftover chicken and slaw separately in airtight containers. The chicken remains delicious for up to 3 days, while the slaw will stay fresh and crunchy.
Freezer: If you want to freeze the chicken, place it in a freezer-safe bag after cooling. It can last in the freezer for up to 3 months. Reheat fully before enjoying again.
Reheating: To reheat chicken, bake in the oven at 350°F (175°C) until heated through, approximately 10–15 minutes. Pitas can be warmed briefly in a skillet or oven.
Assembly: For the best texture, fill pitas just before serving to ensure they remain soft and fresh, avoiding sogginess from the slaw.
Chicken Pitas with Herby Ranch Variations
Feel free to explore these delicious twists and substitutions to make the chicken pitas your own!
-
Shrimp Substitute: Swap out the chicken for shrimp, which cooks in just a few minutes, delivering a delightful seafood twist!
-
Dairy-Free Delight: Use a dairy-free yogurt in the herby slaw if you’re looking to keep it vegan. You’ll miss nothing with this creamy alternative!
-
Extra Crunch: Add crunchy vegetables like bell peppers or radishes to the slaw for a vibrant crunch. The colorful mix keeps every bite exciting!
-
Spice It Up: For those craving heat, include diced jalapeños or a sprinkle of red pepper flakes. Your taste buds will thank you for the kick!
-
Whole Wheat Pitas: Opt for whole wheat pitas for a hearty, fiber-packed wrap. It’s a wholesome swap without sacrificing flavor!
-
Mediterranean Veggies: Stuff the pitas with charred zucchini, eggplant, or bell peppers for a vibrant veggie-filled option. This twist brings a wonderful Mediterranean flair!
-
Hummus Swap: Instead of avocado, spread hummus in the pitas for a creamy texture that complements the chicken beautifully.
To amp up your meal even more, consider pairing these pitas with a refreshing Greek Quinoa Salad or a zesty Hot Honey Chicken Bowl for an unforgettable dining experience!
Make Ahead Options
These Sheet Pan Chicken Pitas with Herby Ranch are perfect for meal prep enthusiasts! You can season and marinate the chicken up to 24 hours in advance; simply toss it with spices, brown sugar, and olive oil, then refrigerate in an airtight container. Additionally, the herby slaw can be assembled and stored for up to 3 days, ensuring it stays fresh and flavorful. When ready to serve, just roast the marinated chicken as directed, warm up your pitas, and fill them with the prepared slaw, avocado, and chicken. With these make-ahead options, you’ll enjoy delicious, restaurant-quality chicken pitas with herby ranch on busy weeknights—all with minimal effort!
Sheet Pan Chicken Pitas with Herby Ranch Recipe FAQs
How do I choose ripe ingredients for the slaw?
Absolutely! For the freshest slaw, select a firm cabbage with no dark spots and vibrant color. When choosing herbs, look for bright, perky leaves; wilted ones will lack flavor. For avocados, gently squeeze—ripe ones yield slightly but shouldn’t feel mushy.
How should I store leftovers?
To keep your Chicken Pitas with Herby Ranch fresh, store leftover chicken and slaw in separate airtight containers. The chicken lasts for up to 3 days in the fridge, while the slaw will remain crunchy if stored short-term. To reheat, use the oven at 350°F (175°C) for about 10–15 minutes.
Can I freeze the chicken for later use?
Absolutely! To freeze the chicken, allow it to cool completely, then place it in a freezer-safe bag, squeezing out any air to prevent freezer burn. It can be stored for up to 3 months. When ready to enjoy, thaw in the fridge overnight and reheat in the oven until warmed through.
What should I do if my chicken turns out dry?
If your chicken is dry, it may have been overcooked or cooked at too high of a temperature. To prevent this, always check the internal temperature—165°F (75°C) is your goal. Letting it rest for a few minutes before shredding can also help retain moisture.
Can I make this recipe allergen-friendly?
Very! For gluten-free options, choose gluten-free pitas. To make the slaw dairy-free, swap plain yogurt for a plant-based substitute, like coconut or almond yogurt. Adjust seasonings to taste, especially if you’re eliminating ingredients to suit dietary restrictions.
Is there a substitute for fresh herbs in the slaw?
If you’re out of fresh herbs, dried ones can work as substitutes; just use less since dried herbs are more concentrated. A teaspoon of dried dill, parsley, or chives can still provide flavor. Alternatively, add a splash of your favorite salad dressing for a quick fix!
Satisfying Chicken Pitas with Herby Ranch for a Quick Dinner
Ingredients
Equipment
Method
- Preheat your oven to 425°F (220°C). In a large mixing bowl, combine chicken breasts with brown sugar, smoked paprika, garlic powder, onion powder, cayenne pepper, kosher salt, and olive oil. Toss well and add lemon slices, then spread the mixture onto a greased sheet pan.
- Place the sheet pan in the preheated oven and roast the chicken for about 15 minutes. Stir and return for an additional 4 to 7 minutes until golden brown and cooked through.
- While the chicken roasts, whisk together yogurt, herbs, lemon juice, olive oil, and salt in a separate bowl. Fold in shredded cabbage and let sit for 10 to 15 minutes.
- Warm pitas briefly, then fill each with herby slaw, chicken pieces, and avocado slices.
- Serve warm for the best experience.
Leave a Reply