
“Did you taste that?” I overheard someone exclaim as they savored a rich dessert, and I couldn’t help but smile. Today, I’m excited to share my recipe for Nutella Cheesecake Bars—a delightful treat that transforms any gathering into a celebration. Combining a creamy cheesecake filling with luscious swirls of Nutella, these bars are not only a chocolate lover’s dream but also incredibly easy to whip up. Just imagine serving a crowd-pleasing dessert that can be made ahead of time, saving you from last-minute anxiety. Plus, they hold their flavor beautifully, making them just as irresistible the next day. Ready to indulge in something special? Let’s dive into the sweet world of Nutella Cheesecake Bars!
Why Are These Cheesecake Bars Irresistible?
Decadent Indulgence: Each bite of these Nutella cheesecake bars brings a creamy richness that chocolate lovers crave. Easy to Prepare: With just a few simple steps, you’ll create a dessert that impresses without the fuss. Make-Ahead Magic: Perfect for parties! Prepare them in advance and enjoy a stress-free gathering. Versatile Flavor: Feel free to experiment with different flavors—swap Nutella for peanut butter or fresh berries for a refreshing twist. Don’t forget to check out my Strawberry Cheesecake Stuffed for another delightful dessert idea! Crowd-Pleasing Delight: Their gooey texture and irresistible taste will leave everyone wanting more, making these bars a must-have at any dessert table!
Nutella Cheesecake Bars Ingredients
• Dive into the delightful world of Nutella Cheesecake Bars with this simple ingredient list!
For the Crust
- Chocolate Sandwich Cookie Crumbs – The crunchy base that brings a rich flavor; Oreos work perfectly here!
- Salted Butter – Binds the crust ingredients together while enhancing flavor; always use melted for easy mixing.
For the Filling
- Cream Cheese – The star of the cheesecake; ensure it’s softened for a smooth mix.
- Granulated Sugar – Sweetens the cheesecake; feel free to adjust to your preference for a balanced flavor.
- Full-Fat Sour Cream – Adds a layer of richness and creaminess; Greek yogurt is a great substitute for a lighter option.
- Vanilla Extract – Boosts flavor; using vanilla bean paste can elevate the taste even more!
- Eggs – Provides structure to the bars; room temperature eggs incorporate seamlessly into the batter.
- Nutella – Infuses chocolatey goodness and sweetness into the cheesecake; adjust the amount depending on how decadent you want to go!
These key ingredients come together to create your dream Nutella Cheesecake Bars—rich, creamy, and utterly irresistible!
Step‑by‑Step Instructions for Nutella Cheesecake Bars
Step 1: Prep the Crust
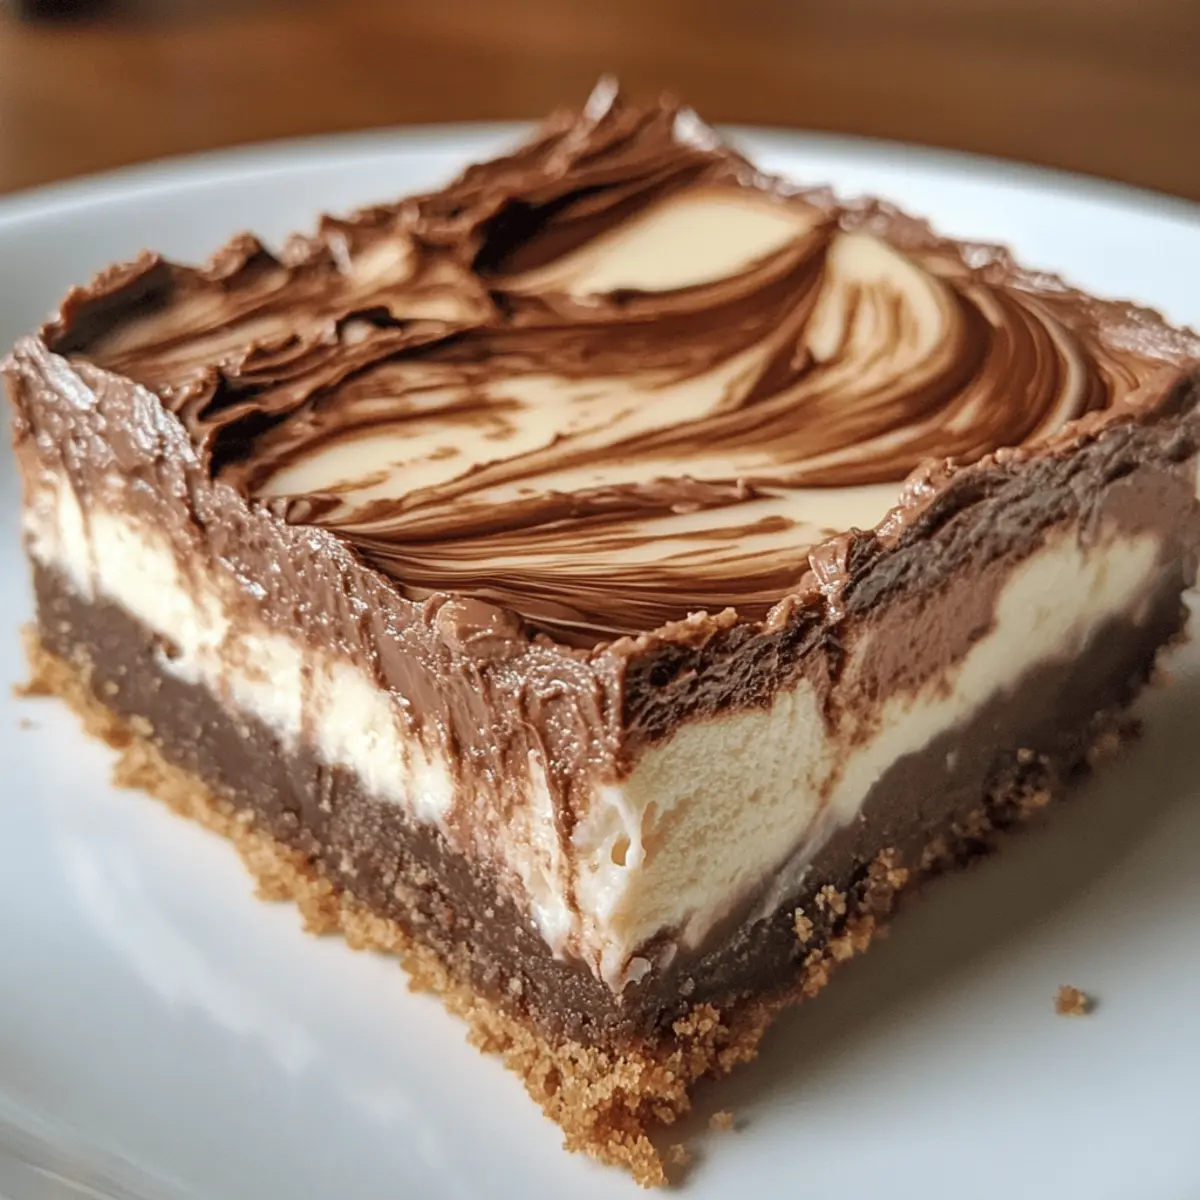
Preheat your oven to 325°F (165°C) and line an 8×8-inch baking pan with parchment paper for easy removal. In a mixing bowl, combine chocolate sandwich cookie crumbs and melted salted butter until well mixed. Press this mixture firmly into the bottom of the prepared pan to form an even layer. Bake for 8 minutes, then let it cool completely on a wire rack.
Step 2: Create the Water Bath
While the crust cools, prepare a water bath for baking your Nutella cheesecake bars. Fill a rimmed baking dish with about 1 inch of water and place it on the bottom rack of your oven. This step helps create a gentle baking environment, ensuring your cheesecake bakes evenly and remains creamy.
Step 3: Make the Filling
In a large mixing bowl, beat the softened cream cheese with an electric mixer on medium speed until smooth and creamy, about 2 minutes. Gradually add granulated sugar, mixing until combined. Then, blend in full-fat sour cream and vanilla extract. With the mixer on low, add eggs one at a time, incorporating each until the mixture is smooth and creamy throughout.
Step 4: Gelatinize the Batters
Once your filling is smooth, separate half of the cheesecake mixture into another bowl. Add Nutella to one half and blend until fully incorporated. In the other half, gently fold in crushed Oreo crumbs, enhancing the filling’s texture and flavor while keeping it creamy.
Step 5: Layer the Batters
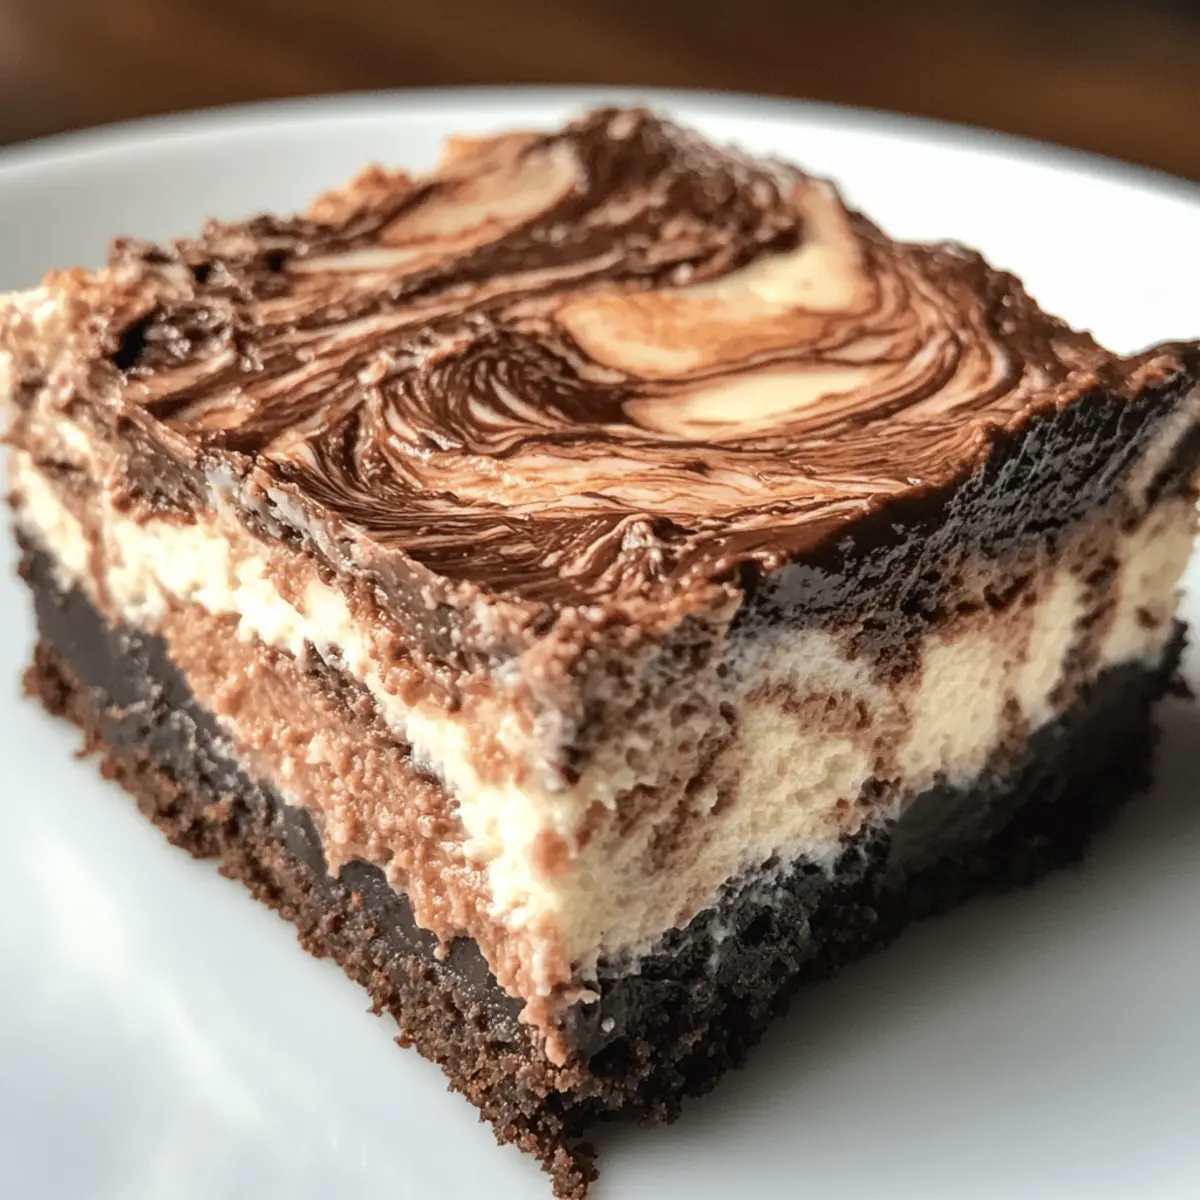
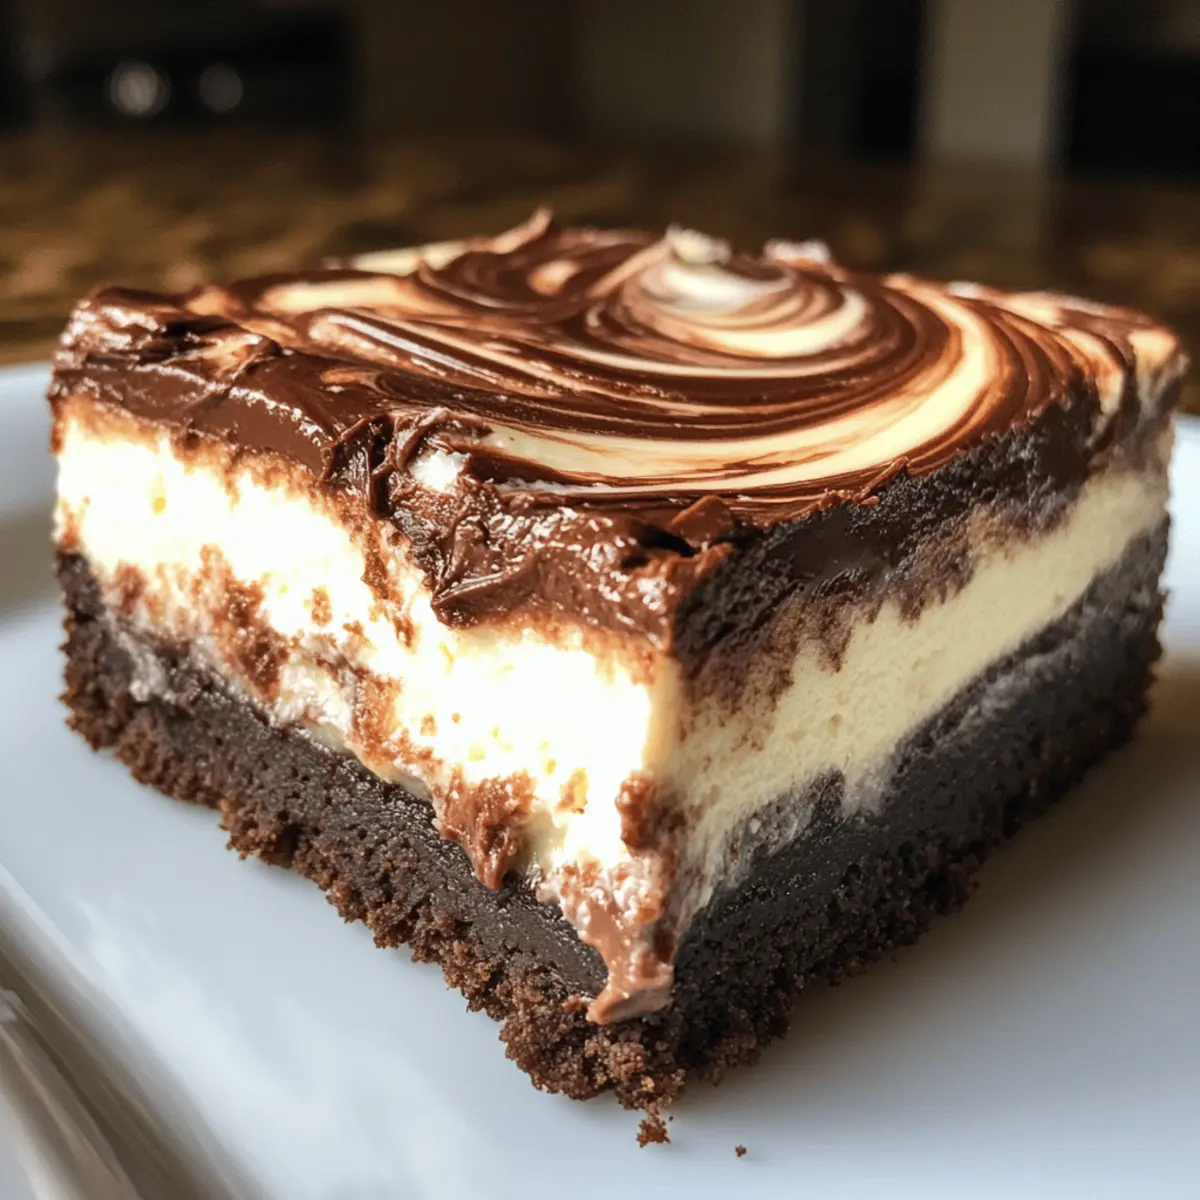
Pour alternating layers of the Oreo-infused cheesecake batter and the Nutella cheesecake batter into the prepared crust. Start by spooning in a layer of one batter, then the other, creating a lovely marbled effect. To finish, swirl warm Nutella on top using a knife to create decorative swirls across the surface.
Step 6: Bake
Place the assembled Nutella cheesecake bars in the oven, ensuring the water bath is still in place. Bake for 55-65 minutes, keeping an eye on the bars as they bake. When done, gently shake the pan; the center should have a slight jiggle but not be liquid, indicating your Nutella cheesecake bars are ready.
Step 7: Cool and Chill
Once baked, remove the cheesecake from the oven and let it cool completely at room temperature. After cooling, transfer it to the refrigerator and chill for at least 2 hours, or overnight for the best flavor and texture. When ready, slice them into bars for serving, and enjoy the rich, creamy goodness of your Nutella cheesecake bars!

What to Serve with Nutella Cheesecake Bars
Indulging in these dessert delights opens up a world of pairing possibilities that will elevate your dessert experience!
-
Fresh Berries: A tart contrast to the creamy sweetness, vibrant strawberries or raspberries add a refreshing touch to each rich bite.
-
Whipped Cream: A dollop of lightly sweetened whipped cream brings a light, airy texture that beautifully balances the dense cheesecake bars.
-
Vanilla Ice Cream: Creamy vanilla ice cream enhances the chocolatey goodness while providing a cool, refreshing complement to the bars.
-
Espresso or Coffee: A bold cup of espresso or rich coffee enhances the sweet flavors, creating a heavenly dessert pairing that many adore.
-
Chocolate Sauce Drizzle: For those who crave extra decadence, a drizzle of warm chocolate sauce enhances the chocolate experience, creating moist bites of bliss.
-
Salted Caramel Sauce: A luscious drizzle of salted caramel adds a touch of savory bliss, beautifully contrasting with the sweetness of the Nutella.
-
Nutella Dipped Fruit: Experience a fun companion by dipping fresh fruits like bananas or apples into warm Nutella for a delightful, chocolatey treat that pairs perfectly with the bars.
Every option is sure to make your Nutella Cheesecake Bars even more irresistible!
Nutella Cheesecake Bars Variations & Substitutions
Feel free to customize your Nutella cheesecake bars with these delightful twists that will inspire your culinary creativity!
-
Dairy-Free: Substitute cream cheese with vegan cream cheese and use coconut yogurt for the filling for a plant-based delight.
-
Nut-Free: Replace Nutella with a homemade chocolate ganache made using dairy-free chocolate chips for a nut-free treat while still keeping it rich and creamy.
-
Gluten-Free: Use gluten-free cookie crumbs for the crust, maintaining the indulgent flavor while being friendly to gluten sensitivities.
-
Fruity Flair: Add a swirl of pureed strawberries or raspberries to the Nutella layer for a refreshing fruitiness that brightens each bite!
-
Chocolate Overload: Mix in mini chocolate chips into the filling for extra chocolatey goodness or even top with chocolate shavings for that wow factor.
-
Pumpkin Spice: For a seasonal twist, replace half of the cream cheese with pumpkin puree and add warm spices like cinnamon and nutmeg for festive flavors. Don’t forget to check out my delicious Pumpkin Cheesecake Truffles to get more pumpkin inspiration!
-
Rich Toppings: Drizzle with salted caramel or melted chocolate before serving, adding a luxurious finish that will have everyone swooning.
With these variations and substitutions, you can craft a Nutella cheesecake bar that perfectly aligns with your taste preferences or dietary needs!
How to Store and Freeze Nutella Cheesecake Bars
Fridge: Store your Nutella cheesecake bars in an airtight container in the fridge for up to 5 days. This keeps them fresh and ready for indulgence any time you crave a sweet treat.
Freezer: For longer storage, freeze the cheesecake bars in a single layer on a baking sheet until firm. Then, wrap each bar individually in plastic wrap and place them in a freezer-safe container. They’ll stay deliciously good for up to 2 months.
Thawing: When you’re ready to enjoy, thaw the bars in the fridge overnight. This gentle process helps preserve their rich, creamy texture.
Serving: These cheesecake bars can be enjoyed chilled for a refreshing dessert or brought to room temperature for a more decadent experience!
Helpful Tricks for Nutella Cheesecake Bars
-
Softened Cream Cheese: Ensure cream cheese is at room temperature for a lump-free filling. If in a hurry, microwave it in short bursts to soften gradually.
-
Water Bath Importance: Always use a water bath during baking to achieve creamy, smooth Nutella cheesecake bars without cracks. It creates a gentle, moist environment for even baking.
-
Check for Doneness: Instead of using a toothpick, gently shake the pan to check doneness. A slight jiggle in the center means it’s beautifully set!
-
Slicing without Mess: For clean cuts, dip a sharp knife in hot water before slicing each bar. Wipe the knife between cuts to keep those edges perfect.
-
Perfect Cooling Time: Allow the bars to cool completely at room temperature before refrigerating, letting flavors meld beautifully in this make-ahead dessert.
Make Ahead Options
These Nutella Cheesecake Bars are an exceptional treat for busy home cooks who want to streamline dessert preparation! You can prepare the crust and the cheesecake filling up to 24 hours in advance; simply store them separately in airtight containers in the refrigerator to keep the crust crisp and the filling creamy. Additionally, you can bake your Nutella cheesecake bars and chill them overnight for a rich flavor profile. When you’re ready to serve, slice them and let them sit at room temperature for about 15 minutes to enhance their delicious creaminess. By prepping these sweet bars in advance, you not only save time but also enjoy an indulgent dessert that’s just as delightful as if it were freshly made!
Nutella Cheesecake Bars Recipe FAQs
How do I choose ripe ingredients for Nutella Cheesecake Bars?
Absolutely! For the best results, ensure your cream cheese is fully softened to room temperature—this creates a smooth batter without lumps. If you’re using eggs, take them out of the fridge at least 30 minutes before mixing so they blend seamlessly. As for your Nutella, check for a smooth, glossy consistency; if it’s too thick, a quick stir may help.
What’s the best way to store Nutella Cheesecake Bars?
These delicious bars can be stored in an airtight container in the fridge for up to 5 days. Keeping the container sealed will maintain their creamy texture while preventing absorbing any unwanted fridge odors. If you want to enjoy them later, you can freeze them for up to 2 months. Just ensure they are wrapped individually to keep them fresh and lovely!
Can I freeze Nutella Cheesecake Bars?
Certainly! To freeze your Nutella cheesecake bars, first, allow them to cool completely. Then, slice them into individual bars and freeze them on a baking sheet for about an hour. Once they’re firm, wrap each bar in plastic wrap securely and place them in a freezer-safe container. When craving strikes, simply thaw in the fridge overnight before indulging.
What should I do if my Nutella cheesecake bars crack after baking?
Don’t worry—this can happen! If cracks appear, smooth them out with a dollop of Nutella after slicing; it adds a lovely touch to your presentation! To avoid cracks in the future, ensure you’re using the water bath method during baking, and don’t overbake your cheesecake bars. They are done when they jiggle slightly in the center.
Are Nutella Cheesecake Bars safe for those with dietary restrictions?
While these bars are made with traditional ingredients, you can certainly modify them to suit dietary needs! To make them gluten-free, use gluten-free chocolate sandwich cookies for the crust. If you’re concerned about allergies, be mindful of the cream cheese and Nutella, both of which contain dairy. Plant-based alternatives can be used, such as vegan cream cheese and dairy-free chocolate spreads.
How do I cut Nutella Cheesecake Bars cleanly?
For the cleanest cuts, use a sharp knife dipped in hot water. After each slice, wipe the knife thoroughly to prevent any smearing and ensure each bar looks as good as it tastes. This technique not only impresses your guests but also showcases the beautiful swirls of Nutella in each bar!
Indulge in Decadent Nutella Cheesecake Bars Today
Ingredients
Equipment
Method
- Preheat your oven to 325°F (165°C) and line an 8x8-inch baking pan with parchment paper for easy removal.
- In a mixing bowl, combine chocolate sandwich cookie crumbs and melted salted butter until well mixed. Press this mixture firmly into the bottom of the prepared pan to form an even layer.
- Bake for 8 minutes, then let it cool completely on a wire rack.
- While the crust cools, prepare a water bath for baking your Nutella cheesecake bars by filling a rimmed baking dish with about 1 inch of water and place it on the bottom rack of the oven.
- In a large mixing bowl, beat the softened cream cheese with an electric mixer on medium speed until smooth and creamy, about 2 minutes.
- Gradually add granulated sugar, mixing until combined. Then, blend in full-fat sour cream and vanilla extract.
- With the mixer on low, add eggs one at a time, incorporating each until the mixture is smooth and creamy throughout.
- Once your filling is smooth, separate half of the cheesecake mixture into another bowl. Add Nutella to one half and blend until fully incorporated. In the other half, gently fold in crushed Oreo crumbs.
- Pour alternating layers of the Oreo-infused cheesecake batter and the Nutella cheesecake batter into the prepared crust, creating a marbled effect. Swirl warm Nutella on top using a knife.
- Place the assembled Nutella cheesecake bars in the oven with the water bath still in place. Bake for 55-65 minutes.
- When done, gently shake the pan; the center should have a slight jiggle. Remove from the oven and let it cool completely at room temperature.
- Transfer to the refrigerator and chill for at least 2 hours before slicing into bars.
Leave a Reply