
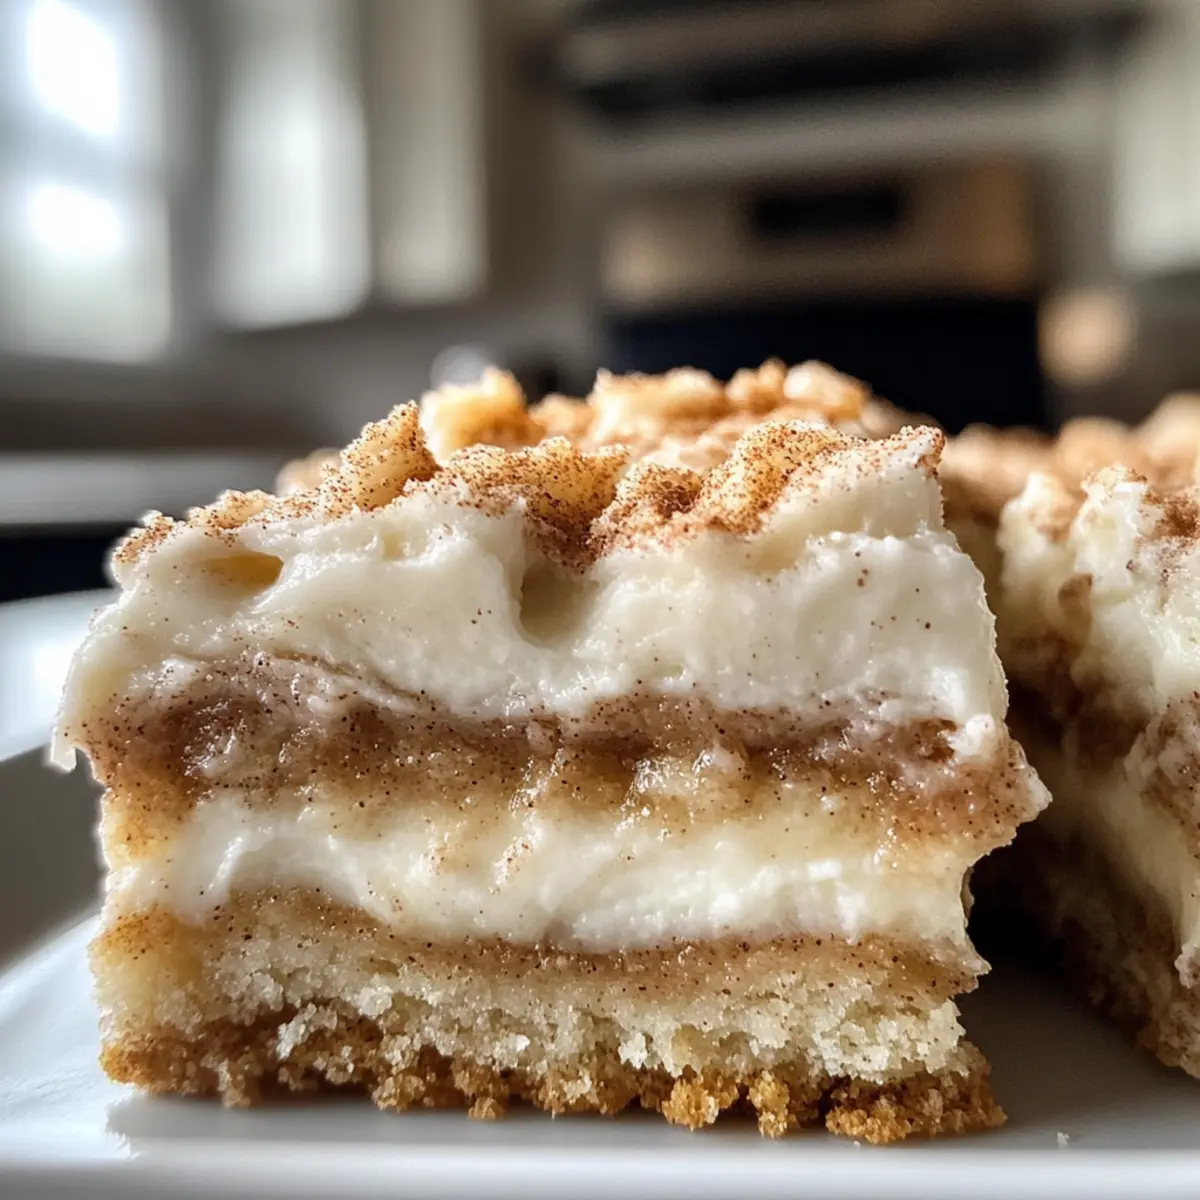
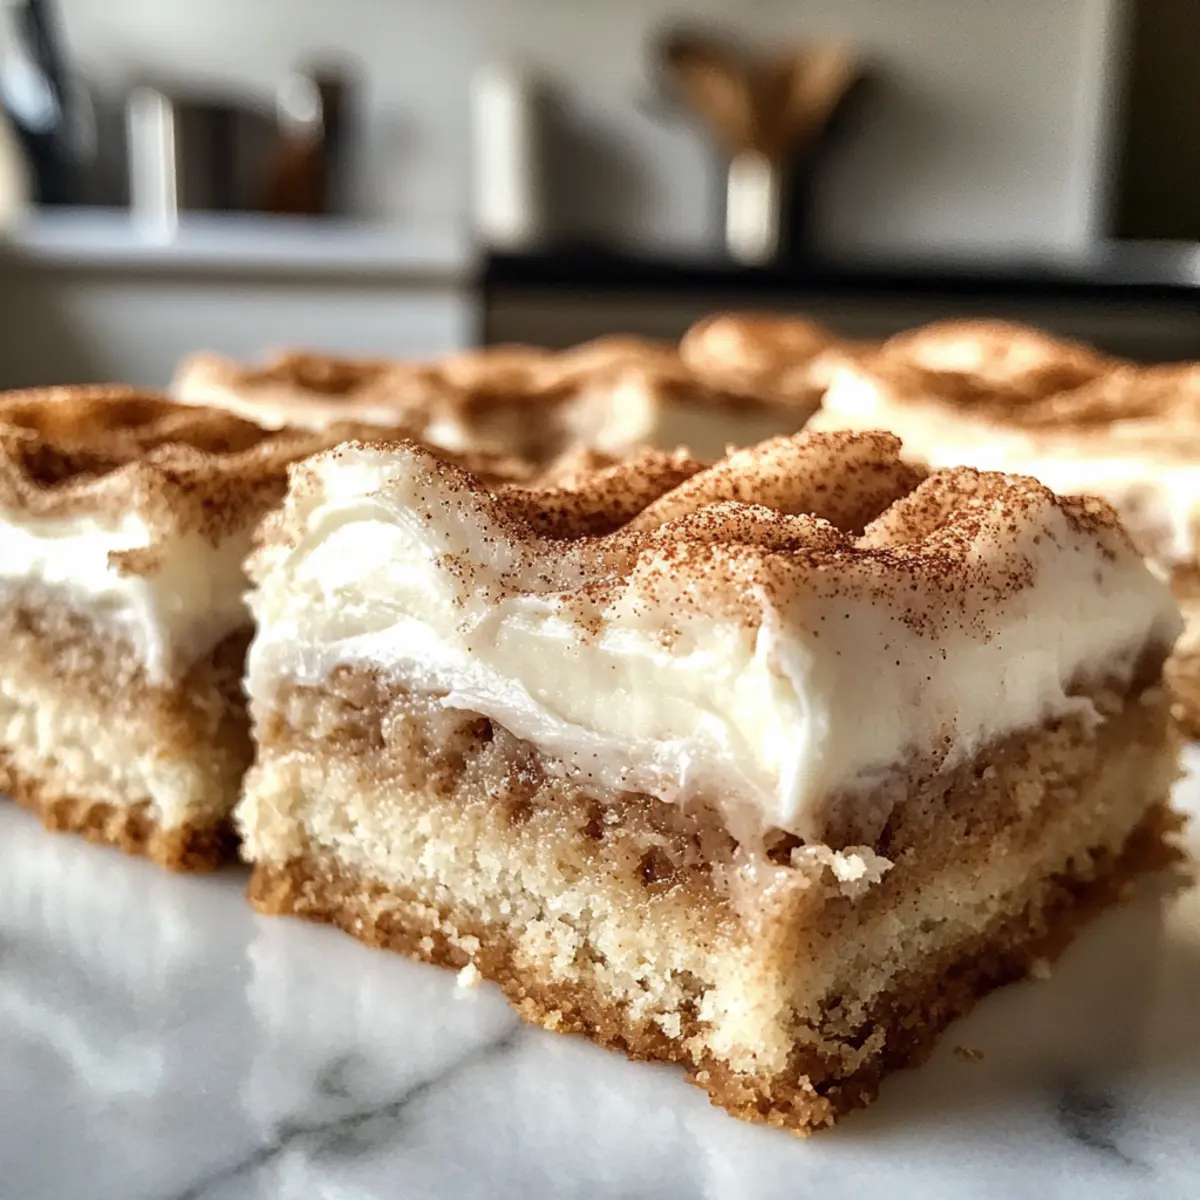
The scent of cinnamon wafting through the air has a way of transforming any day into a cozy celebration, doesn’t it? I can’t help but smile every time I whip up a batch of these delightful Cinnamon Roll Bliss Bars. Not only do they come together in just 45 minutes, making them a lifesaver for busy afternoons, but they also carry the charm of traditional cinnamon rolls in a convenient bar form. Each bite offers the perfect balance of crunchy and chewy texture, topped with creamy frosting that makes them impossible to resist. Whether you’re satisfying your sweet tooth or sharing a treat with friends, these bars bring warmth and joy to any occasion. Are you ready to discover how easy it is to indulge in this irresistible dessert?
Why are Cinnamon Roll Bliss Bars a must-try?
Decadent Flavor: These bars pack the delightful taste of cinnamon rolls in every bite, with a sweet and creamy frosting that elevates them to a whole new level.
Quick Preparation: With just 45 minutes from start to finish, these bliss bars fit perfectly into your busy schedule.
Versatile Treat: Whether you enjoy them as an afternoon snack or serve them at gatherings, they are guaranteed crowd-pleasers!
Customizable Options: Feel free to experiment with add-ins or swap the frosting; from Pumpkin Cinnamon Rolls to chocolate drizzle, the possibilities are endless!
Comforting Texture: Expect a chewy yet soft experience that is reminiscent of freshly-baked cinnamon rolls, perfect for cozy moments.
Diet-Friendly Adaptations: Make these bars gluten-free or vegan with simple ingredient swaps, ensuring everyone can savor them!
Cinnamon Roll Bliss Bars Ingredients
For the Batter
• Butter – Adds richness and contributes to a tender texture; substitute with margarine for a dairy-free option.
• Brown Sugar – Provides moisture and deep sweetness; can replace with coconut sugar for a healthier alternative.
• Granulated Sugar – Sweetens the bars and affects texture; substitute with your preferred sugar, adjusting for sweetness level.
• Eggs – Binds ingredients and adds fluffiness; for egg-free, use flax eggs or applesauce.
• Sour Cream – Keeps the bars moist with a slight tang; substitute with Greek yogurt or dairy-free yogurt.
• Vanilla Extract – Enhances flavor; use almond extract for a different taste profile.
• All-Purpose Flour – Forms the base structure of the bars; swap with a gluten-free flour blend for a gluten-free version.
• Baking Powder – Leavens the bars for a light texture; ensure it’s fresh for best results.
• Baking Soda – Works with baking powder to provide lift.
• Ground Cinnamon – Adds the signature cinnamon flavor; adjust the amount to taste.
• Salt – Enhances overall flavor; can be omitted for low-sodium diets.
For the Frosting
• Powdered Sugar – Used for frosting; replace with a sugar-free alternative if desired.
• Milk – Creates a smooth frosting consistency; use almond milk or coconut milk for a dairy-free option.
These Cinnamon Roll Bliss Bars are sure to become a favorite dessert!
Step‑by‑Step Instructions for Cinnamon Roll Bliss Bars
Step 1: Preheat the Oven
Start by preheating your oven to 350°F (175°C). As the oven warms up, grease a 9×13 inch baking pan with butter or non-stick spray to ensure the Cinnamon Roll Bliss Bars release easily after baking. This step sets the foundation for your delightful dessert.
Step 2: Cream the Butters and Sugars
In a large mixing bowl, cream together ½ cup of softened butter, 1 cup of brown sugar, and ½ cup of granulated sugar using an electric mixer. Whip the mixture until it becomes light and fluffy, about 3-4 minutes. This process incorporates air, ensuring that your bars are tender and delicious.
Step 3: Incorporate Wet Ingredients
Next, add in 2 eggs, ½ cup of sour cream, and 1 teaspoon of vanilla extract to the creamed mixture. Mix until everything is well combined and smooth, about 2 minutes. This step adds moisture and richness, making your Cinnamon Roll Bliss Bars utterly irresistible.
Step 4: Prepare Dry Ingredients
In a separate bowl, whisk together 2 cups of all-purpose flour, 1 teaspoon of baking powder, ½ teaspoon of baking soda, 1 tablespoon of ground cinnamon, and a pinch of salt. This dry mixture provides structure and facilitates even rising when combined with the wet ingredients.
Step 5: Combine Wet and Dry Mixtures
Gradually fold the dry ingredients into the wet mixture using a spatula. Mix gently until just combined to avoid overworking the batter, which can lead to tough bars. You want a thick, cohesive dough that’s ready for the baking pan.
Step 6: Spread the Batter
Evenly spread the batter into the greased baking pan, smoothing the top with a spatula. This ensures that every bite of your Cinnamon Roll Bliss Bars is consistent and delightful. Be careful not to leave any gaps and make sure the batter is evenly distributed.
Step 7: Prepare the Topping
In a small bowl, mix together 2 tablespoons of granulated sugar with 1 tablespoon of ground cinnamon for the Cinnamon Roll topping. Sprinkle this mixture generously over the batter in the baking pan, enhancing the flavor and creating a lovely crust.
Step 8: Bake the Bars
Place the baking pan in the preheated oven and bake for 25-30 minutes. Check for doneness by inserting a toothpick into the center; it should come out clean. The edges should turn a light golden color, indicating that your Cinnamon Roll Bliss Bars are perfectly baked.
Step 9: Cool and Frost
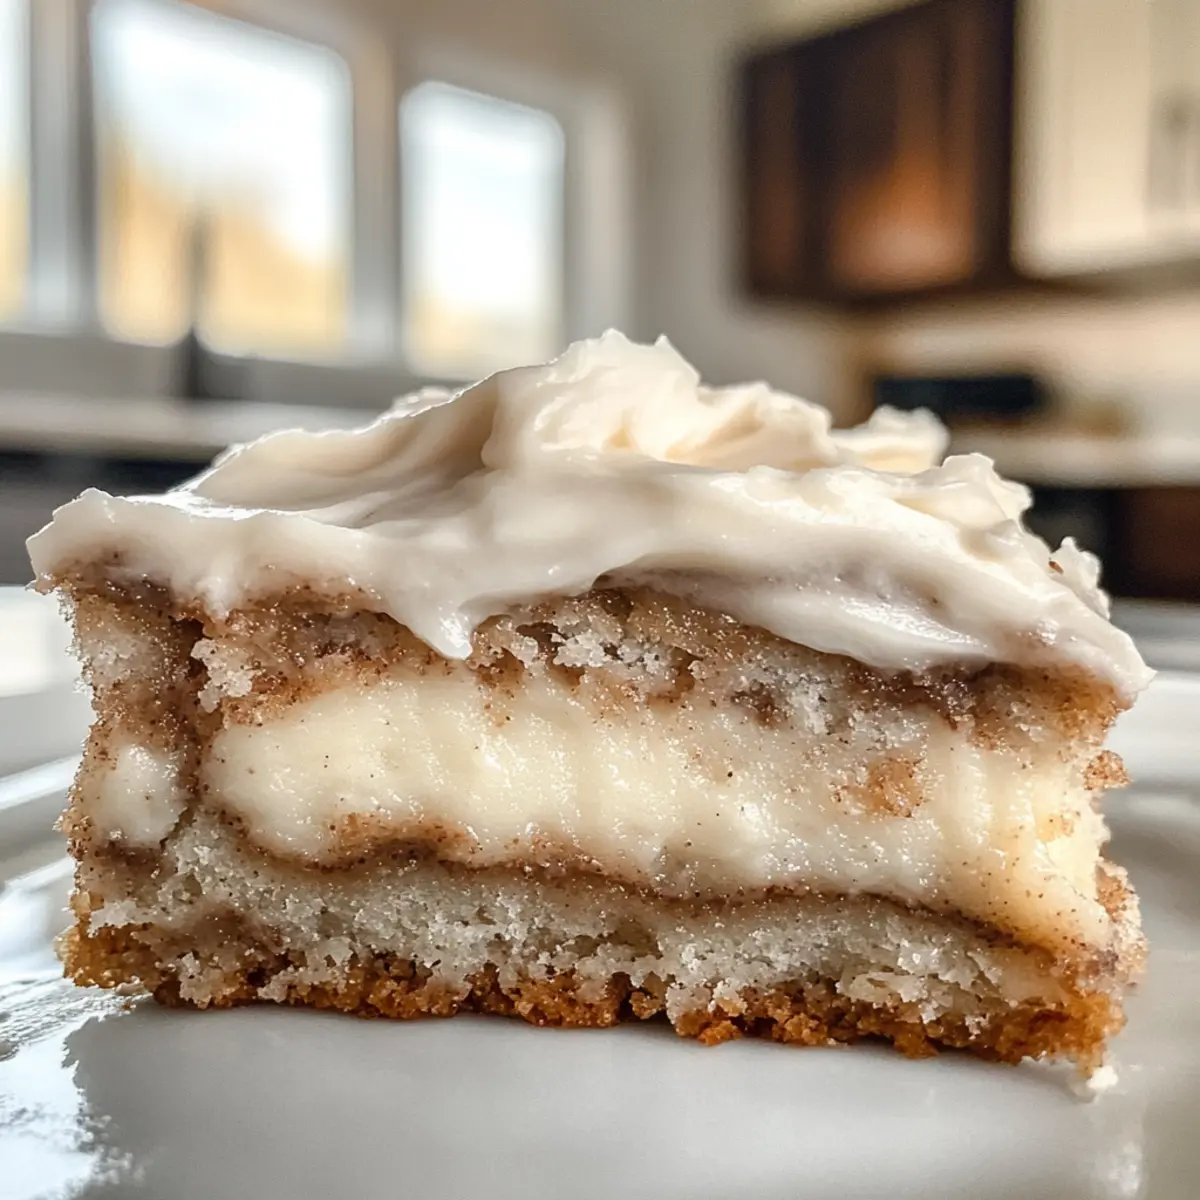
Once baked, remove the pan from the oven and allow the bars to cool completely in the pan. This cooling step is vital for achieving the perfect texture. Whip together 1 cup of powdered sugar, 2 tablespoons of milk, and another ½ teaspoon of vanilla extract for frosting once cooled.
Step 10: Apply the Frosting
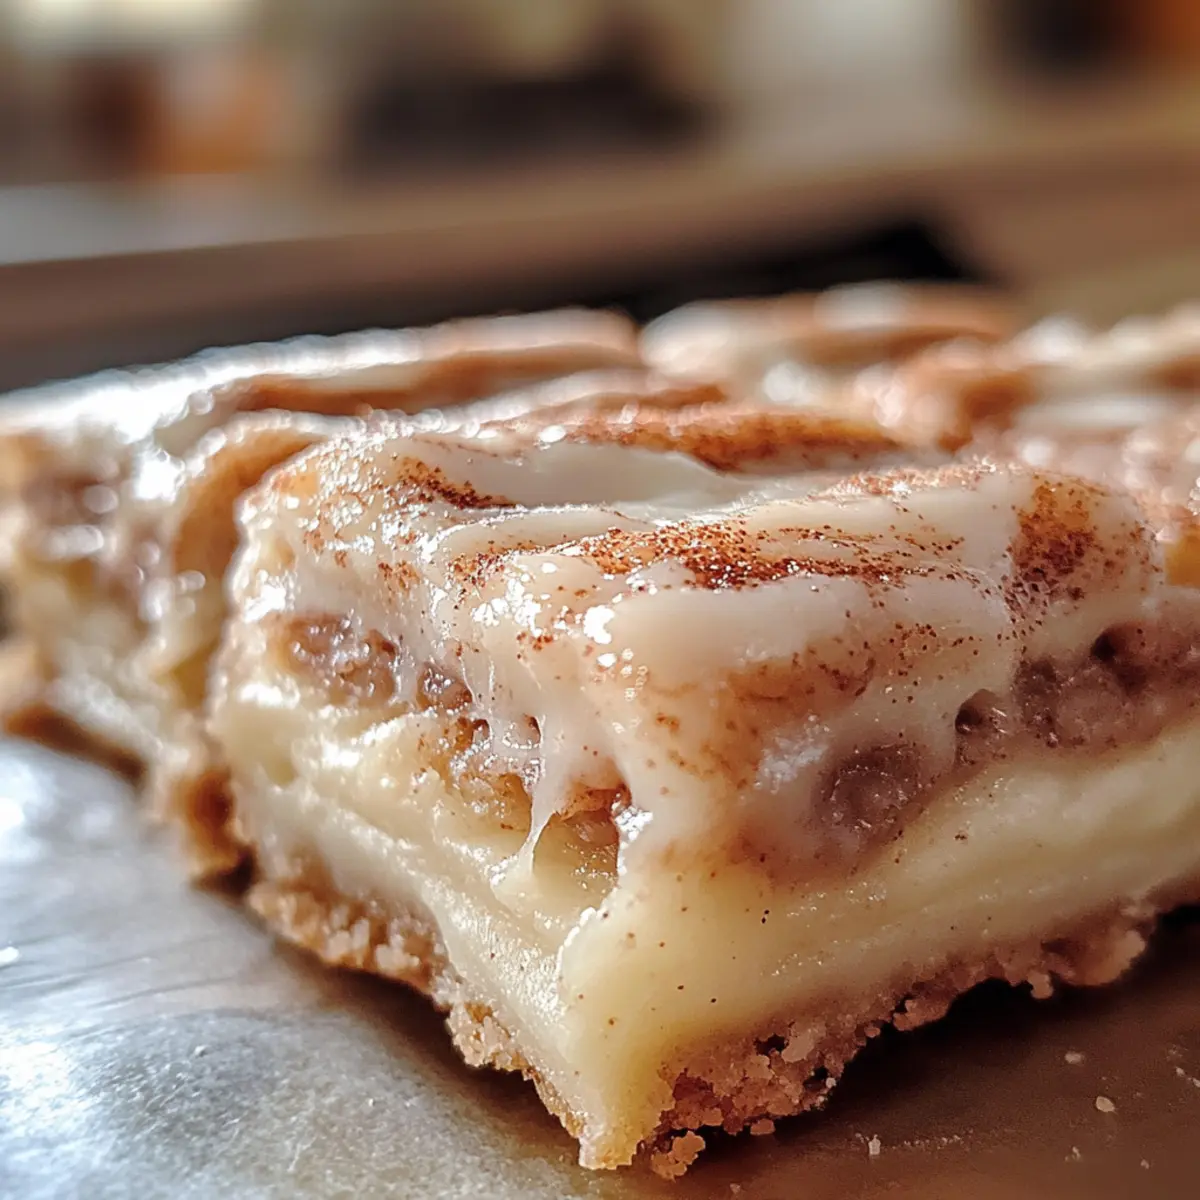
Once the bars are completely cool, spread the creamy frosting over the top using a spatula. This final touch adds the indulgent sweetness that elevates your Cinnamon Roll Bliss Bars to a delightful treat. Slice into squares and get ready to enjoy!
Make Ahead Options
These Cinnamon Roll Bliss Bars are a fantastic choice for meal prep, making life a little easier for busy home cooks! You can prepare the batter and spread it in the baking pan up to 24 hours in advance; just cover it tightly with plastic wrap to maintain freshness. Additionally, you can whip up the frosting and store it separately in the refrigerator for up to 3 days. When you’re ready to bake, simply uncover the batter and pop it into the oven, adjusting the baking time if it’s cold from the fridge. This approach keeps the bars just as delicious and ensures a delightful treat is always at hand, saving you precious time during hectic days!
How to Store and Freeze Cinnamon Roll Bliss Bars
Room Temperature: Store leftover Cinnamon Roll Bliss Bars in an airtight container at room temperature for up to 3 days to maintain their chewy texture.
Fridge: For longer freshness, keep them refrigerated in an airtight container for up to a week. Allow them to come to room temperature before serving for optimal flavor.
Freezer: These bars can be frozen for up to 2 months. Wrap them tightly in plastic wrap and place in a freezer-safe container. Thaw at room temperature when ready to enjoy.
Reheating: If you prefer warm bars, gently reheat them in the microwave for about 10-15 seconds, just until warmed through.
Tips for the Best Cinnamon Roll Bliss Bars
-
Room Temperature Ingredients: Always use eggs and dairy at room temperature for better incorporation, leading to a fluffier texture in your bars.
-
Gentle Mixing: Avoid overmixing the batter; this can result in tough bars instead of the soft, chewy texture you’re after with your Cinnamon Roll Bliss Bars.
-
Cool Completely: Let the bars cool completely before frosting. This ensures the frosting doesn’t melt and creates a smooth, beautiful finish.
-
Toothpick Test: Use a toothpick to check for doneness; it’s normal for the bars to seem slightly underbaked in the center. They will set as they cool!
-
Even Distribution: When spreading the batter, make sure it is evenly spread in the pan to avoid uneven baking and ensure every bite is delicious.
What to Serve with Cinnamon Roll Bliss Bars
Indulging in these delightful bars can be even sweeter when paired with the perfect accompaniments that enhance their flavors!
-
Creamy Vanilla Ice Cream: The cool creaminess of vanilla ice cream contrasts beautifully with the warm, chewy bars, creating a delightful temperature play.
-
Fresh Berries: Juicy strawberries or tart raspberries add a splash of acidity that brightens up the rich sweetness of the bars while providing a lovely color.
-
Coffee or Espresso: The robust flavors of a freshly brewed cup complement the cinnamon richness, making for a comforting dessert experience, perfect for afternoon chats.
-
Whipped Cream: Light and airy whipped cream adds a luscious texture that balances the dense nature of the bars, making each bite even more indulgent.
-
Hot Chocolate: Cozy up with a warm cup of hot chocolate for a delightful pairing; the chocolaty warmth perfectly contrasts the cinnamon bliss.
-
Chai Tea: Spiced chai tea brings a complementary flavor profile that enhances the cinnamon while adding a cozy, aromatic experience to the dessert.
-
Coconut Yogurt: For a lighter option, creamy coconut yogurt provides a dairy-free contrast that offers a velvety texture and tropical essence.
-
Chocolate Drizzle: A simple drizzle of melted chocolate on top can elevate the bars to a new level of decadence, intensifying their sweet charm.
-
Caramel Sauce: A drizzle of salted caramel over the bars lends an extra sweetness and a hint of saltiness that pairs wonderfully with their cinnamon flavor.
Cinnamon Roll Bliss Bars Variations
Explore these delightful variations that bring your Cinnamon Roll Bliss Bars to life in unique ways, making every bite an adventure!
-
Dairy-Free: Swap butter and milk for coconut oil and almond milk to make these bars dairy-free. You’ll retain that rich flavor while accommodating dietary needs!
-
Gluten-Free: Use a gluten-free flour blend to make these bars suitable for gluten-sensitive friends. They won’t miss the wheat one bit!
-
Choco-Lovers: Add chocolate chips to the batter for a deliciously rich twist. The chocolate melts in, complementing the cinnamon beautifully!
-
Nutty Crunch: Mix in toasted walnuts or pecans for extra texture and a nutty flavor that pairs beautifully with cinnamon. It brings an earthy richness to each bite.
-
Fruit Infusion: Incorporate dried cranberries or raisins into the batter for a fruity surprise. These additions enhance both flavor and chewy texture, creating a delightful contrast.
-
Cream Cheese Frosting: Swap the frosting with a creamy, tangy cream cheese frosting. This luscious topping creates an irresistible pairing with the cinnamon bars.
-
Spiced Up: Add a pinch of nutmeg or ginger for an extra warm spice kick. The additional flavors elevate the classic cinnamon essence, perfect for fall!
-
Fruity Swirl: Swirl some fruit preserves or fresh fruit puree into the batter before baking for a burst of fruitiness in your bars. A raspberry or strawberry swirl can brighten the flavors!
Feeling inspired? Consider trying these variations for your next baking adventure. And if you enjoy creative twists, don’t miss out on making Pumpkin Cinnamon Rolls or indulging in Cinnamon Roll Cookies. Happy baking!
Cinnamon Roll Bliss Bars Recipe FAQs
What is the best way to choose ripe ingredients for Cinnamon Roll Bliss Bars?
Absolutely! When selecting your ingredients, fresh and high-quality items will improve your final product. Look for butter that is creamy and well-wrapped, while brown sugar should be soft and moist. Make sure your eggs are fresh, as they bind the ingredients and affect fluffiness. For the sour cream, a creamy consistency is key—opt for brands that have a rich texture, or substitute with Greek yogurt for a similar result.
How should I store Cinnamon Roll Bliss Bars and how long do they stay fresh?
These delicious bars should be stored in an airtight container at room temperature for up to 3 days. If you’d like them to last longer, refrigerate them for up to a week, but do let them come back to room temperature before indulging. If opting for longer storage, they can be frozen for up to 2 months—simply wrap them tightly in plastic wrap and place them in a freezer-safe container.
Can I freeze Cinnamon Roll Bliss Bars? What’s the process?
Very! To freeze your Cinnamon Roll Bliss Bars, first, let them cool completely after baking. Once cooled, cut them into squares and wrap each piece tightly in plastic wrap to prevent freezer burn. Place the wrapped bars in a freezer-safe container or a resealable bag labeled with the date. When you’re ready to enjoy, thaw them at room temperature, which should take about 1-2 hours.
What should I do if my Cinnamon Roll Bliss Bars turn out too dense?
If your bars are dense, it might be due to overmixing the batter. Always fold your dry ingredients into the wet mixture gently, just until combined. If you find the bars too dry, ensure that your oven temperature is accurate—a temperature that’s too high can lead to moisture loss. Additionally, check your baking powder’s freshness; using old leavening agents can hinder the rise and texture.
Are there any allergy considerations I should be aware of with these Cinnamon Roll Bliss Bars?
With love in mind, it’s important to consider any dietary restrictions! This recipe is vegetarian, but if you have allergies, be cautious about the eggs and dairy ingredients. For a dairy-free or vegan option, substitute eggs with flax eggs or applesauce and use dairy-free yogurt in place of sour cream. Always check the labels of your flour and any mixed ingredients to avoid cross-contamination with gluten or other allergens.
Can I make these bars gluten-free? What modifications do I need?
Absolutely! To make the Cinnamon Roll Bliss Bars gluten-free, simply replace the all-purpose flour with a gluten-free flour blend. Look for blends that contain xanthan gum, which helps mimic the texture of regular flour, ensuring that your bars turn out delightful! You might also want to use gluten-free baking powder just to be safe. Enjoy the same scrumptious taste without gluten!
Cinnamon Roll Bliss Bars: Your Cozy Dessert Fix Today
Ingredients
Equipment
Method
- Preheat your oven to 350°F (175°C) and grease a 9x13 inch baking pan.
- Cream together softened butter, brown sugar, and granulated sugar until light and fluffy (3-4 minutes).
- Add eggs, sour cream, and vanilla extract, mixing until smooth (about 2 minutes).
- In a separate bowl, whisk together all-purpose flour, baking powder, baking soda, ground cinnamon, and salt.
- Gradually fold dry ingredients into the wet mixture until just combined.
- Spread the batter evenly into the greased baking pan.
- Mix granulated sugar with ground cinnamon and sprinkle over the batter.
- Bake for 25-30 minutes or until a toothpick comes out clean.
- Remove from oven and allow to cool completely.
- Whip together powdered sugar, milk, and vanilla extract for frosting.
- Spread frosting over the cooled bars and slice into squares.
Leave a Reply