
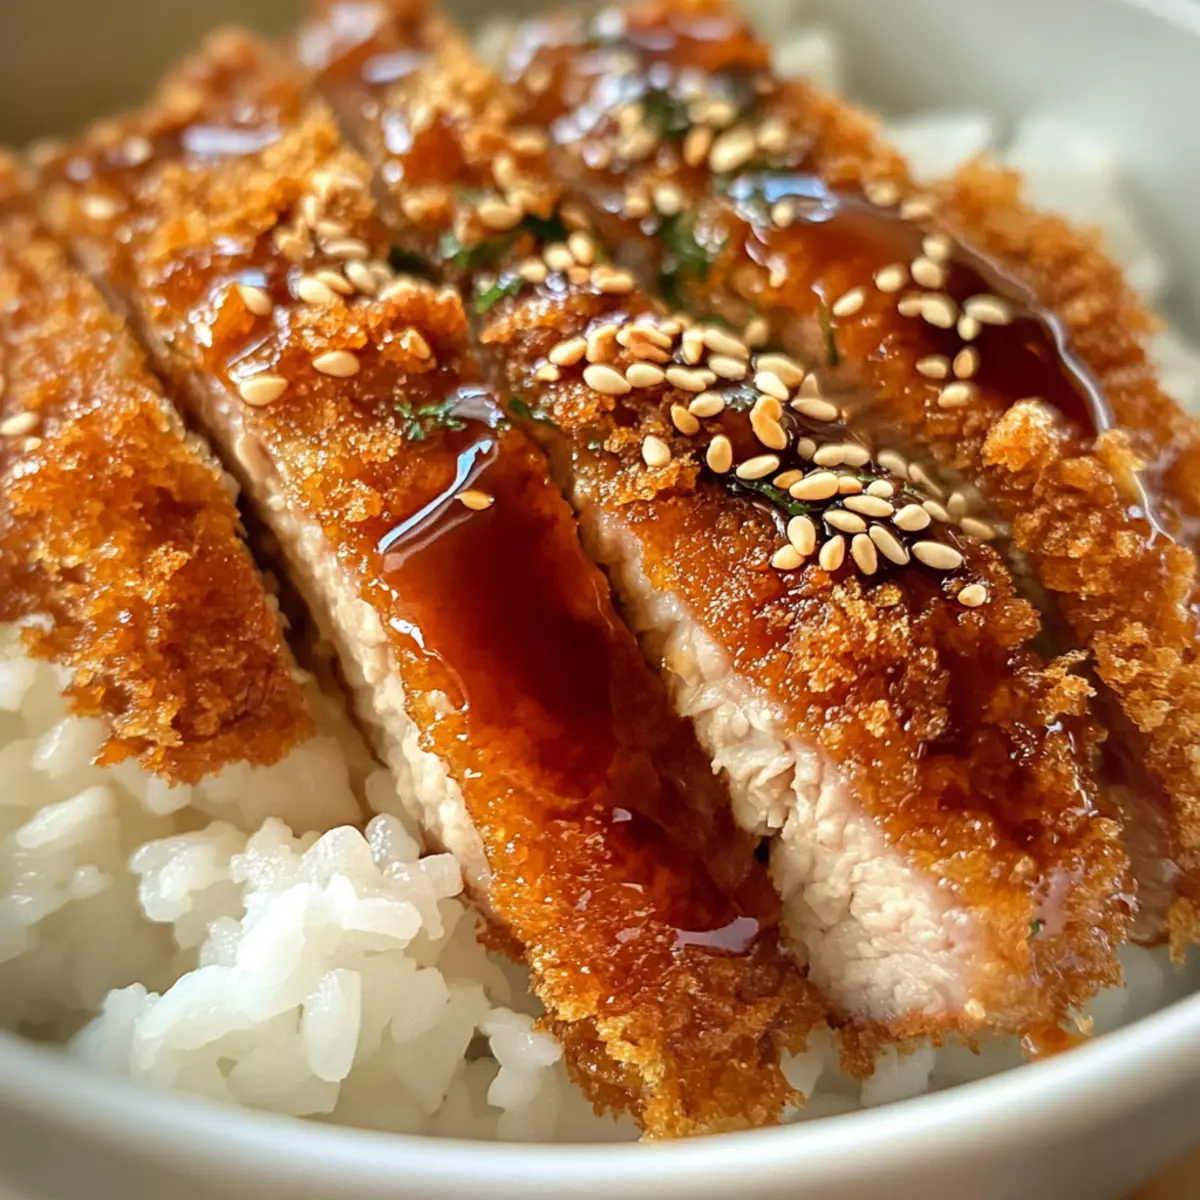
As the sizzling sound of panko-crusted cutlets hits the hot oil, it’s hard not to feel an instant rush of excitement. These Crispy Japanese Katsu Bowls with Tonkatsu Sauce are more than just a meal; they embody the cozy comfort of homemade goodness. The delightful crunch of the cutlets pairs beautifully with the savory umami of the sauce, making this dish a quick gourmet experience right in your kitchen. Not only is it a feast for the senses, but it’s also incredibly easy to whip up, transforming your weeknight dinners into something a little more special. Whether you’re serving it solo or sharing with loved ones, this recipe is sure to become a go-to for those craving something satisfying and scrumptious. Are you ready to bring a slice of Japan to your table? Let’s dive into this delicious adventure together!
Why Are Katsu Bowls a Must-Try?
Irresistible Crunch: The panko breading gives these cutlets a satisfying crunch that will have you coming back for more.
Savory Satisfaction: Paired with homemade tonkatsu sauce, each bite is a perfect balance of sweet, tangy, and umami flavors.
Quick Gourmet: In just under 30 minutes, you can enjoy this restaurant-quality dish at home, making it ideal for busy weeknights.
Versatile Options: Feel free to substitute proteins or top with fresh veggies, like shredded cabbage, for a vibrant twist.
Crowd-Pleaser: Perfect for family dinners or entertaining guests, these bowls are sure to impress your loved ones and keep them asking for more.
Want to explore more delightful flavors? Check out our delicious Chicken Gyros Feta or Chinese Pepper Steak for more culinary inspiration!
Japanese Katsu Bowls Ingredients
• Here’s what you’ll need to create these delicious Japanese Katsu Bowls with Tonkatsu Sauce.
For the Katsu
- Pork or Chicken Cutlets – Boneless, skinless cuts work best; tofu is a great vegetarian substitute.
- Panko Bread Crumbs – Opt for these for ultimate crispiness; avoid regular bread crumbs for the best texture.
- Flour – All-purpose flour helps the coating stick; gluten-free flour is a suitable replacement.
- Eggs – Binds the panko coating to the cutlets; look for runny yolks after frying for perfect results.
- Salt and Pepper – Essential for enhancing flavor; adjust these to suit your taste.
- Cooking Oil – Use vegetable or canola oil for frying; ensure it has a high smoke point for better frying.
For Serving
- Steamed Rice – Short-grain rice is traditional and provides a delicious base for the katsu.
- Tonkatsu Sauce – Adds a tangy-sweet finish; homemade is preferred for full flavor.
- Sesame Seeds (optional) – Sprinkled on top for both flavor and presentation; don’t skip this for authenticity!
Step‑by‑Step Instructions for Japanese Katsu Bowls with Tonkatsu Sauce
Step 1: Prepare the Rice
Begin by cooking the short-grain rice according to package instructions. Once done, fluff the rice with a fork and cover it to keep warm and steamy. This fluffy rice will serve as a perfect base for your Japanese Katsu Bowls, complementing the rich flavors of the crispy cutlets and tonkatsu sauce.
Step 2: Season the Cutlets
While the rice is cooking, take your boneless pork or chicken cutlets and season them generously with salt and pepper on both sides. Make sure to coat evenly for a well-balanced flavor throughout. This simple seasoning step enhances the natural taste of the meat before it gets coated in the crispy panko breading.
Step 3: Dredge the Cutlets
Set up three shallow dishes: one with flour, one with beaten eggs, and another with panko breadcrumbs. Start by dredging each cutlet in flour, shaking off the excess. Next, dip it into the egg wash until fully coated, and finally, press it firmly into the panko breadcrumbs. Ensure every surface is well-covered for an ultra-crispy finish.
Step 4: Heat the Oil
In a large skillet, heat about 1/2 inch of vegetable or canola oil over medium-high heat, aiming for around 350°F (175°C). To test the readiness, drop a few breadcrumbs into the oil; they should sizzle immediately. Once the oil is hot, it’s time to fry your cutlets to golden perfection.
Step 5: Fry the Cutlets
Carefully place each coated cutlet into the hot oil, ensuring not to crowd the pan. Fry for 3-4 minutes on each side, or until they are golden brown and crispy. Use tongs to flip the cutlets gently to maintain the coating. When done, transfer the crispy katsu to a plate lined with paper towels to drain excess oil.
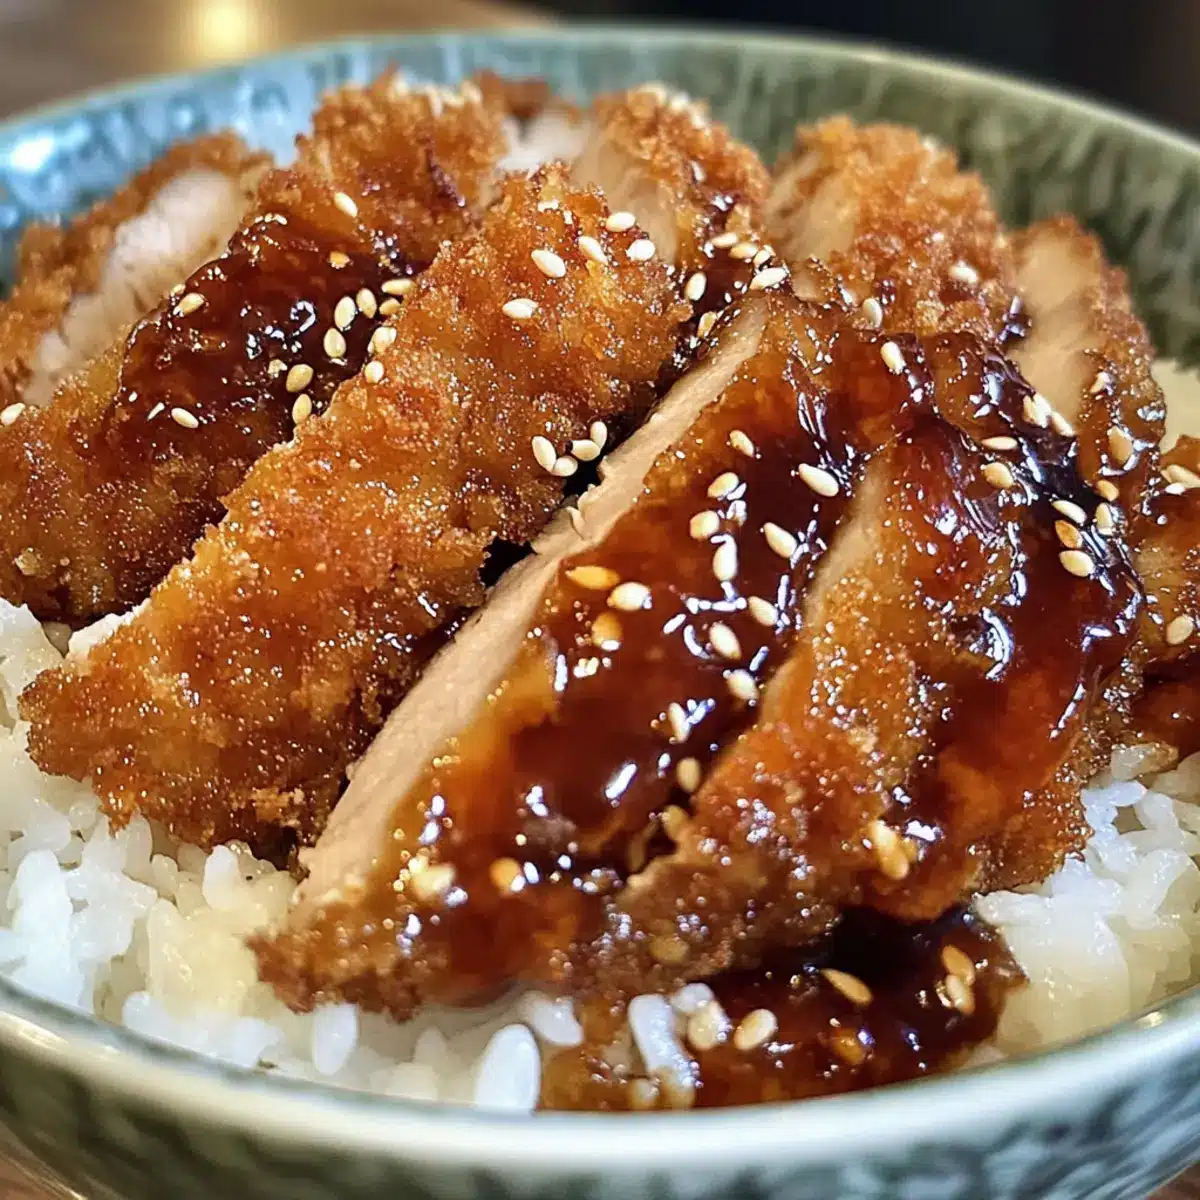
Step 6: Slice the Cutlets
After draining, let the katsu rest for a minute, then slice each cutlet into strips. This will make it easy to serve over rice and allow the succulent meat to shine through each bite. The delightful contrast of the crispy texture will complement the warm rice beautifully.
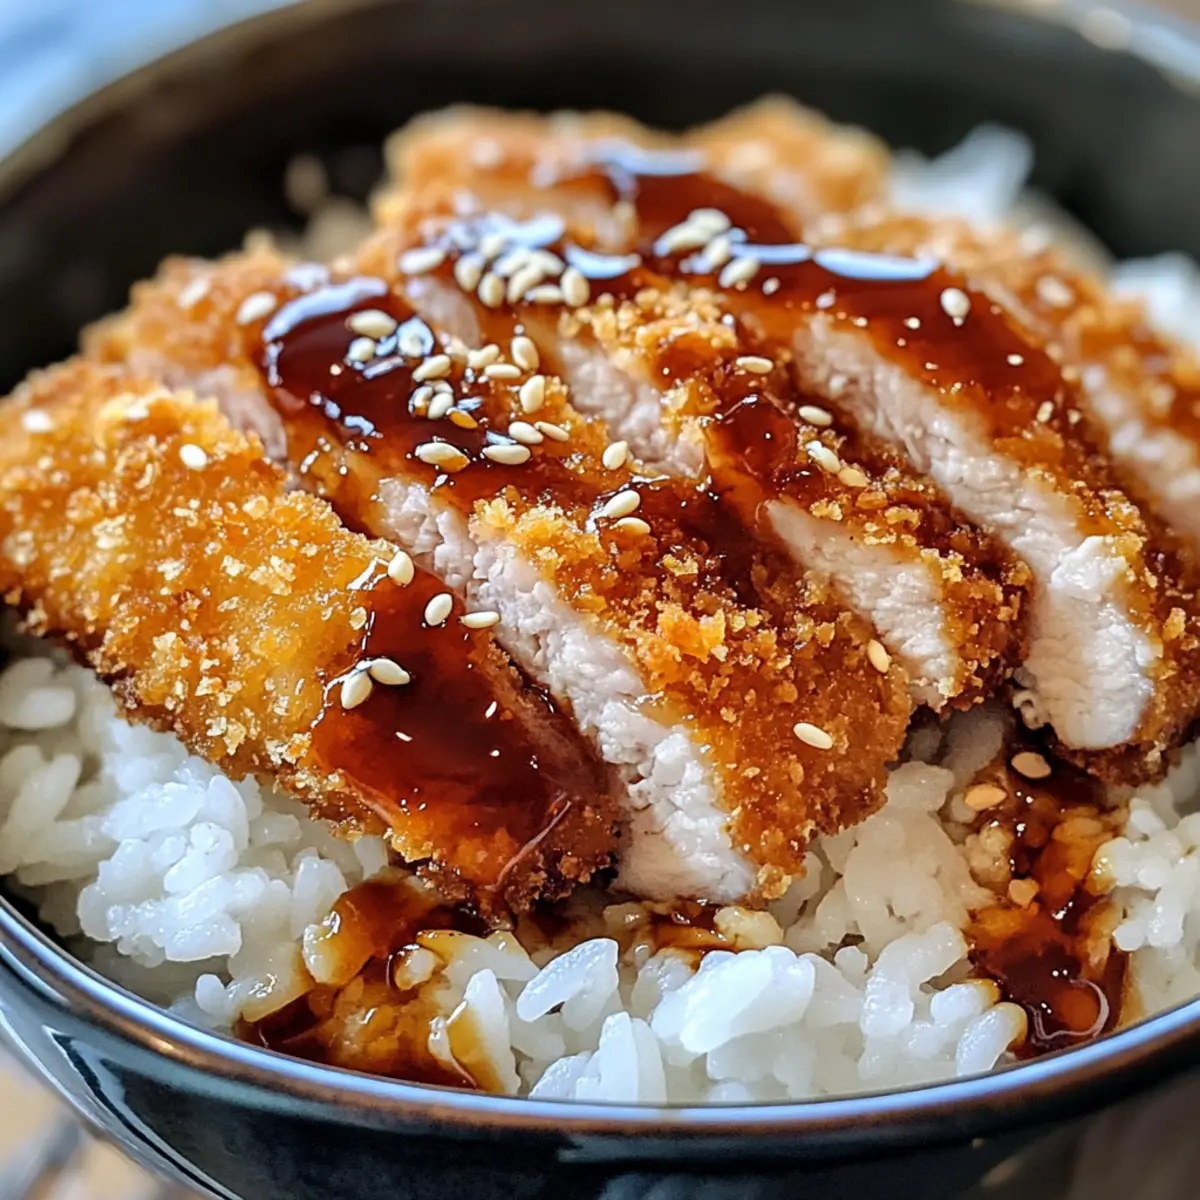
Step 7: Assemble the Bowls
To assemble your Japanese Katsu Bowls, place a generous serving of warm rice at the bottom of a bowl. Arrange the sliced katsu on top, allowing the condensation from the meat to slightly moisten the rice. Drizzle a hearty amount of tonkatsu sauce over the cutlets, enhancing their savory flavor with tangy sweetness.
Step 8: Garnish and Serve
For an authentic touch, sprinkle sesame seeds over the top of the katsu. Serve immediately while everything is warm and enticing. These Crispy Japanese Katsu Bowls with Tonkatsu Sauce are a delightful meal that’s sure to satisfy your cravings for comfort food, bringing a taste of Japan to your home kitchen.
Make Ahead Options
These Crispy Japanese Katsu Bowls with Tonkatsu Sauce are perfect for meal prep enthusiasts looking to streamline their weeknight cooking! You can bread the cutlets and store them in the refrigerator up to 24 hours in advance. Just cover them tightly to prevent moisture loss, which helps maintain their crunchiness. Additionally, you can prepare the tonkatsu sauce and keep it in an airtight container for up to 3 days in the fridge. When you’re ready to serve, simply fry the prepped cutlets directly from the fridge until they’re golden brown, and then assemble your bowls with warm rice and sauce. This way, you’ll have a delicious, restaurant-quality meal on the table in no time!
Expert Tips for Japanese Katsu Bowls
-
Oil Temperature: Ensure the cooking oil is hot enough before frying; test by dropping in a breadcrumb that should sizzle right away for crispy cutlets.
-
Coating Technique: For maximum crunch, be sure to firmly press the panko breadcrumbs onto the cutlet and avoid crowding them in the pan to prevent steaming.
-
Substitutions: Experiment with proteins! Chicken and tofu are excellent alternatives to pork, giving you delicious variations of these Japanese Katsu Bowls.
-
Baking Option: If you’re looking for a healthier cooking method, consider baking or air frying: bake at 400°F for 20-25 minutes or air fry at 375°F for 12-15 minutes, flipping halfway.
-
Rest Time: Allow the fried cutlets to rest for a minute after frying before slicing. This helps them retain their juiciness and ensures a delightful texture.
-
Serving Idea: Serve with a side of fresh shredded cabbage or pickled vegetables for an exciting crunch that complements the savory katsu flavors beautifully.
How to Store and Freeze Japanese Katsu Bowls
Fridge: Store cooked katsu in an airtight container for up to 3 days. To keep the breading crispy, avoid adding the tonkatsu sauce until serving.
Freezer: If you want to freeze katsu, place cooled cutlets in a single layer on a baking sheet. Once frozen, transfer them to a freezer bag for up to 3 months.
Reheating: For the best results, reheat in the oven at 350°F (175°C) for 10-15 minutes to maintain crispiness. If thawing, avoid microwaving as it can make the cutlets soggy.
Make-Ahead Tip: Prepare katsu in advance, store it as per the guidelines, and enjoy the convenience of a quick meal on busy days.
Japanese Katsu Bowls Variations
Feel free to let your culinary creativity shine with these delightful twists and substitutions for your Japanese Katsu Bowls!
- Vegetarian Option: Substitute pork or chicken with firm tofu, pressed and sliced for an equally delicious, plant-based katsu.
- Whole Grain Crunch: Use whole wheat panko breadcrumbs for a heartier texture and added nutritional benefits without sacrificing that signature crunch.
- Spicy Kick: Add a splash of sriracha or chili oil to the tonkatsu sauce for a sweet and spicy flavor explosion that your taste buds will adore.
- Crispy Additions: Top your katsu with crispy fried onions or shallots for an extra layer of crunch and flavor that elevates each bite.
- Vegetable Medley: Include a medley of sautéed or pickled veggies, like bell peppers and carrots, for a fresh, colorful addition to your bowls.
- Coconut Rice: Swap traditional steamed rice for coconut rice by cooking it with coconut milk. This adds a tropical twist that beautifully complements the savory katsu.
- Szechuan Style: Give your bowls a unique flair by incorporating Szechuan peppercorns into the sauce. The aromatic heat will enhance the savory elements of the dish.
- Asian Slaw: Serve with a side of Asian slaw made with cabbage, carrots, and a zesty dressing to add a refreshing crunch and contrast to the savory katsu.
Each variation lets you explore new dimensions of flavor while enjoying this comforting dish. For another delightful meal idea, don’t miss our tasty Cherry Almond Cold Brew with Vanilla Bean Cream that pairs perfectly after your tasty Katsu Bowls!
What to Serve with Crispy Japanese Katsu Bowls with Tonkatsu Sauce
Elevate your dinner experience by pairing these katsu bowls with delightful sides that balance flavors, textures, and aromas for a truly fulfilling meal.
-
Miso Soup: A warm, comforting bowl of miso soup adds a gentle umami touch, enhancing the overall dining experience.
-
Cucumber Salad: Crisp, refreshing slices of cucumber tossed in rice vinegar bring a tart contrast that perfectly balances the rich katsu and sauce.
-
Steamed Vegetables: Lightly steamed greens like broccoli or bok choy provide a fresh crunch and nutrient boost alongside the hearty katsu.
-
Pickled Radishes: Sweet and tangy pickled radishes introduce a vibrant zest, cutting through the heaviness of the fried cutlets.
-
Sake or Green Tea: A chilled glass of good sake or a warm cup of green tea complements the savory notes and adds a comforting touch after each bite.
-
Sesame Noodles: Serve alongside chilled sesame noodles for an added element of texture and flavor that pairs beautifully with the crispy cutlet.
-
Fried Gyoza: Crispy pan-fried gyoza offers a crunchy bite that mirrors the katsu, making it an irresistible addition to your meal.
-
Chocolate Mochi: End on a sweet note with chewy chocolate mochi, providing a delightful contrast to the savory meal while keeping the Japanese theme alive.
Japanese Katsu Bowls with Tonkatsu Sauce Recipe FAQs
How do I choose the right cutlets for my katsu?
Absolutely! For the best flavor and texture, choose boneless, skinless pork or chicken cutlets. If you’re going vegetarian, tofu is an excellent alternative that will still absorb the delicious tonkatsu sauce well. Make sure the meat is fresh, without any dark spots, and about 1/2-inch thick for optimal cooking.
How do I store leftover katsu?
It’s so easy! You can store cooked katsu in an airtight container in the refrigerator for up to 3 days. To keep the coating crispy, I suggest not adding the tonkatsu sauce until you’re ready to serve. When reheating, the oven at 350°F (175°C) for about 10-15 minutes works wonders to revive that crunch!
Can I freeze katsu cutlets?
Very much so! To freeze, first allow the cooked cutlets to cool completely. Arrange them in a single layer on a baking sheet and freeze until solid. Once frozen, transfer the cutlets to a freezer bag and store for up to 3 months. When you’re ready to enjoy them, simply reheat in the oven (at 350°F for 10-15 minutes) to maintain their crispy goodness.
What are some common mistakes when frying katsu?
One of the most common pitfalls is not heating the oil sufficiently before frying. You’ll know the oil is ready when a breadcrumb dropped in sizzles immediately. Additionally, avoid crowding the pan; this can cause the cutlets to steam instead of fry, resulting in a less crispy texture. If you’re concerned, you can also test one cutlet first to ensure it cooks properly before frying the entire batch.
Is tonkatsu sauce safe for dogs?
While tonkatsu sauce is delicious for humans, it contains ingredients like garlic and onion that can be harmful to dogs. Always keep human food safe for your furry friends; if you’re looking to share a bite, opt for plain, well-cooked meat without any added seasonings!
What can I substitute for panko breadcrumbs?
If you can’t find panko breadcrumbs, don’t fret! You can use crushed cornflakes or make your own by processing fresh bread into coarse crumbs. Just ensure they’re not fine, as the coarser texture gives you that signature crunch that complements your Japanese Katsu Bowls so perfectly!

Crispy Japanese Katsu Bowls with Tonkatsu Sauce Delight
Ingredients
Equipment
Method
- Begin by cooking the short-grain rice according to package instructions. Once done, fluff the rice with a fork and cover it to keep warm.
- Take your boneless cutlets and season them generously with salt and pepper on both sides.
- Set up three shallow dishes: one with flour, one with beaten eggs, and another with panko breadcrumbs. Dredge each cutlet in flour, coat with egg, and press into panko.
- Heat about 1/2 inch of oil over medium-high heat until it reaches 350°F (175°C).
- Carefully place the coated cutlets in the hot oil and fry for 3-4 minutes on each side until golden brown.
- Let the katsu rest for a minute after frying, then slice each cutlet into strips.
- Assemble your bowls with warm rice at the bottom, topped with sliced katsu and drizzled with tonkatsu sauce.
- Sprinkle sesame seeds on top and serve immediately.
Leave a Reply